To create a DIY paper cutting lampshade or lantern, start by gathering sturdy, lightweight paper and sharp tools like scissors and craft knives. Choose a design that suits your style and transfer it carefully onto the paper before cutting detailed patterns. Assemble your pieces securely, add decorative elements, and install a safe light source. With patience and creativity, you can craft a unique, beautiful lampshade that transforms your space—keep exploring to master every step.
Key Takeaways
- Select durable, lightweight paper and create a design inspired by nature, geometric shapes, or traditional motifs suitable for your space.
- Use sharp tools and proper transfer methods to ensure precise, clean cuts and accurate pattern tracing.
- Carefully assemble the cut pieces with adhesive, securing edges and reinforcing structures for durability and safety.
- Incorporate decorative elements like ribbons, stickers, or metallic accents to personalize and enhance your lampshade.
- Install suitable lighting, test for even illumination, and maintain the lantern regularly for longevity and optimal glow.

DIY Lampshade Kit 8"x12" White – DIY Lamps Shade Making Kit with All Materials – Self-Adhesive Lampshade Backing, Metal Rings, Double Sided Tape and Instructions, No Fabric Included – Adult Craft Kit
- Complete DIY Lampshade Kit: Includes rings, liner, tape, and instructions
- Customizable Fabric Choice: Use your own fabric for personalized design
- Self-Adhesive Lampshade Backing: Peel, press, and smooth fabric easily
As an affiliate, we earn on qualifying purchases.
As an affiliate, we earn on qualifying purchases.
Gathering Materials and Tools
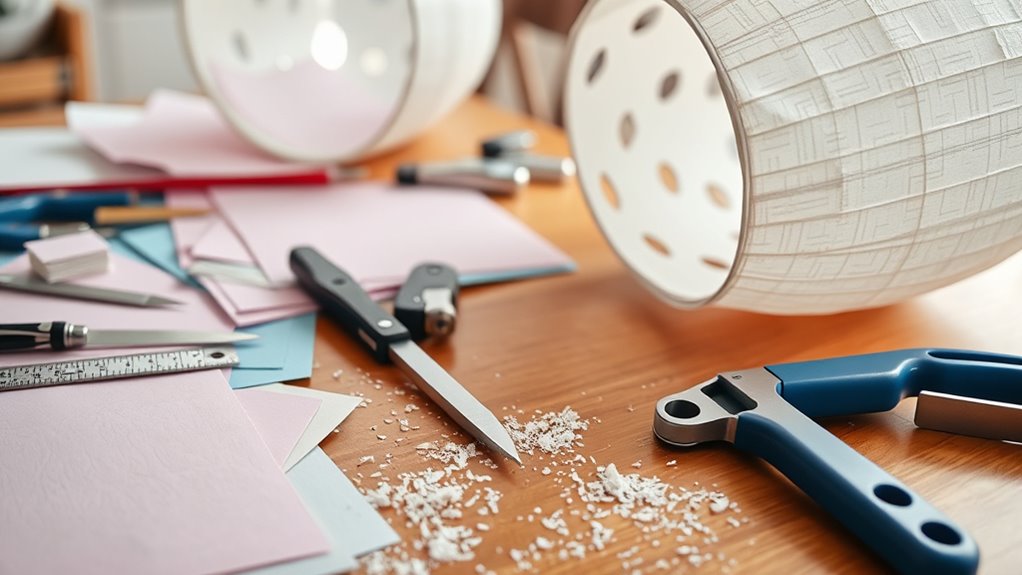
Before you begin crafting your paper cutting lampshade, gather all the necessary materials and tools. You’ll want sturdy, durable paper or cardstock to guarantee material durability, preventing tears or damage over time. Choose lightweight paper that allows a soft lighting ambiance, creating a warm, inviting glow when illuminated. Sharp scissors or a craft knife are essential for precise cuts, while a metal ruler helps keep your lines straight. A pencil is useful for sketching your patterns before cutting. Adhesives like glue or double-sided tape will help assemble your lampshade securely. Don’t forget a cutting mat or protective surface to prevent damage to your workspace. Collecting these items beforehand streamlines your process and assures you have everything needed for a successful, long-lasting project. Additionally, considering the air quality of your space can help you choose materials that won’t emit fumes or odors when illuminated.
Choosing Your Design and Patterns
When selecting your patterns, consider how they’ll look when lit and match your space’s style. You can find inspiration in nature, geometric shapes, or even your favorite artwork. Keep your skill level in mind to choose designs that are achievable and will look great once finished. Additionally, think about visual harmony to ensure your lampshade complements your overall decor.
Pattern Selection Tips
Choosing the right patterns for your paper cutting lampshade can dramatically influence its overall look and ambiance. Consider your preferred color combinations to create harmony or contrast that enhances your space. Bright, bold hues can make a statement, while softer tones lend a subtle, calming effect. When selecting patterns, think about pattern complexity—simple designs are more versatile and easier to cut accurately, especially if you’re a beginner. Intricate patterns add visual interest but require patience and precision. Balance complexity with your skill level and the desired mood. Also, keep in mind the size and scale of your design—larger patterns work well for bigger lampshades, while smaller, detailed patterns suit smaller fixtures. Ultimately, choose patterns that reflect your style and complement your room’s decor. Incorporating sound healing principles such as rhythmic or harmonious patterns can also enhance the calming effect of your lampshade.
Design Inspiration Sources
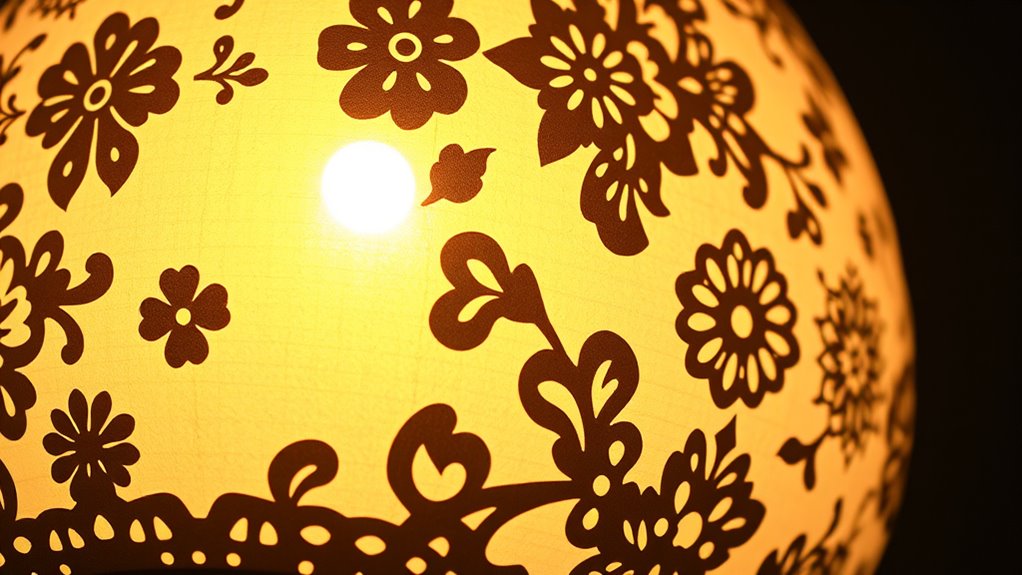
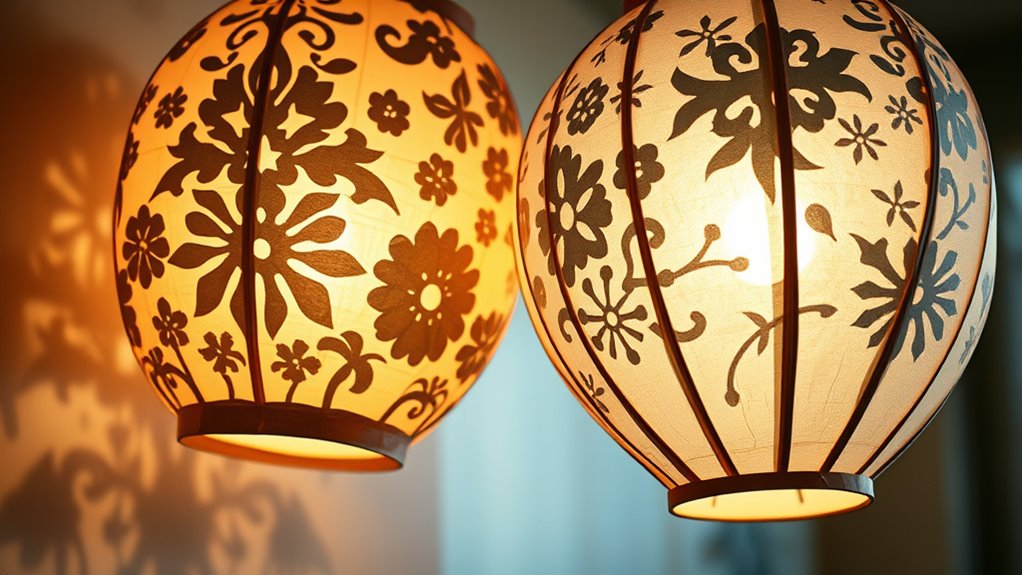
Finding inspiration for your paper cutting lampshade can be an exciting part of the creative process. Traditional motifs, like intricate patterns or cultural symbols, can add a timeless and meaningful touch to your design. Nature inspired themes, such as floral patterns, leaves, or animal silhouettes, bring a fresh, organic feel that beautifully complements the light. You might explore historical designs or folk art for unique motifs that resonate with your style. Take a walk outside or browse botanical illustrations to spark ideas rooted in nature’s beauty. Incorporating design principles can help you create balanced and aesthetically pleasing patterns. Combining these sources allows you to craft a personalized lampshade that reflects your personality. Remember, inspiration can come from anywhere—art, history, or your surroundings—so keep your eyes open for patterns that inspire your craft.
Preparing Your Lampshade Base
Before you start decorating, it is essential to prepare your lampshade base properly. First, choose a sturdy material that offers good material durability, like thick cardboard or metal, to guarantee your lampshade holds its shape. Clean the surface thoroughly to remove dust and grease, which can interfere with adhesive or paint. When selecting your base, consider color coordination; opt for a neutral or complementary color that will enhance your paper cut design. Measure and cut the base precisely to fit your lamp socket, ensuring a snug fit. Reinforce weak spots with tape or glue if needed. A well-prepared base provides a solid foundation for your decorative paper, making the final result look professional and polished. Additionally, ensuring your base is free of material imperfections can help prevent issues during the decorating process.
Drafting and Transferring Your Pattern
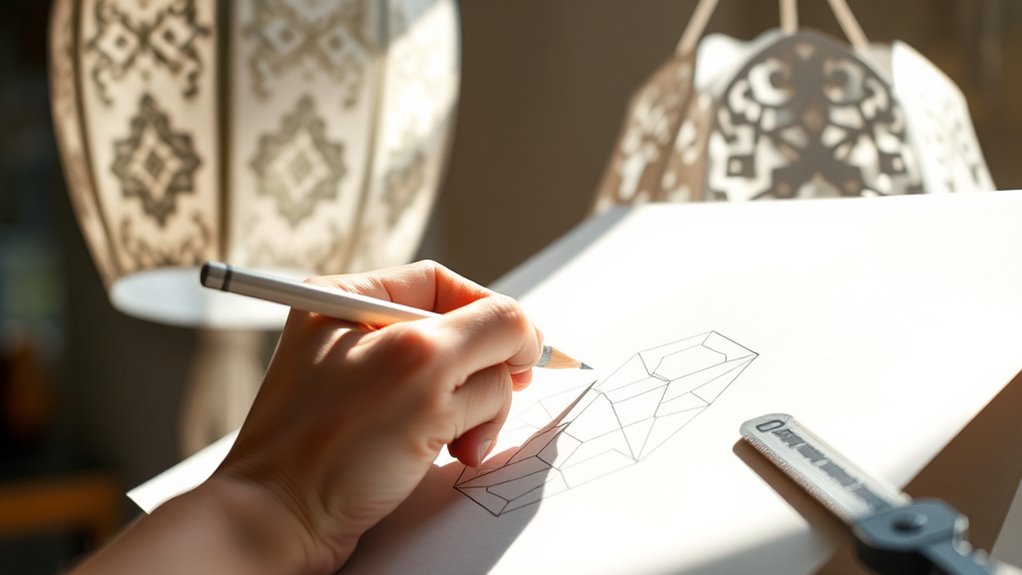
Have you ever struggled to transfer a delicate design onto your lampshade? It’s common to feel unsure about how to keep your pattern precise. To start, choose your paper wisely, sourcing high-quality options that suit your design and color theory. Use tracing paper or vellum for easier transfer, and consider carbon paper for sharp outlines. When drafting, sketch your pattern clearly, paying attention to color harmony and balance. Use this table as a guide:
| Paper Type | Best Use | Tips |
|---|---|---|
| Vellum | Light transference | Use a light box or window |
| Carbon Paper | Precise outlines | Keep paper smooth |
| Kraft Paper | Drafting | Avoid tearing easily |
| Scrapbook Paper | Final design | Select vibrant colors |
| Tracing Paper | Transfer | Ensure clean lines |
This approach helps you transfer your design accurately, setting the stage for successful paper cutting. Additionally, understanding the effects of eye patches can inspire creative ways to relax and rejuvenate during your crafting sessions.
Cutting Out Intricate Designs
When cutting out intricate designs, choose detailed patterns that will create stunning visual effects. Use precision tools like craft knives and cutting mats to guarantee clean, accurate lines. This attention to detail enhances the overall look of your lampshade and adds a touch of elegance. Additionally, incorporating diverse design options can elevate your indoor decor and make your lampshade truly unique.
Choosing Detailed Patterns
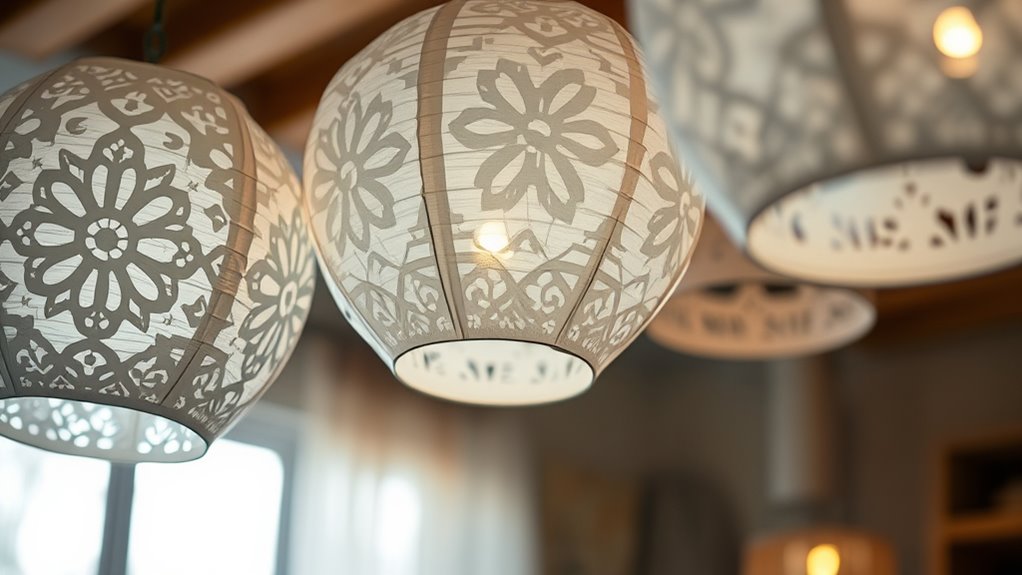
Are you ready to add a touch of elegance to your paper lampshade? Choosing detailed patterns is key to achieving a stunning design. When selecting intricate patterns, consider the pattern complexity—some designs are delicate and require steady hands, while others are bolder and easier to cut. Look for patterns that complement your decor and personal style. Opt for designs with clear outlines and balanced details to ensure they translate well onto your lampshade. Remember, more intricate patterns can create beautiful shadows, but they also demand precision. If you’re a beginner, start with simpler detailed patterns and gradually move to more complex ones as your skills improve. With careful choice, your lampshade will become a captivating focal point.
Using Precision Tools
To accurately cut out intricate designs, using the right precision tools is essential. Craft knives allow you to make detailed cuts manually, giving you control over delicate patterns. For more complex or repetitive designs, laser cutting offers precision and uniformity that’s hard to achieve by hand. When working with craft knives, verify you have a sharp blade to prevent tearing or uneven edges. Take your time and steady your hand for precise results. Here are some tools to consider:
- Sharp craft knives
- Cutting mats
- Rulers and templates
- Laser cutting machines
- Fine-tipped scissors
These tools help you achieve clean, intricate cuts that elevate your paper lampshade’s design and craftsmanship. Incorporating industry-standard training and skills can further enhance your ability to execute detailed designs effectively.
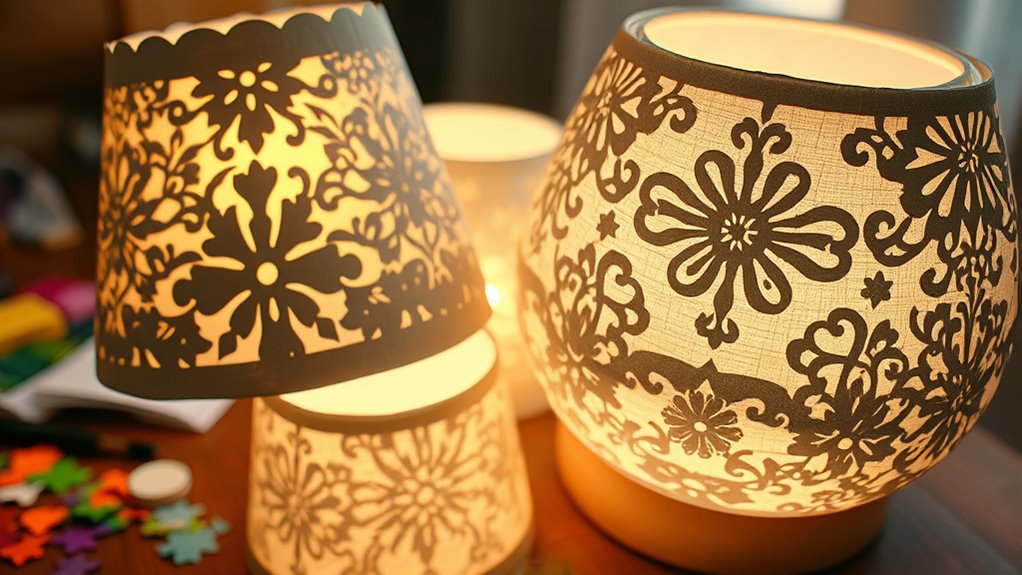
Enhancing Visual Effects
After mastering precise cutting techniques, you can start exploring ways to enhance your paper lampshade’s visual effects. Intricate designs create captivating shadows and add depth to your project. Choose color schemes that complement your space, blending or contrasting with the light to produce unique effects. Opt for durable material choices to ensure your design withstands handling and time without tearing or fading. Experiment with patterns that vary in complexity to cast interesting shadows. The table below illustrates design ideas, color schemes, and material durability considerations:
| Design Idea | Color Scheme | Material Durability |
|---|---|---|
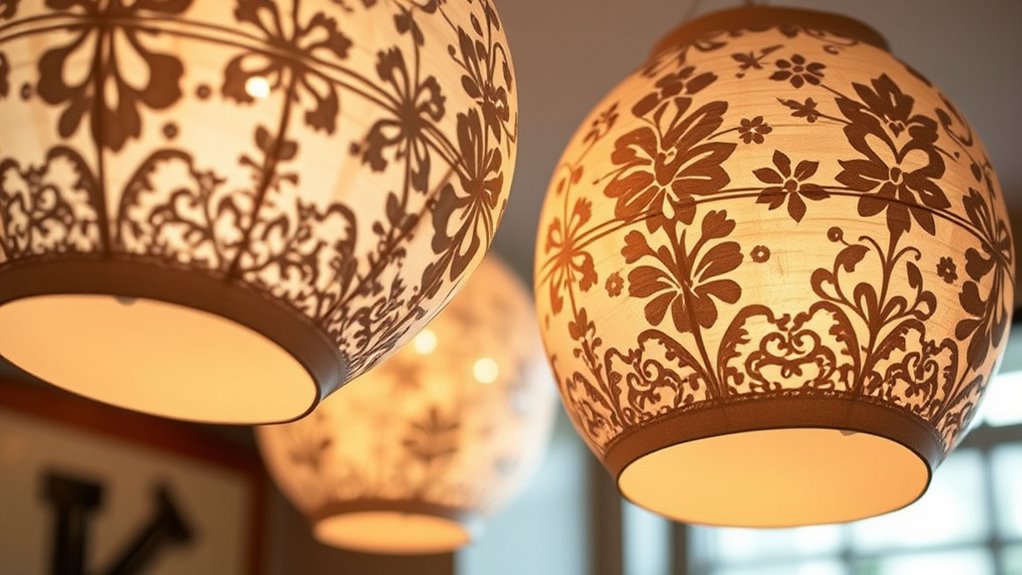
| Floral Patterns | Warm tones | Thick, sturdy paper |
| Geometric Cuts | Monochrome | Heavy cardstock |
| Nature Scenes | Bright colors | Acid-free paper |
| Abstract Shapes | Metallic shades | Laminated paper |
| Lattice Designs | Soft hues | Reinforced paper |
Additionally, considering material durability can help ensure your lampshade maintains its appearance over time, especially with frequent handling or exposure to light.
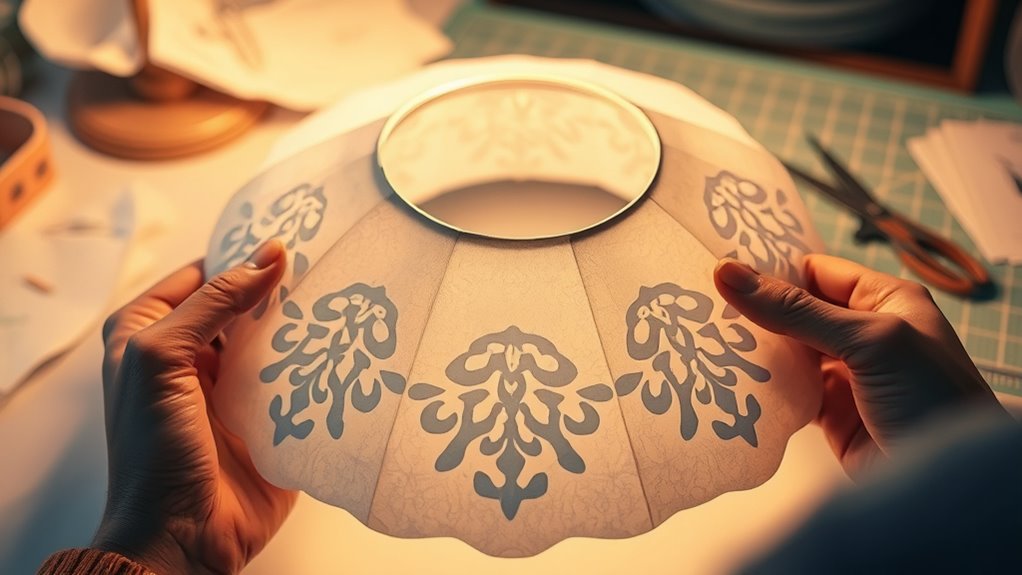
Assembling the Lampshade or Lantern
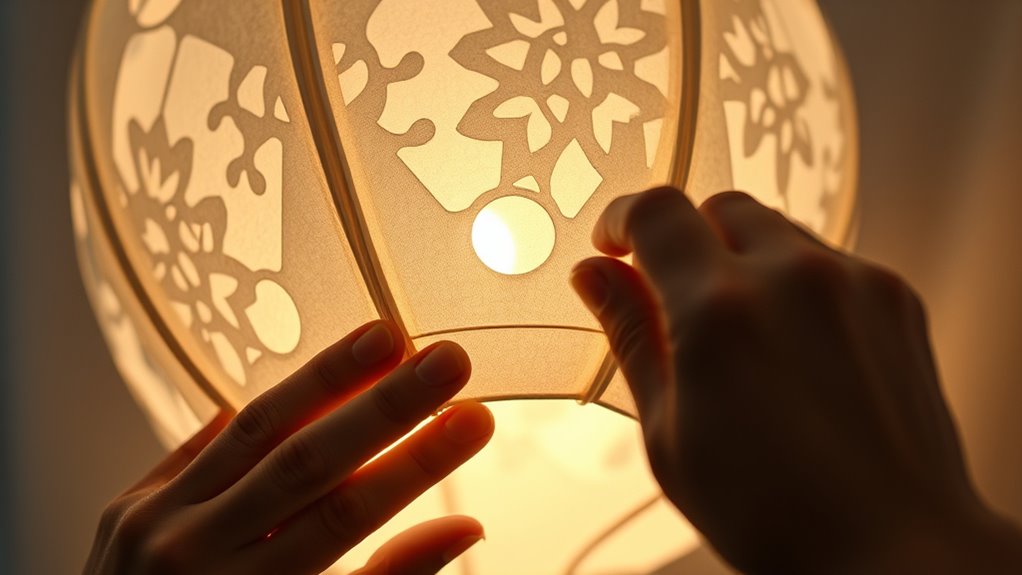
Once you’ve finished cutting out your paper design, it’s time to assemble the lampshade or lantern. To guarantee the best lighting ambiance and maximize material durability, handle each piece carefully. Begin by connecting the cut sections using adhesive or double-sided tape, aligning edges precisely. Secure the structure with clips or fasteners if needed, ensuring stability. As you assemble, keep the design symmetrical for even light distribution. Make sure the paper is taut but not stretched to prevent tearing. Consider the placement of the light source to achieve ideal lighting effects. Take your time to avoid wrinkles or gaps, as these can affect both the appearance and functionality of your lampshade or lantern. Proper assembly guarantees a beautiful, durable finished piece. Additionally, you can incorporate protective styling techniques to help your paper lanterns last longer and maintain their appearance over time.
Adding Finishing Touches and Decorations
Adding finishing touches and decorations is the perfect way to personalize your paper lampshade and enhance its visual appeal. You can incorporate seasonal themes like snowflakes for winter or leaves for fall to make it more festive. Color coordination also plays a key role—match your lampshade with room decor or choose contrasting hues for a bold statement. Consider adding small embellishments such as ribbons, stickers, or metallic accents to elevate the design. Here’s a quick overview:
| Seasonal Themes | Color Coordination |
|---|---|
| Snowflakes, pumpkins | Complementary colors |
| Flowers, stars | Contrasting shades |
| Holiday motifs | Monochrome schemes |
| Nature-inspired designs | Bright or pastel hues |
These touches bring your lampshade to life and reflect your unique style. Incorporating decorative elements can further enhance the overall aesthetic and make your creation truly stand out.
Installing the Light and Testing Effects
Now it’s time to install your light fixture and see how your lampshade looks when lit. Make certain the fixture is secure and compatible with your shade for safe operation. Once everything’s in place, evaluate the lighting effects by observing the pattern and brightness to ensure it meets your expectations. Additionally, consider air circulation to prevent overheating and maintain safety during use.
Light Fixture Setup
Ever wonder how to guarantee your DIY paper lampshade looks perfect when lit? Start by carefully installing your chosen light fixture, ensuring it’s securely mounted. Use color theory to select a bulb that complements your design and enhances the mood. Always prioritize electrical safety by turning off the power before wiring or handling components. Once installed, test the setup with the switch to check for flickering or uneven lighting. Adjust the bulb or fixture if necessary to achieve an even glow. Remember, proper installation prevents hazards and highlights your craftsmanship. Keep these tips in mind:
- Double-check wiring connections
- Use the correct bulb wattage
- Securely fasten the fixture
- Test for consistent light distribution
- Follow electrical safety guidelines
- Consider lighting effects to enhance your design and mood.
This approach guarantees a safe, beautiful lighting effect for your DIY lampshade.
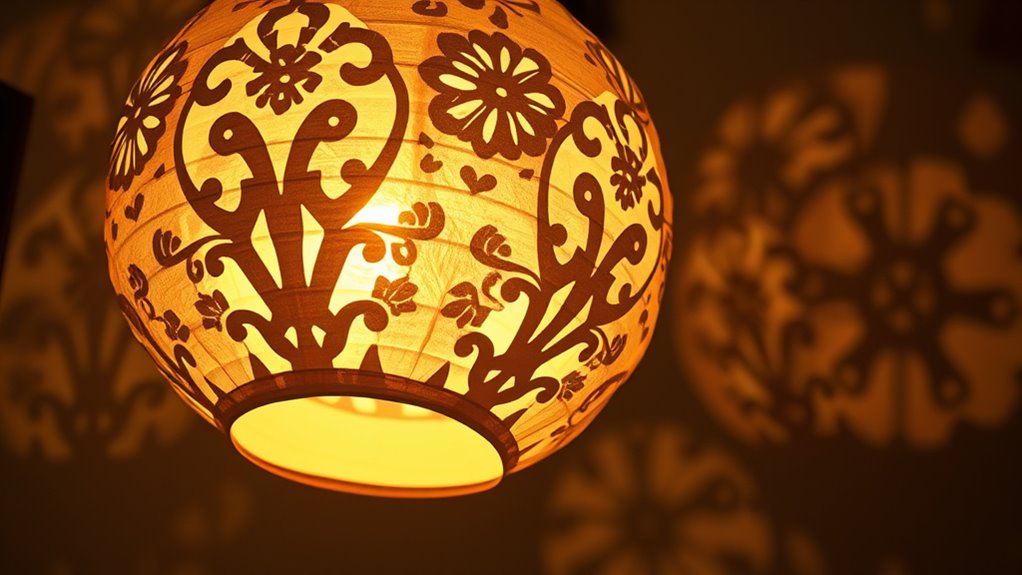
Effect Evaluation Techniques
Once your light fixture is securely installed, it’s time to evaluate how your DIY paper lampshade performs when lit. Turn on the light and observe the lighting ambiance it creates. Notice how the cut-out patterns cast shadows and influence the overall mood of the space. Pay attention to the color contrast between the light and the paper, ensuring the design details stand out clearly. Check if the light disperses evenly or if any areas appear too dim or too bright. Adjust the bulb wattage if necessary to enhance the visual effect. This testing helps you refine your lampshade’s appearance, ensuring it produces the desired atmosphere and highlights the intricate paper cuts. Proper effect evaluation guarantees your lampshade achieves the perfect balance of light and shadow. Additionally, lighting design principles can help you optimize the overall visual impact of your creation.
Tips for Maintaining Your Handmade Lampshade
To keep your handmade lampshade looking its best, regular maintenance is essential. Proper cleaning techniques prevent dust buildup and preserve the paper’s integrity. Use a soft brush or a gentle vacuum with a brush attachment to remove surface dust. When storing your lampshade, choose storage solutions that protect it from moisture, direct sunlight, and crushing. Additionally, being aware of water damage risks common in humid environments can help you take proactive steps to maintain your lampshade’s condition. Consider these tips:
- Store in a cool, dry place away from direct sunlight
- Use a breathable container or cover to prevent dust accumulation
- Avoid stacking heavy objects on top
- Gently wipe with a damp cloth if needed
- Keep away from humidity to prevent warping or mold
Consistent care guarantees your lampshade stays vibrant and durable for years to come.
Creative Ideas for Customizing Your Lampshade
Customizing your handmade lampshade allows you to express your personal style and create a unique focal point in any room. Start by experimenting with color combinations that match your decor or set a specific mood. Bright, contrasting hues can energize a space, while soft pastel shades add a calming touch. Consider the material durability of your paper; select thicker, high-quality paper that withstands handling and time, ensuring your design stays intact. You can also add decorative elements like stencils, layered cutouts, or painted accents to enhance the visual appeal. Remember, blending vibrant colors with durable materials helps your lampshade remain both beautiful and functional. Understanding material properties can help you choose the right type of paper for longevity and safety. Personal touches make your creation truly one-of-a-kind and perfectly suited to your space.
Frequently Asked Questions
What Are the Safest Lighting Options for Paper Lampshades?
You should choose LED bulbs for your paper lampshades because they generate less heat, reducing fire safety risks. Avoid incandescent or halogen bulbs, which can get very hot and pose a fire hazard. Always guarantee your lampshade is made from flame-retardant materials and keep it away from flammable objects. Regularly check your lighting setup for any signs of overheating, and never leave your lamp unattended when it’s on.
How Can I Make My Lampshade More Durable?
To make your lampshade more durable, you should apply reinforcement techniques like adding a sturdy frame or using thicker paper for added strength. Additionally, protect your lampshade with a clear, heat-resistant coating to prevent damage from moisture and wear. These steps help reinforce the structure and shield it from everyday hazards, ensuring your lampshade remains beautiful and secure for longer periods.
Can I Use Recycled Paper for My Lampshade?
You can definitely use recycled paper for your lampshade, but keep in mind it’s a double-edged sword. Recycled paper is a great sustainable material, helping reduce waste and environmental impact. Just make sure it’s sturdy enough to handle the heat and isn’t too fragile. With proper treatment, it’s a smart choice that lets you craft something eco-friendly and unique while keeping safety in check.
How Do I Prevent the Paper From Tearing During Cutting?
To prevent the paper from tearing, use proper scissor techniques and sharp cutting tools. Hold the scissors firmly and cut slowly along your design lines, applying steady pressure. Keep your paper flat and secure, using a ruler or straight edge for guide lines. Switch to precision scissors or craft knives for intricate details, ensuring clean cuts and reducing the risk of tearing. Practice these techniques to improve your accuracy and protect your paper.
What Are Eco-Friendly Finishing Options for Paper Lampshades?
You can make your paper lampshades eco-friendly by using biodegradable coatings that protect the paper without harming the environment. Opt for plant-based adhesives to assemble and finish your lampshades, avoiding synthetic glues. These options guarantee your project stays sustainable and eco-conscious. Applying a biodegradable coating also adds durability while maintaining eco-friendliness, giving you a beautiful, environmentally friendly finish that aligns with your green values.
Conclusion
Creating your own paper lampshade is a rewarding project that adds a personal touch to any space. Did you know that DIY home decor projects like this can reduce waste and save you up to 30% compared to store-bought options? With patience and creativity, you can craft a beautiful, unique piece that reflects your style. So, gather your materials, follow these steps, and enjoy the warm, handcrafted glow of your custom lampshade.