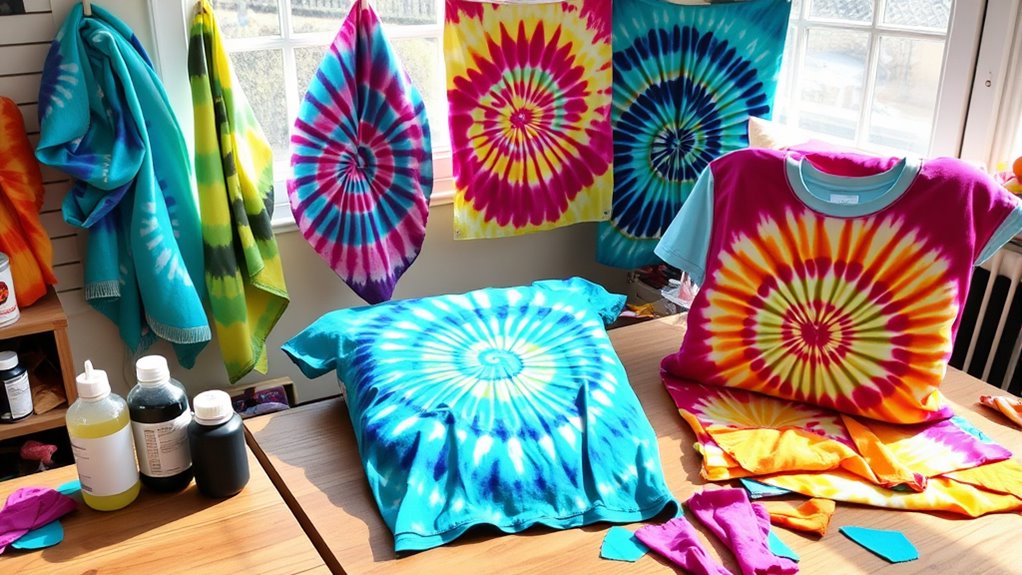

To create DIY tie-dye fabric projects for home use, start by choosing natural, durable fabrics like cotton or linen that resist fading and last over time. Use simple folding and tying techniques to craft patterns on items like pillowcases, curtains, or table runners. Apply vibrant dyes with squeeze bottles or brushes to achieve your desired designs. Proper care — washing in cold water and avoiding prolonged sun exposure — keeps your textiles colorful and beautiful. Explore more tips to perfect your creations.
Key Takeaways
- Choose natural, durable fabrics like cotton or linen for vibrant, long-lasting tie-dye results at home.
- Use simple folding, tying, and resist techniques such as shibori to create unique patterns easily.
- Experiment with color combinations and application methods to customize home decor items like pillowcases and curtains.
- Follow proper dyeing and fabric care practices, including washing in cold water and avoiding prolonged sun exposure.
- Preserve and extend the life of your DIY tie-dye textiles by mindful handling and appropriate storage.

Honey Oak Natural Tie Dye Kit | 3 Color Extract Set – Olive Green, Sunflower Yellow, Turkey Red | Plant-Based Fabric Dyes for Shibori & DIY Fabric Art | Easy to Use Craft Kit
Natural & Non-Toxic Dye – Made from 100% natural sources, Honey Oak’s dye is safe, chemical-free, and perfect…
As an affiliate, we earn on qualifying purchases.
As an affiliate, we earn on qualifying purchases.
Choosing the Right Fabrics and Colors for Your Projects
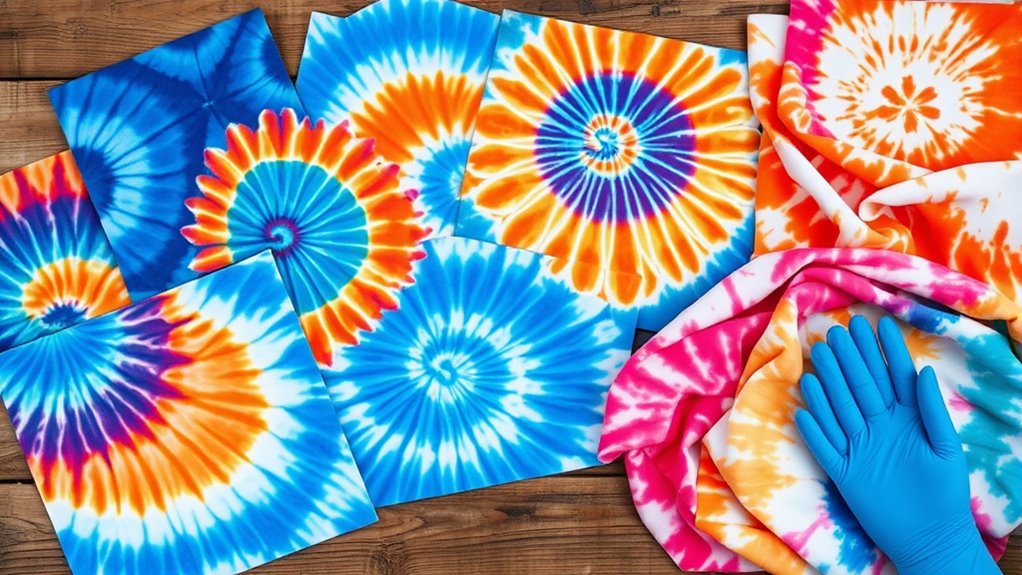
When selecting fabrics and colors for your tie-dye projects, it’s important to start with natural, breathable materials like cotton, rayon, or linen, as these absorb dye best. Fabric durability plays a key role here—choose sturdy fabrics that won’t tear or wear quickly through handling and washing. This ensures your finished piece remains vibrant longer. Additionally, consider color fastness; fabrics with good color retention will resist fading after multiple washes. Natural fibers generally offer better color retention than synthetic ones, giving your designs a richer, more lasting appearance. Picking the right fabric guarantees your dyeing efforts won’t go to waste, and your projects stay bold and beautiful over time. Focus on quality materials to achieve professional-looking, long-lasting results. Sound healing science also suggests that the materials used can influence the overall vibrancy and effectiveness of your dyeing process.

12 Colors Tie Dye Kit, Tie Dye Set for Kids, Pre-Filled Tye Dye Bottles, Non Toxic Permanent Fabric Dye Art Set, Easy DIY Fabric Art – Create Fun
【Premium Tie Dye Kit】Dive into the vibrant world of tie-dyeing with our all-inclusive kit. Perfect for beginners and…
As an affiliate, we earn on qualifying purchases.
As an affiliate, we earn on qualifying purchases.
Basic Techniques for Achieving Classic Tie-Dye Patterns
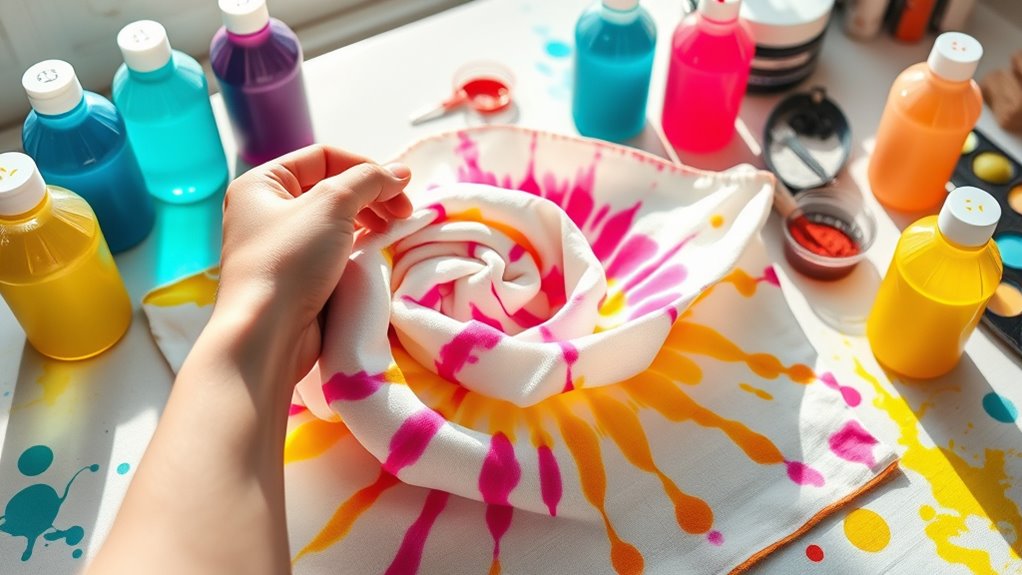
To create classic tie-dye patterns, mastering simple folding and tying techniques is essential. You can achieve distinctive designs using shibori techniques, which involve folding, clamping, or binding fabric in specific ways before dyeing. Resist dyeing methods, like tying sections with rubber bands or string, create patterns where dye doesn’t penetrate. For a spiral or bullseye, twist the fabric tightly and secure with rubber bands at intervals. For stripes, fold fabric accordion-style and bind sections. These methods prevent dye from reaching certain areas, producing bold, recognizable patterns. Practice different folding and tying styles to understand how each impacts the final look. Additionally, understanding contrast ratio can help you choose the right lighting to showcase your finished projects effectively. With patience, you’ll develop a strong foundation in basic tie-dye techniques that form the basis for more complex designs.

Tulip One-Step Tie-Dye Party Kit, Set of 123
Kit dyes up to 36 projects or enough for 6 people
As an affiliate, we earn on qualifying purchases.
As an affiliate, we earn on qualifying purchases.
Creating Personalized Pillowcases With Tie-Dye Designs
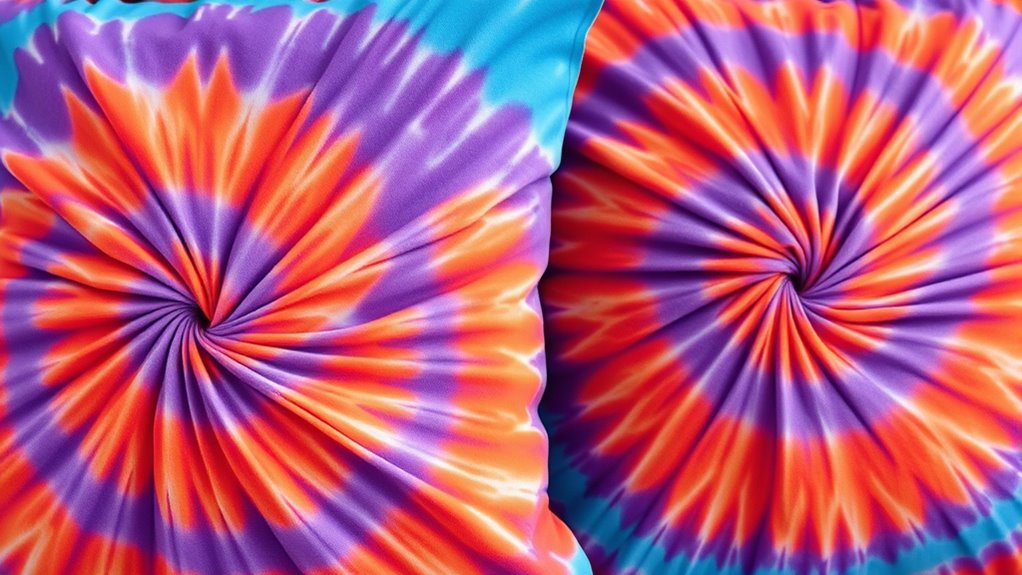
When creating personalized pillowcases, choosing vibrant color combinations makes your designs pop. Experimenting with different folding and tying techniques helps you achieve unique patterns that stand out. With a little creativity, you can craft pillowcases that reflect your style and brighten up any space. Incorporating color contrast can further enhance the visual appeal of your tie-dye projects.
Choosing Vibrant Color Combinations
Choosing vibrant color combinations is key to making your personalized pillowcases stand out. To achieve this, consider color wheel harmony, which helps you select colors that naturally complement each other for a balanced look. Experiment with contrasting hues for bold, eye-catching designs or analogous shades for a more subtle, cohesive effect. Seasonal color palettes offer inspiration, combining colors that reflect the time of year—warm oranges and browns for fall or cool blues and greens for summer. Keep in mind that blending these palettes thoughtfully can enhance your pillowcase’s visual appeal. Test small fabric sections first to see how the colors interact. Additionally, understanding personality traits can help in choosing colors that resonate with your personal style and mood. Ultimately, your goal is to create vibrant, harmonious combinations that reflect your personal style and brighten up your space.
Techniques for Unique Patterns
Creating unique tie-dye patterns on pillowcases involves experimenting with various folding, twisting, and binding techniques to produce distinctive designs. To achieve this, you can try different methods:
- Use Shibori techniques like accordion folding and binding to create textured, resist patterns.
- Create spiral patterns by twisting the fabric into a tight swirl and applying dye selectively.
- Combine folding and tying for geometric designs, such as diamonds or stripes.
- Experiment with different dye colors and application methods to enhance your patterns’ uniqueness.
- Incorporating dye application techniques can help you achieve more precise and vibrant designs.

Tulip One-Step Tie-Dye Kit One-Step Tie Kit Fabric Dye, Shibori
Features 5 bottle of shibori-inspired dye: Sky Blue, Turquoise, Gray, Black AND Indigo
As an affiliate, we earn on qualifying purchases.
As an affiliate, we earn on qualifying purchases.
Transforming Plain Curtains Into Vibrant Statement Pieces
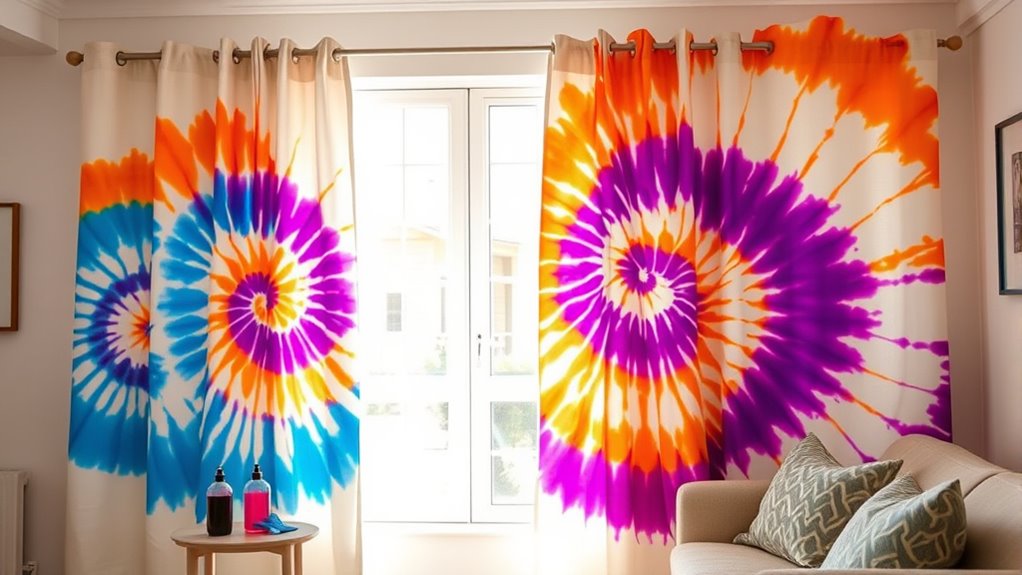
Transforming plain curtains into vibrant statement pieces is a simple way to refresh your space and showcase your creativity. Start by pre-treating your fabric with a mordant or a fabric fixative to guarantee the dye bonds well and colors stay vibrant. Next, experiment with dye color mixing to create bold, unique hues that match your décor. Once your fabric is pre-treated and your colors are ready, fold or tie your curtains to develop interesting patterns. Apply the dye using squeeze bottles or brushes, focusing on areas you want to stand out. Remember, the way you layer and combine colors will influence the final look. With careful planning and attention to detail, you’ll turn plain curtains into eye-catching, colorful accents that truly make a statement. Incorporating techniques like mindful decluttering can help you create a more organized space, making your DIY projects easier to manage and enjoy.
Making Custom Table Runners and Placemats With Tie-Dye

If you want to add a personal touch to your dining area, making custom tie-dye table runners and placemats is a fun and creative project. Start with fabric dyeing by choosing your favorite colors and experimenting with color blending to create unique shades. Follow these steps:
Create unique, colorful table runners and placemats with fun fabric dyeing and blending techniques.
- Prepare your fabric and secure it with rubber bands for interesting patterns.
- Apply dye using different techniques, ensuring a variety of color blends.
- Let the fabric sit to set the dye, then rinse and dry thoroughly.
- Sew or hem the fabric into your desired table runner or placemat shape.
- Remember to work in a well-ventilated area and wear gloves to protect your skin from dyes and chemicals safety precautions.
This process allows you to customize your tableware, making each piece one-of-a-kind while showcasing your creativity through vibrant fabric dyeing and seamless color blending.
Crafting Unique Wall Hangings and Fabric Art

Have you ever considered turning fabric into striking wall art that reflects your personality? Using fabric dyeing techniques, you can create one-of-a-kind textile art pieces that transform your space. Start with bold colors or subtle gradients to craft a piece that speaks to you. Combining different dyeing methods, like ice dye or shibori, adds texture and visual interest. To organize your ideas, here’s a quick overview:
| Technique | Description |
|---|---|
| Tie-Dye | Classic method with vibrant, swirling patterns |
| Ice Dye | Creates organic, unpredictable designs |
| Shibori | Resists dye to produce intricate patterns |
Experimenting with these methods allows you to craft unique wall hangings that showcase your creativity and personal style. Incorporating dyeing techniques can also help you explore new textures and color effects, making your fabric art truly distinctive.
Tips for Caring for and Maintaining Your Tie-Dye Textiles

Once you’ve created your stunning wall hangings or fabric art with various dyeing techniques, caring for your textiles properly guarantees their vibrant appearance lasts. To maintain fabric care and dye longevity, follow these simple tips:
Protect your vibrant textiles by washing in cold, turning inside out, and avoiding prolonged sun exposure.
- Wash your tie-dye textiles in cold water to prevent colors from fading.
- Turn the fabric inside out before washing to protect the dye surface.
- Use mild, dye-safe detergents that preserve the colors.
- Avoid exposing your textiles to direct sunlight for extended periods, as UV rays can fade the dye.
- Incorporate mindfulness practices while handling your fabrics to enhance their longevity and preserve their vibrancy cultural impact.
Frequently Asked Questions
What Are the Best Types of Dyes for Fabric Durability?
You should choose fiber types like cotton, polyester, or silk, as they respond well to durable dyes. For better dye fixation, use fiber-reactive dyes or professional-grade dyes designed for fabric. These dyes create strong bonds, ensuring your tie-dye stays vibrant through multiple washes. Always follow the manufacturer’s instructions for ideal dye fixation, and pre-treat or fix the dye properly to achieve the most durable, long-lasting results.
How Can I Prevent Colors From Bleeding During Washing?
To prevent colors from bleeding during washing, you should follow colorfastness tips like washing your tie-dye fabric separately first and using cold water. Always turn your items inside out and opt for gentle cycle settings. Avoid harsh detergents and bleach. These washing precautions help lock in the dye, maintaining vibrant colors. Additionally, air-drying instead of machine drying can further preserve your fabric’s bright hues.
Are There Eco-Friendly or Non-Toxic Dye Options Available?
Sure, because nothing says “eco-friendly” like pouring chemical-laden dyes down the drain. Luckily, you have options! You can opt for natural dyes, like beet juice or turmeric, or plant-based dyes that are gentle on the planet and your skin. These eco-friendly choices not only give vibrant colors but also help you feel morally superior while avoiding toxic chemicals. Who knew dyeing could be so guilt-free?
How Long Does It Take for Tie-Dye Projects to Fully Set?
Tie-dye projects typically take 6 to 24 hours to fully set, but setting times can vary based on environmental factors like temperature and humidity. Warmer, more humid conditions usually speed up the process, while cooler or dry environments might slow it down. To guarantee vibrant colors and proper setting, keep your dyed fabric in a warm, shaded area and avoid disturbing it during the initial drying phase.
Can I Create Multi-Colored or Gradient Effects With Basic Techniques?
Yes, you can create multi-colored or gradient effects with basic techniques. Think of color blending like painting a sunset—gradual shifts from one hue to another. Use tie-dye methods like accordion folding or twisting to achieve smooth *gradation* techniques, blending colors seamlessly. For instance, start with a light hue and gradually add darker shades as you work, creating beautiful *progressions* that resemble a watercolor masterpiece.
Conclusion
Now, imagine your home transformed into a colorful haven, where vibrant tie-dye patterns dance across pillows, curtains, and wall hangings. With your creativity and these simple techniques, you’ve turned plain fabrics into stunning works of art that reflect your style. Each piece becomes a splash of personality, filling your space with energy and warmth. So grab your dyes and fabric—your personalized, rainbow-infused home décor awaits, ready to brighten every corner you introduce it to.