
To master DIY stained wood techniques and finishes, start by choosing high-quality wood that suits your project and selecting a stain that matches your desired color. Properly prepare your surface by sanding thoroughly and removing dust. Apply stain evenly, layering for richness and experimenting with techniques like blending or wiping to create different effects. Finish with a protective sealant to guarantee durability. For more expert tips and tricks, keep exploring how to achieve professional results.
Key Takeaways
- Properly sand and clean your wood surface to ensure smooth stain absorption and an even finish.
- Choose the right stain type and color, testing on scrap wood before applying to your project.
- Apply stain in thin, even coats using brushing or wiping techniques, layering for depth and richness.
- Experiment with blending, layering, or wiping to create unique effects and textures on your wood.
- Finish with a high-quality sealant or polyurethane, lightly sanding between coats for durability and protection.

Varathane Premium Fast Dry Wood Stain | 1 Hour Dry Time | 1 Coat Color | Interior Wood Stain | Furniture, Cabinets, Doors, Trim | Half Pint | Dark Walnut
Ideal for use on all interior wood projects: furniture, cabinets, doors, trim and paneling
As an affiliate, we earn on qualifying purchases.
As an affiliate, we earn on qualifying purchases.
Choosing the Right Wood and Stain Products
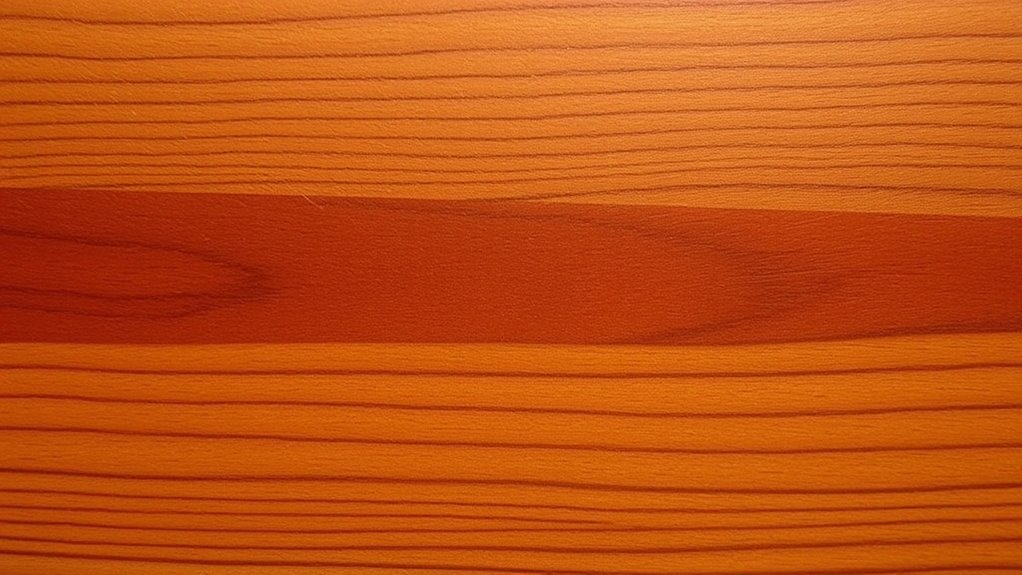
When selecting wood for your stained project, it’s vital to take into account the type and quality of the material, as different woods absorb stain differently. Your choice of wood types influences the final look, with each variety offering unique grain patterns that add character. Hardwoods like oak, cherry, or maple have distinct grain patterns that can highlight the stain’s depth and richness, while softer woods such as pine or cedar may absorb stain unevenly. Consider how the grain patterns will complement your design, and opt for high-quality wood to guarantee a smooth, even finish. Understanding the key domains of development in psychology can help you appreciate how environmental interactions influence the final appearance, making your stained project look professional and polished. Knowing the differences in wood types helps you choose the right material to achieve your desired aesthetic.

Varathane Water-Based Crystal-Clear Ultimate Polyurethane | Interior Wood Protection | Fast Dry Time | Easy Clean Up | Satin | Half Pint
Protects indoor wood surfaces such as furniture, windows, cabinets, trim and more
As an affiliate, we earn on qualifying purchases.
As an affiliate, we earn on qualifying purchases.
Preparing Your Wood Surface for Staining
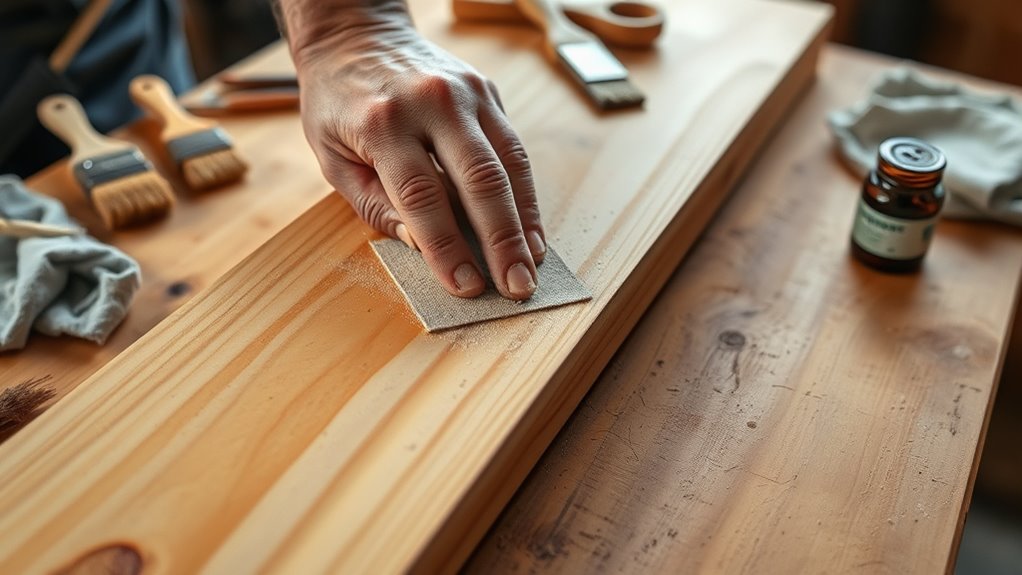
Before you start staining, you need to make sure your wood surface is smooth and clean. Sand the wood thoroughly to remove any rough spots or imperfections. Then, wipe away all dust and debris to guarantee a clean surface for even stain absorption. Ensuring your workspace is free of dust and debris is especially important for achieving a professional-looking finish.
Sanding for Smoothness
Achieving a smooth, even stain finish starts with proper sanding. Begin by following the grain direction to prevent scratches that can show through the stain. Use a medium grit sanding paper, such as 120 grit, to remove rough spots and open the wood’s pores. Always sand with the grain, applying even pressure. Once the surface feels smooth, switch to a finer grit, like 220, to ensure an ultra-smooth finish. Be thorough but gentle, especially on detailed or curved surfaces. Proper sanding removes splinters, raises the grain, and prepares the wood for a flawless stain application. Taking your time with each grit step ensures your surface is perfectly prepared for staining, resulting in a professional-looking finish that highlights the wood’s natural beauty. Additionally, paying attention to surface preparation can significantly impact the overall quality of your staining project.
Cleaning and Dust Removal
To guarantee your stain goes on smoothly and looks its best, it’s essential to thoroughly clean and remove any dust from the wood surface. Dust removal is a vital step that prevents particles from sticking to your stain, which can cause an uneven finish. Use effective cleaning techniques like wiping with a tack cloth or a damp cloth to pick up fine dust. Make certain to inspect the surface closely, catching any residual debris before applying stain. Proper cleaning not only guarantees a smooth application but also enhances the durability of your finish. Remember, even tiny dust particles can mar the final look. Keep your workspace dust-free during this step for ideal results. Here are some helpful cleaning techniques to think about:
- Use a tack cloth for fine dust
- Wipe with a damp cloth for stubborn debris
- Vacuum nearby surfaces to minimize airborne dust
- Ensuring a dust-free environment is crucial for best stain adhesion.

24 Pcs Sanding Sponge 80-3000 Grit Sandpaper Assortment, Washable & Reusable Sanding Blocks for Wood, Metal, Drywall, Glazing, Wet Dry Sandpaper for Smooth Finishing
Assortment Pack: This sanding sponge set includes 24 pieces with grits 80/120/180/240/320/400/500-600/800-1000/1200-1500/2000/2500/3000,each of 2, covering coarse material removal…
As an affiliate, we earn on qualifying purchases.
As an affiliate, we earn on qualifying purchases.
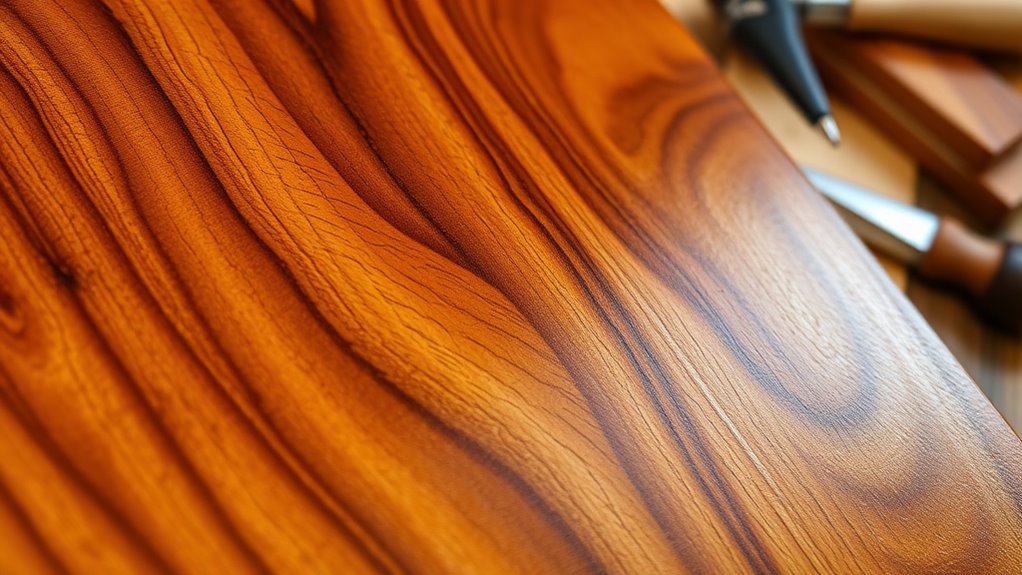
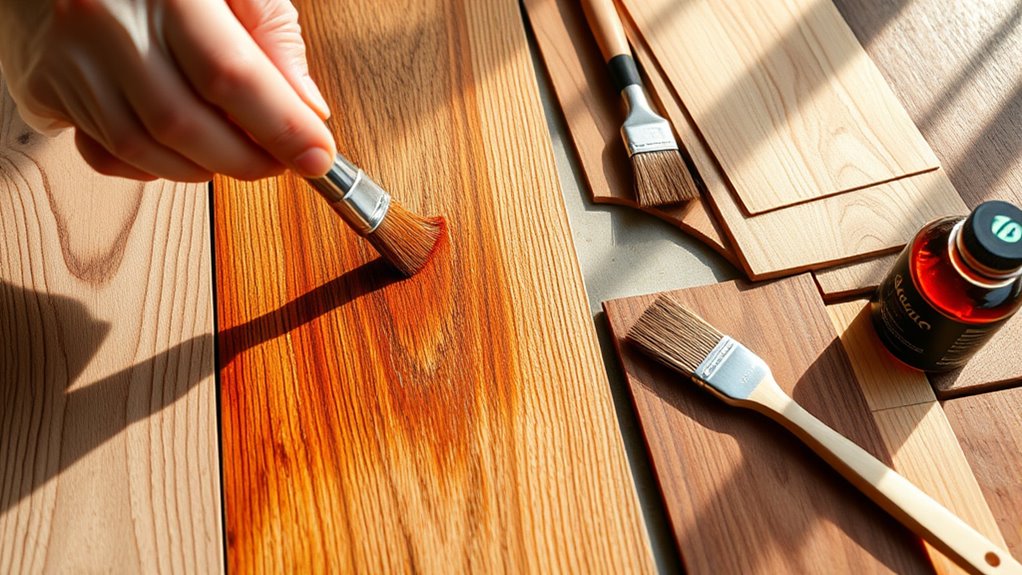
Applying Stain for Rich Color and Depth

Choosing the right stain is key to achieving the color and depth you want, so pick one that complements your project. When applying the stain, use proper techniques like wiping or brushing to guarantee even coverage. Pay attention to these steps to get a rich, professional-looking finish.
Choosing the Right Stain
Selecting the right stain is essential for adding rich color and depth to your wood project. To achieve this, consider your desired look and how well the stain matches your color matching goals. Think about stain durability—some stains are more resistant to wear and fading, ideal for high-traffic areas.
Here are some tips to help you choose:
- Test stain on scrap wood to see how it interacts with your finish
- Decide between oil-based and water-based stains for longevity and ease
- Check product labels for stain durability features suitable for your project
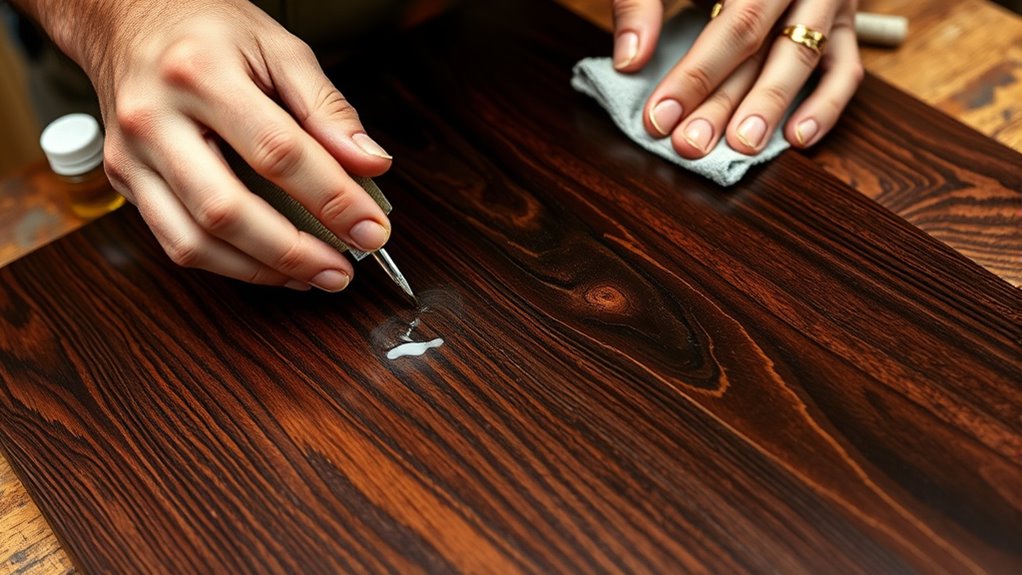
Proper Application Techniques
Applying stain properly guarantees you achieve the rich color and depth you’re after, bringing your wood project to life. Use brush techniques that allow even coverage and control, working along the grain for a smooth finish. Don’t overload your brush; instead, apply thin, consistent coats to prevent blotchiness. Stain layering is key to building depth—start with a light coat, let it dry, then add additional layers for richer color. Always wipe away excess stain after each application to avoid uneven spots. For best results, work in manageable sections and maintain a wet edge to keep connections seamless. Proper application assures your stained wood has vibrant, lasting color, highlighting its natural beauty with professional-looking depth.
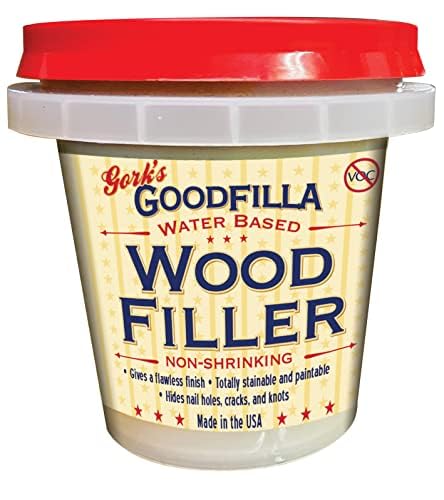
Goodfilla White Oak, 8 oz, Wood and Grain Filler, Stainable, Tintable, Sandable, Zero Waste, Non-Toxic, USA Made
⚒️ HIGH QUALITY & MONEY SAVING: Save time and money with this wood filler that does not shrink,…
As an affiliate, we earn on qualifying purchases.
As an affiliate, we earn on qualifying purchases.
Techniques for Achieving Different Effects
To achieve a variety of effects in your stained wood projects, you can use different techniques that manipulate the stain‘s application and finish. Brush techniques allow you to create textures, gradients, or smooth progressions, adding depth to your work. Color layering involves applying multiple coats of stain in different shades, building richness and complexity. You can also experiment with blending or wiping away stain to produce unique patterns. These methods give you control over the final look, making each project distinctive. Additionally, understanding sound vibrations and their influence can inspire innovative approaches to finishing techniques, adding a new dimension to your woodworking art.
Finishing Your Stained Wood for Longevity
Ensuring your stained wood lasts for years involves applying the right finish to protect it from moisture, dirt, and wear. Weatherproofing secrets are essential; choosing a high-quality exterior sealant or polyurethane creates a durable barrier. Surface sealing tips include applying thin, even coats with a brush or cloth, allowing proper drying time between layers. Sand lightly between coats to guarantee adhesion and a smooth finish. Consider using a clear, waterproof finish for outdoor projects, which guards against weather damage and UV rays. For indoor pieces, a satin or matte topcoat enhances durability without altering the wood’s appearance. Proper finishing not only preserves your stained wood’s beauty but also extends its lifespan, making it withstand the test of time and environmental elements. Additionally, understanding the importance of arcade machine maintenance can help keep your gaming setup in top condition for years to come.
Tips for Troubleshooting Common Staining Issues

Even experienced DIYers encounter staining issues, but many problems can be quickly resolved with the right troubleshooting techniques. Common blotching and uneven color are frequent frustrations, but they’re manageable. To fix common blotching, try lightly sanding the affected area and reapplying stain, working in thin coats. If you notice uneven color, verify you’re using a consistent application method and wipe off excess stain promptly. Ensuring proper surface preparation and understanding how different wood finishes respond can also improve results.
Frequently Asked Questions
How Can I Stain Curved or Intricate Wood Designs Effectively?
To stain curved or intricate wood designs effectively, you should use curved surface techniques like applying stain with a brush or foam applicator, following the wood’s contours. For intricate pattern staining, use small brushes or detail tools to reach tight spots and maintain control. Work slowly and evenly, ensuring the stain penetrates all areas without blotching. This approach helps achieve smooth, professional-looking results on complex surfaces.
What Safety Precautions Should I Take When Working With Stains and Finishes?
You should always wear personal protective equipment like gloves and a mask to avoid skin contact and inhaling fumes. Make certain proper ventilation in your workspace to reduce inhalation risks from stains and finishes. Work in a well-ventilated area, open windows, and use fans if needed. Keep the products away from children and pets, and wash your hands thoroughly after finishing. Taking these precautions keeps you safe while working with stains and finishes.
Can I Mix Different Stains to Create Custom Colors?
Yes, you can mix different stains to create custom colors through color matching and stain blending. Many crafters find this method effective for achieving unique hues that aren’t commercially available. Start by testing small amounts first, blending gradually until you reach your desired shade. Remember, mixing stains can result in unexpected tones, so patience and careful color matching are key to successful custom staining.
How Do I Remove Excess Stain Without Damaging the Wood?
To remove excess stain without damaging the wood, start by wiping it with a clean, damp cloth immediately after application. Use a mineral spirits or stain remover if needed, but test first to avoid damage. Make sure you’ve properly prepared the wood by sanding and cleaning before staining. This helps ensure even stain absorption and easier cleanup, giving you a smooth, professional finish without harming the surface.
What Are Eco-Friendly or Non-Toxic Stain Options Available?
You can choose eco-friendly or non-toxic stain options like natural alternatives and plant-based stains. These products are made from renewable resources, free of harmful chemicals, and safer for your health and the environment. Look for brands that specify plant-based ingredients or natural dyes. They offer beautiful finishes while minimizing impact, making them perfect for eco-conscious projects. Always check labels to guarantee they meet your eco-friendly standards.
Conclusion
Don’t worry if your first DIY stained wood project isn’t perfect—practice makes perfect! With the right products and techniques, you’ll achieve stunning results that last. Even if you encounter issues, troubleshooting tips will help you fix them quickly. So, jump in with confidence and enjoy the process of transforming your wood surfaces. Before long, you’ll be proud of your beautiful, custom-stained creations that add a personal touch to your space.