
To achieve professional-quality resin 3D prints, start by carefully removing supports and cleaning your models with isopropyl alcohol. Next, cure your prints uniformly with a UV light to boost strength and detail. Sand and finish the surface for a smooth look, then paint or add details for realism. Troubleshoot issues like uneven curing or surface imperfections, and use quality tools. Continue exploring these steps to master post-processing and get pro results.
Key Takeaways
- Properly remove supports and clean prints with isopropyl alcohol to ensure surface quality and detail preservation.
- Use consistent UV curing with calibrated equipment to maximize strength, clarity, and fine detail.
- Follow safety protocols, including PPE and ventilation, when handling resin and post-processing materials.
- Employ precise sanding, polishing, and finishing techniques for a smooth, professional surface appearance.
- Regularly maintain and calibrate curing and cleaning equipment to ensure reliable, high-quality results.

Premium 3D Print Removal Tool Kit – Durable 3D Printer Tools with Sturdy Comfort Grips, Sharp and Hardened Blades for Easy Separation of Prints, Knife and Spatula Set of 2 – Enhanced Version
Durable, rigid construction; Solid rivets keep the blades in place, no more repurposed artist palette spatulas with spinning,…
As an affiliate, we earn on qualifying purchases.
As an affiliate, we earn on qualifying purchases.
Learn the Basics of Resin Post-Processing
To achieve high-quality resin 3D prints, understanding the basics of post-processing is essential. One of the first steps is proper resin disposal, which helps keep your workspace safe and environmentally friendly. Never pour leftover resin down the drain; instead, follow local regulations for disposal or cure excess resin for safe handling. Safety precautions are vital throughout post-processing—wear gloves, eye protection, and a mask to avoid skin contact and inhalation of fumes. Always work in a well-ventilated area. Before cleaning or handling your prints, ensure the resin is fully cured to prevent accidental skin contact. Proper resin disposal and waste management are crucial for maintaining a safe workspace. Additionally, using the correct tools and following safety tips—such as nail guns, hacks, and protective gear—can significantly reduce risks during post-processing. By following these foundational safety practices and resin disposal guidelines, you set a solid base for achieving professional results in your resin 3D printing projects.

FYSETC Resin 3D Printing Cleaning Wipes – Upgrade Dry-Wettable Wipers: Ultrasoft Large Size Clean Up Tool for Silicone Mat 405nm UV Resin Curing Machine Vat Tank Funnel Washing Bucket Smooth Print Bed
1. Upgrade resin printer part: New Cleaning up tool for Resin 3d printer and the surrounding area. Disposable…
As an affiliate, we earn on qualifying purchases.
As an affiliate, we earn on qualifying purchases.
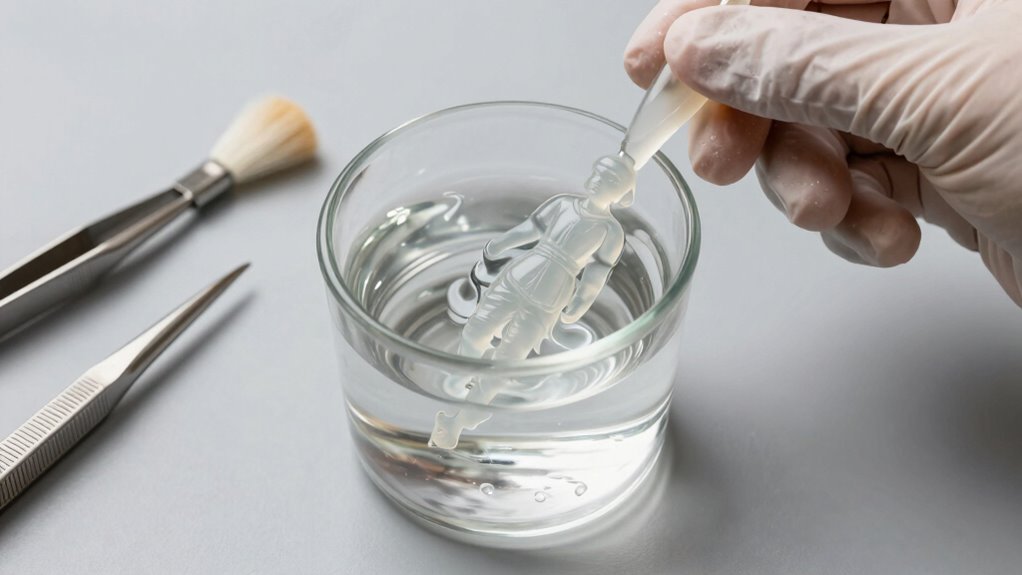
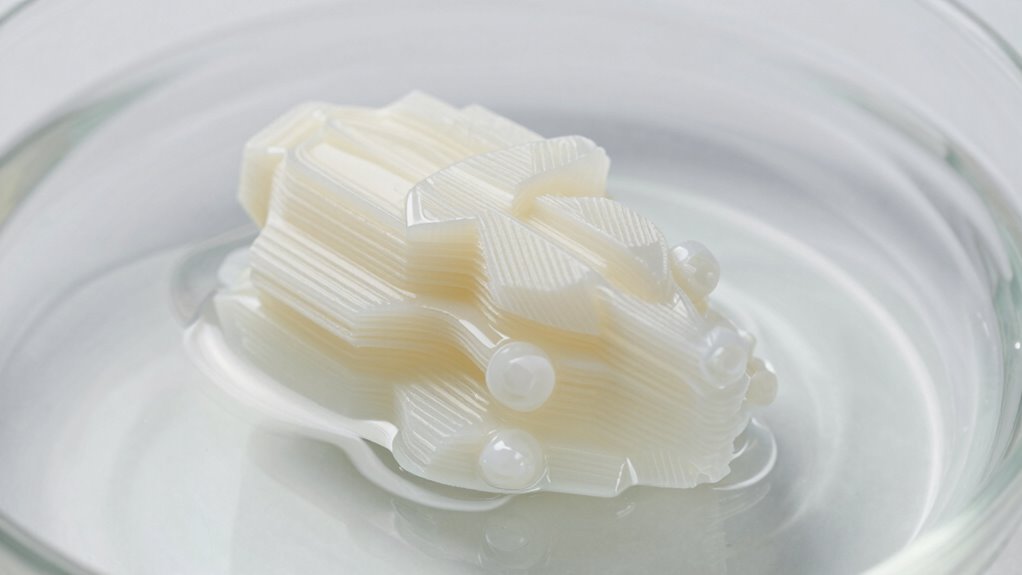
Remove Supports and Clean Your Resin Prints
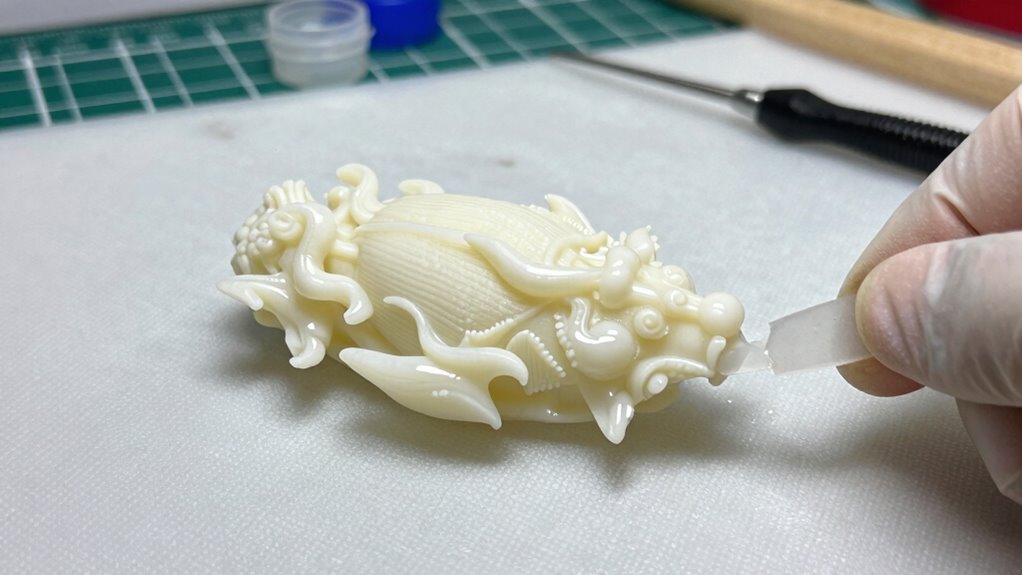
Removing supports is a crucial step in resin post-processing because they guarantee your print maintains its intended shape during printing but must be carefully removed afterward. Support removal requires patience and the right tools, like tweezers or precision cutters, to avoid damaging delicate details. Once supports are removed, you need to focus on print cleaning. Gently wash your print in isopropyl alcohol to eliminate residual resin and surface imperfections. This step ensures a smooth finish and prepares your model for further curing or finishing. Proper support removal and thorough cleaning are essential for achieving high-quality, professional results in your resin 3D prints. Additionally, color accuracy during the cleaning process can influence the final appearance of your print, especially if you plan to do post-curing or painting. Using the right cleaning technique can also help prevent surface imperfections, which are common if supports are removed improperly. Paying attention to regional flavor profiles can inspire creative finishing touches, such as painting or surface treatment, that enhance your print’s aesthetics. Incorporating post-curing methods can further improve the strength and appearance of your finished piece. Being aware of surface quality and its impact on the final product can help you refine your post-processing workflow for consistently better results.

FUNGDO 3D Printer Resin Curing Station DIY Curing Enclosure with UV Light UV Lamp Solar Turntable for 405nm UV Resin SLA DLP LCD 3D Printer Solidify Model
1: Big Curing SizeUpdate to 8.27"x8.67"x10.24"(21*22*26CM), enough for model from 10.1 inch or small LCD Printer to use.
As an affiliate, we earn on qualifying purchases.
As an affiliate, we earn on qualifying purchases.
How to Cure Resin 3D Prints for Strength and Detail
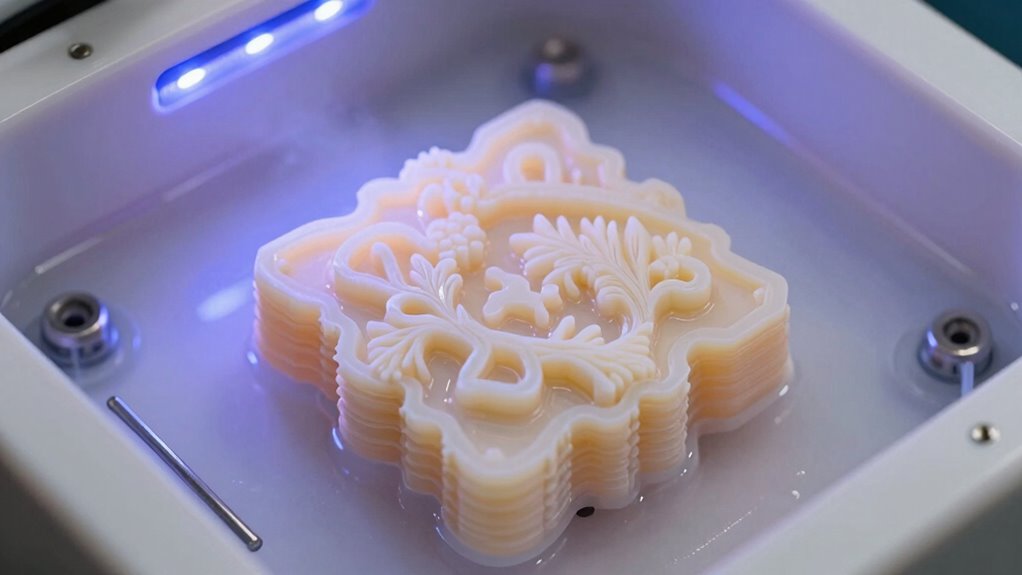
To guarantee your resin prints are strong and detailed, you’ll need to apply proper UV curing techniques. Using the right curing duration and handling your prints carefully afterward can make a big difference. Let’s explore the best methods to achieve ideal results. Incorporating Free Floating principles into your post-processing can help ensure your prints are both durable and visually appealing. Additionally, paying attention to gear handling and avoiding unnecessary stress during curing can prevent defects and enhance overall quality. Understanding battery capacity can also help optimize your curing process by ensuring your UV sources operate effectively and efficiently. Properly managing tights for different styles can serve as a helpful analogy, emphasizing the importance of tailored approaches for optimal outcomes. Recognizing the influence of cultural shifts can further inform your techniques, aligning your workflow with evolving standards in the field.
Proper UV Curing Techniques
Proper UV curing is essential for maximizing the strength and detail of your resin 3D prints. To achieve this, guarantee your curing chamber design provides uniform exposure to the UV light spectrum. A well-designed chamber minimizes shadowed areas and ensures consistent curing across your print’s surface. Use a chamber with multiple UV light sources or reflective surfaces to evenly distribute light. Avoid direct sunlight, which can cause uneven curing or overexposure. Keep the print steady and centered within the chamber for ideal results. Proper UV curing techniques prevent tackiness and improve mechanical properties, giving your prints the durability and fine detail you desire. Focus on consistent, even exposure to enhance both the strength and clarity of your finished model.
Optimal Curing Duration
Finding the right curing duration is essential for achieving peak strength and fine detail in your resin prints. Too short, and your print may be weak or sticky; too long, and you risk over-curing, which can cause brittleness or loss of detail. To determine the ideal time, consider your resin type and follow manufacturer guidelines, adjusting based on print calibration. Proper resin storage ensures consistent results, as exposure to light or temperature changes can affect curing behavior. Always test small adjustments to find the perfect balance, especially for complex or detailed parts. Consistency in curing time helps maintain quality across multiple prints, ensuring your finished pieces are both strong and finely detailed. Proper calibration and storage are key to achieving the best results. Additionally, understanding the chemistry of resin curing processes can help optimize your post-processing workflow for better durability and appearance. Monitoring curing temperature can also impact the final properties of your print, so maintaining a stable environment is recommended. Being aware of resin shelf life is equally important to prevent variability in your curing results. Maintaining proper exposure settings can further enhance the quality of your cured prints and prevent issues like overexposure or under-curing. Moreover, understanding the chemical reactions involved can help you troubleshoot common curing problems more effectively.
Post-Cure Handling Tips
After you’ve completed the initial curing process, handling your resin prints correctly during post-curing is crucial for maximizing strength and detail. Store your resin prints in a clean, dust-free environment or in resin storage containers to prevent damage before final curing. When placing your print in the curing chamber, ensure it’s properly supported to avoid deformation. Regular curing chamber calibration guarantees consistent UV exposure, which is essential for thorough curing. Avoid touching the surface during post-curing to prevent fingerprints or smudges that can affect detail. Use gloves if necessary. Monitor the chamber’s temperature and UV intensity to achieve uniform curing. Proper handling during this stage ensures your print develops maximum strength, clarity, and fine details without warping or incomplete curing. Additionally, understanding safe storage practices can help maintain the quality of your resin prints over time. Proper post-processing techniques can also enhance the final appearance and durability of your models. Implementing proper maintenance of your curing equipment is also vital to sustain optimal performance and consistent results.

XIFOWE Resin Drill 3D Printed Resin Cured Sanding and Polishing Tool Kit, Mini Tepy-C Cordless Electric Rotary Sander with 58 Attachments for Drilling, Sanding and Polishing 3D Printed Resin Models
Versatile 3D Printed Sanding Tool: Includes high-performance 3-stage speed-adjustable Tepy-C rechargeable rotary tool and 58 tool accessories, perfect…
As an affiliate, we earn on qualifying purchases.
As an affiliate, we earn on qualifying purchases.
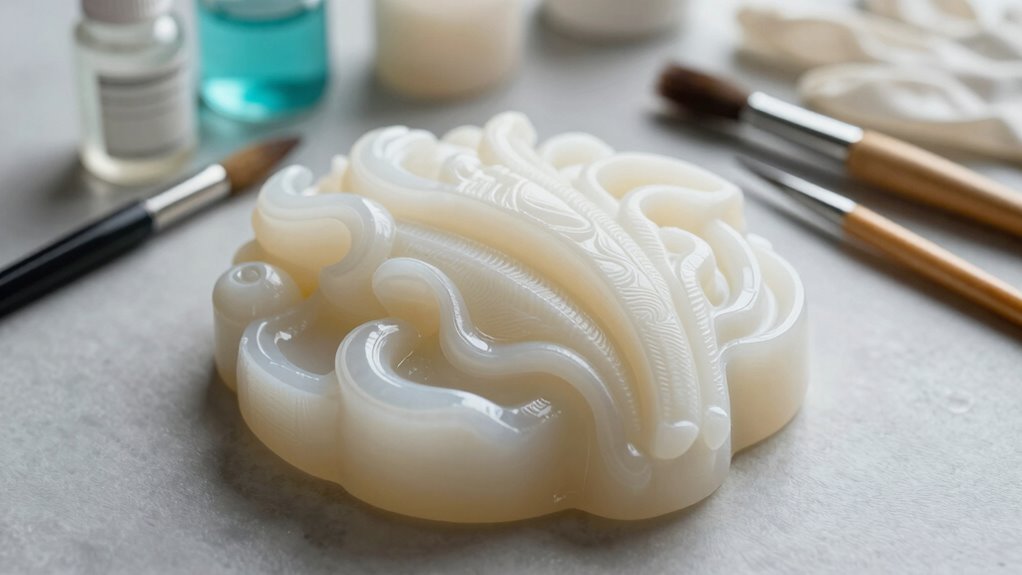
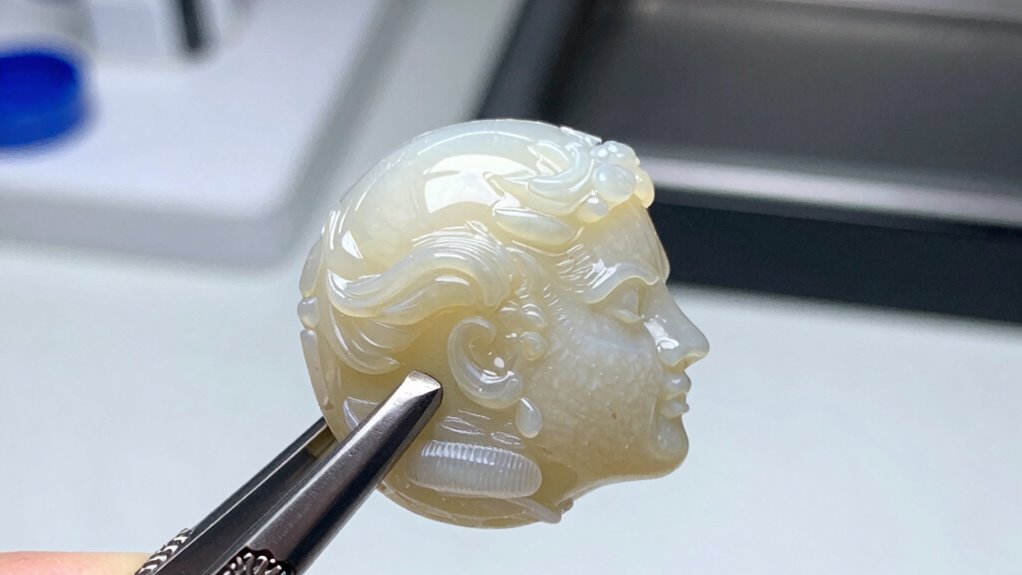
Sand and Smooth Resin Models for a Professional Finish
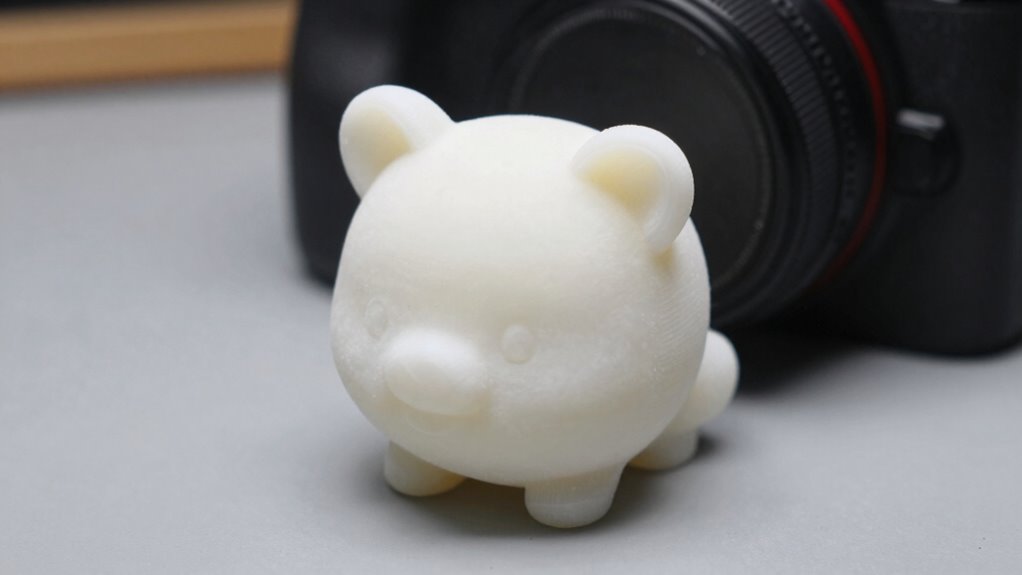
To achieve a professional finish, you need to master proper sanding techniques that remove imperfections without damaging your model. Using the right grit sandpapers helps you smoothly refine the surface for a flawless look. Once sanded, your model will be ready for a sleek, polished appearance that enhances its overall quality. Additionally, understanding surface finishing is essential for achieving consistent and high-quality results. Proper post-processing ensures that every detail is refined, giving your model a truly professional appearance. Incorporating the correct tools and settings can further streamline your workflow and improve your final results. Moreover, selecting appropriate lubricants can help reduce friction and wear on delicate components during post-processing, contributing to a cleaner and more precise finish.
Proper Sanding Techniques
Sanding is a critical step in achieving a professional finish on your resin 3D prints, and doing it correctly can make all the difference. Proper sanding improves layer adhesion by smoothing out surface imperfections and revealing finer details. To start, use light, even strokes with fine-grit sandpaper, ensuring you don’t apply too much pressure, which could damage delicate features. Keep in mind that resin viscosity affects how easily the surface sands; lower viscosity resins tend to sand more smoothly, while higher viscosity resins may require gentler, more deliberate motions. Always sand in a well-ventilated area and wear a mask to avoid inhaling dust. Taking your time and maintaining consistent pressure will give you a clean, polished surface ready for the next steps.
Achieving a Smooth Finish
Once you’ve smoothed out surface imperfections with proper sanding, the next step is to achieve an ultra-smooth finish that looks professional. To do this, prioritize resin safety by working in a well-ventilated area and wearing protective gear. Then, follow these steps:
- Use fine-grit sandpaper or polishing compounds to refine the surface, removing any remaining roughness.
- Rinse the model thoroughly with water or isopropyl alcohol, ensuring all dust and debris are eliminated.
- Apply a thin coat of resin or a gloss sealer to enhance shine and fill tiny imperfections, but always handle printing materials carefully to avoid fumes or skin contact. This process results in a sleek, professional finish.
Finish and Paint Resin Prints for Realistic Results
Finishing and painting resin prints is essential to achieving realistic results that truly stand out. Start by carefully selecting your paint colors to ensure accurate color matching with real-world references. This step sets the foundation for a convincing look. Use thin layers of paint and build up gradually for smooth, even coverage. Incorporate weathering techniques like dry brushing, washes, or stippling to add depth, age, and authenticity to your model. These methods help simulate dirt, rust, or wear, making your print appear more lifelike. Take your time blending colors and weathering effects for seamless transitions. Proper finishing and painting elevate your resin print from a polished model to a convincing, realistic piece that captures attention and showcases your craftsmanship.
Fix Common Resin Post-Processing Problems
When working with resin prints, encountering common post-processing issues is inevitable, but many can be quickly resolved with the right techniques. Resin resin can sometimes lead to problems like sticky surfaces, rough finishes, or incomplete curing. To fix these issues:
- Remove excess resin with isopropyl alcohol and gentle brushing to ensure a clean surface.
- Re-curing improperly cured areas using a UV light helps solidify your print evenly.
- Sand and smooth rough spots with fine-grit sandpaper, then reapply resin or paint if needed.
Applying effective post processing techniques is key to achieving professional results. Addressing these common resin print problems quickly will improve your final model and save time on future projects.
Must-Have Tools and Materials for Resin Print Finishing
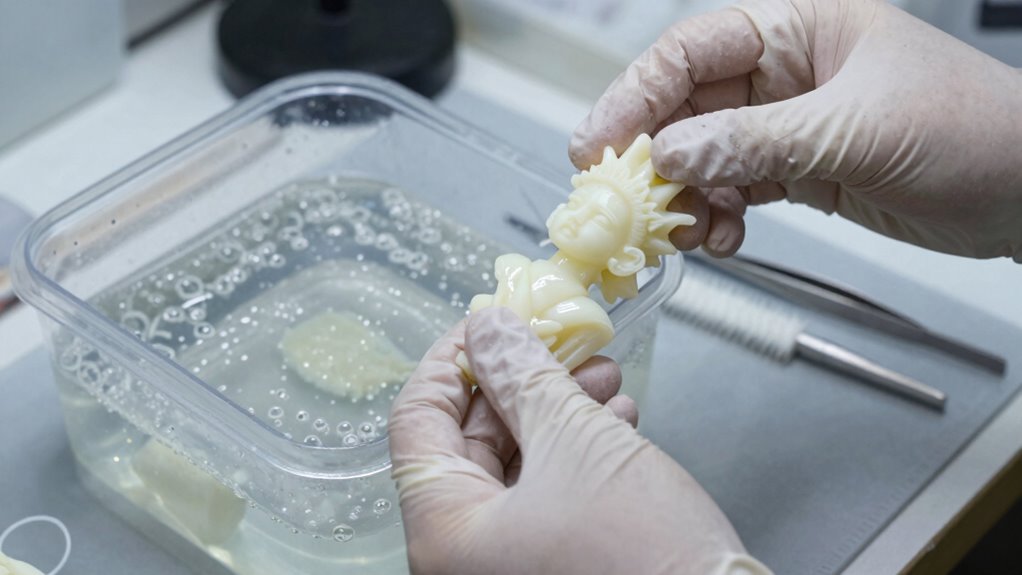
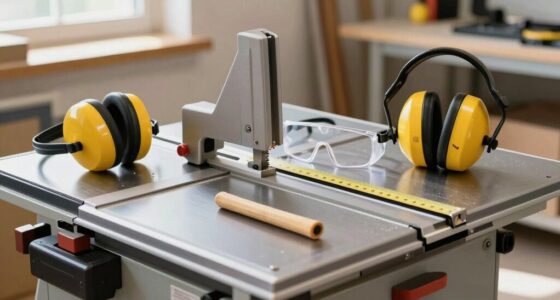
To achieve a smooth, professional resin print, having the right tools and materials on hand is vital. First, you’ll need high-quality cleaning solvents like isopropyl alcohol to safely remove uncured resin without damaging your print. Safety gear is indispensable; always wear gloves and eye protection to guarantee resin safety during handling. Precision tools such as fine files, hobby knives, and brushes help clean and refine details. A UV curing station or light helps fully cure your print after washing. Keep a dust-free workspace and use tongs or clamps to handle prints safely. Investing in these tools guarantees efficient post-processing and minimizes the risk of resin exposure or damage, setting the stage for a flawless finish.
Speed Up Your Post-Processing Without Sacrificing Quality
Streamlining your post-processing can save time without compromising quality by adopting efficient workflow techniques and proper equipment. First, optimize resin storage by using airtight containers to prevent waste and ensure consistent results. Second, pay attention to print orientation; positioning your model correctly minimizes supports and reduces cleanup time. Third, prepare your workspace with tools within reach and organize your materials for quick access. These steps help speed up the process while maintaining high-quality finishes. Proper resin storage reduces delays caused by contaminated or expired resin, and strategic print orientation cuts down on post-processing steps. By focusing on these key areas, you’ll enhance your workflow, save time, and achieve professional results without sacrificing precision.
Frequently Asked Questions
How Long Should I Wait Before Handling a Cured Resin Print?
You should wait at least 30 minutes to an hour before handling a cured resin print, depending on its size and thickness. Follow the recommended curing time for your resin type to ensure full hardening. During this period, avoid handling the print excessively and wear gloves as a handling precaution, since uncured resin residues can be harmful. Proper curing time guarantees your print’s durability and safety.
Can I Reuse Leftover Resin From Failed Prints?
Yes, you can reuse leftover resin from failed prints. Store it properly in an airtight container, away from light, to prevent curing. Before recycling, strain the resin to remove any cured particles. Resin storage and recycling help reduce waste and save costs. Just make sure to filter thoroughly and check the resin’s consistency; if it’s too thick or cloudy, it’s better to dispose of it responsibly.
What Safety Precautions Are Essential During Post-Processing?
During post-processing, you should always wear protective gear like gloves and goggles to avoid resin contact and fumes. Work in a well-ventilated area to minimize inhalation risks. When disposing of leftover resin, follow proper resin disposal procedures to prevent environmental harm. Avoid skin contact and never pour resin down drains. These precautions keep you safe and ensure responsible resin disposal, maintaining a safe workspace.
How Do Different Resin Types Affect Post-Processing Steps?
Different resin types influence your post-processing steps considerably. Resin composition affects how you handle cleaning and curing; some resins require more thorough washing or longer curing times. Additionally, resin color stability varies, so choose a resin suited for your desired finish. Always follow the manufacturer’s instructions for each resin type, as this ensures proper handling and achieves the best results while maintaining safety and material integrity.
Is It Necessary to Use a UV Chamber for Curing at Home?
You don’t have to use a UV chamber at home, but it offers significant benefits. A UV chamber guarantees even curing, improves resin strength, and reduces curing time. It also minimizes exposure to harmful fumes and UV light, making it safer and more efficient. While you can cure your prints in sunlight, a UV chamber provides consistent results, saving you time and ensuring your resin parts achieve their full strength and clarity.
Conclusion
Think of your resin prints as delicate sculptures awaiting their final touch. With patience and the right tools, you’re the sculptor shaping raw marble into art. By mastering each step—from support removal to painting—you transform a simple print into a masterpiece. Embrace the post-processing journey as an artful dance, where attention to detail elevates your work from good to pro. Your finished piece reflects not just skill, but your dedication to craftsmanship.