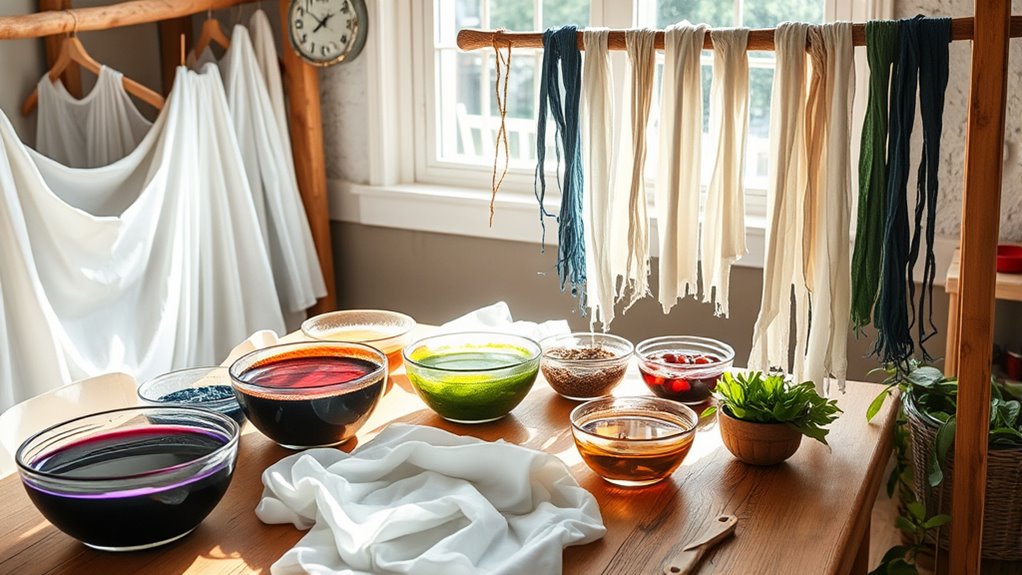
To DIY natural dye textiles, start by accurately identifying and sustainably collecting plants known for vibrant colors, like turmeric or indigo. Prepare your fabrics by thoroughly cleaning and pre-treating them with mordants for better dye adhesion. Extract dye by simmering plant material, then immerse your fabrics, maintaining even dampness and gentle stirring. Fix the color with mordants, rinse carefully, and care for your textiles to keep them vibrant. Continue exploring to master your craft and create stunning eco-friendly textiles.
Key Takeaways
- Collect and prepare natural plant materials responsibly, ensuring sustainable harvesting and accurate identification for vibrant dyes.
- Thoroughly clean and pre-treat fabrics with mordants to improve dye absorption and colorfastness.
- Extract dyes by simmering or soaking plant materials, then immerse fabrics carefully for even, rich coloration.
- Fix the dye using appropriate mordants like alum or iron to enhance durability and prevent fading during washing.
- Experiment with techniques like tie-dye or shibori and store finished textiles properly to extend their lifespan.

Honey Oak Natural Tie Dye Kit | 3 Color Extract Set – Olive Green, Sunflower Yellow, Turkey Red | Plant-Based Fabric Dyes for Shibori & DIY Fabric Art | Easy to Use Craft Kit
Natural & Non-Toxic Dye – Made from 100% natural sources, Honey Oak’s dye is safe, chemical-free, and perfect…
As an affiliate, we earn on qualifying purchases.
As an affiliate, we earn on qualifying purchases.
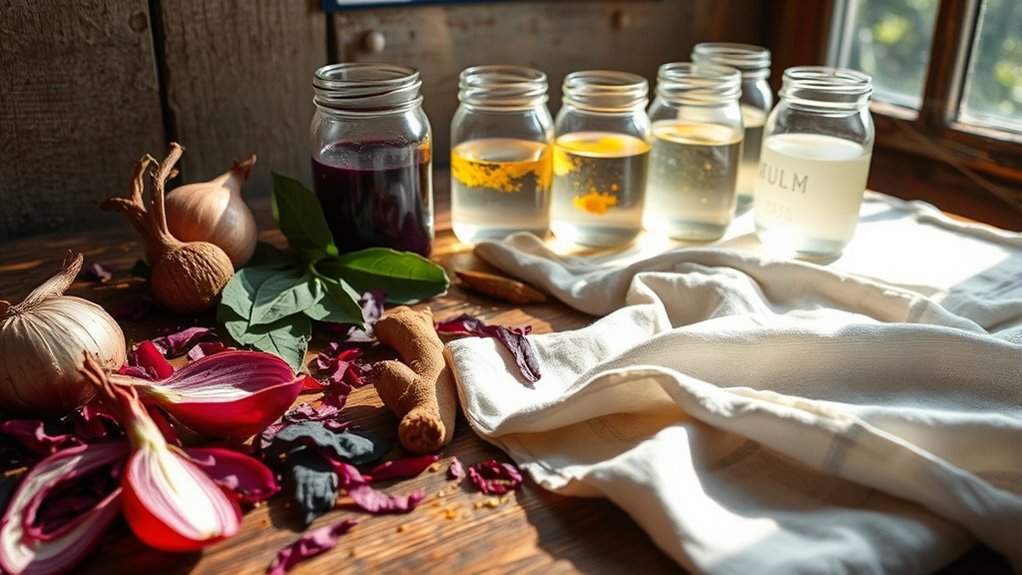
Gathering Natural Dye Materials
To begin your natural dyeing project, you need to gather the right materials from nature. Start by learning plant identification to verify you’re collecting the correct species for dyes. Use reputable guides or local foraging groups to avoid confusion and gather safe, effective plants. Practice sustainable harvesting by collecting only what you need, leaving enough behind for the plant to regenerate. Avoid stripping entire plants or damaging the environment; instead, take small portions or leaves, and harvest during ideal seasons for color intensity. Always double-check the plant’s properties before collecting, and respect local regulations. This mindful approach helps preserve ecosystems and ensures you gather quality materials for vibrant, eco-friendly dyes. Additionally, understanding the silly mishaps that can occur during family photoshoots can provide a lighthearted perspective on the unpredictability of working with nature and people.
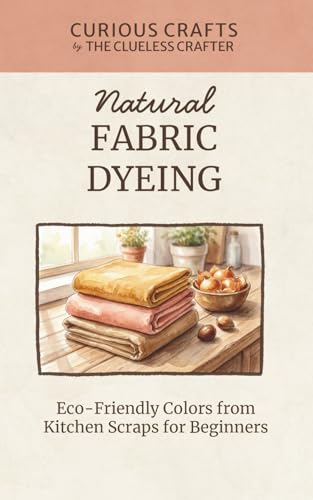
Natural Fabric Dyeing – Eco-Friendly Colors from Kitchen Scraps for Beginners: A Step-by-Step Pocket Guide to Dyeing Cloth with Food Waste at Home (Curious Crafts)
As an affiliate, we earn on qualifying purchases.
As an affiliate, we earn on qualifying purchases.
Preparing Your Fabrics for Dyeing
Before dyeing, you need to prepare your fabrics properly. Start by cleaning them thoroughly to remove any dirt or oils that could influence the color. Handle your textiles carefully and consider pre-treatments to guarantee the dye bonds evenly and your finished piece looks its best. Incorporating proper fabric preparation can significantly enhance the dyeing outcome.
Fabric Cleaning Methods
Ensuring your fabrics are thoroughly cleaned before dyeing is essential for achieving vibrant and even colors. Use gentle washing techniques to remove dirt, oils, and residues that can hinder dye absorption. Pay special attention to stain removal, as stubborn spots can resist dye and create uneven results. Pre-wash your textiles with a mild detergent or natural cleaner, avoiding fabric softeners or conditioners that might coat fibers. Rinse thoroughly to eliminate any leftover soap or additives. If you notice stains, treat them promptly with natural stain removers like baking soda or lemon juice before washing. Proper cleaning prepares your fabric’s surface, ensuring the dye bonds evenly and produces the rich, consistent hues you desire in your natural dyeing projects. Additionally, understanding fiber types can help you select the best cleaning methods to optimize dye uptake and color vibrancy.
Pre-Dye Fabric Treatments
Preparing your fabrics for dyeing starts with specific treatments that help the dye bond evenly and produce vibrant results. Proper fiber preparation ensures dye compatibility and prevents uneven coloring. To achieve this, you should:
- Pre-wash fabrics to remove oils, dirt, and sizing that can interfere with dye absorption
- Use mordants or fixatives when necessary, especially for plant fibers like cotton or linen, to enhance dye affinity
- Test dye compatibility on a small fabric swatch to confirm color outcome before full application
These steps optimize fiber preparation, ensuring your fabric is ready to accept dye uniformly. By properly treating your textiles, you’ll improve color vibrancy and durability, making your DIY natural dyeing project successful from start to finish.
Proper Fabric Handling
Handling your fabrics properly is essential to achieving vibrant and even dye results. Before dyeing, ensure your fabric is thoroughly cleaned and prepped to prevent uneven dye absorption. Fabric softening treatments can help smooth fibers, promoting consistent dye uptake and reducing dye color variation. Avoid fabric softeners with added chemicals, opting instead for natural options like vinegar or baking soda when necessary. Always wring out excess water to prevent dilution of dye, and keep fabrics damp but not dripping. Proper handling minimizes stubborn spots or streaks, ensuring a smooth, uniform finish. Paying attention to fabric preparation helps enhance dye vibrancy and achieve more predictable, beautiful results. By paying attention to how you prepare and manage your fabrics, you’ll enhance dye vibrancy and achieve more predictable, beautiful results.

Indigo Powder – 1 oz – Natural Indigo Blue Powder Dye for Soapmaking & Textiles | Plant-Based Colorant for DIY Crafts, Fabric, Cosmetics | Finely Ground, Non-Toxic, Vegan
100% Natural Indigo Dye Derived from Indigofera tinctoria, our indigo naturalis powder is a plant-based blue dye traditionally…
As an affiliate, we earn on qualifying purchases.
As an affiliate, we earn on qualifying purchases.
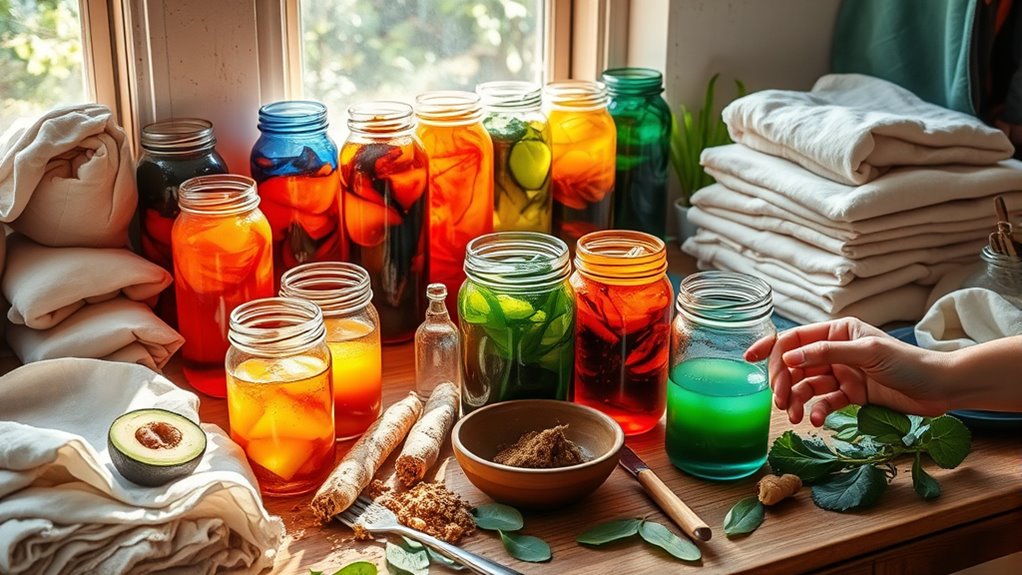
Creating Your Natural Dyes: Methods and Tips
Choosing the right plant sources is key to getting vibrant dyes, so pick plants known for their color strength. Next, prepare your materials by chopping or crushing the plant parts to release their pigments, then extract the dye using water or alcohol. With these simple steps, you’ll create rich, natural dyes perfect for your textiles.
Selecting Plant Sources
Ever wondered which plants can give your textiles vibrant, lasting colors? Choosing the right plant sources starts with proper plant identification. You want plants rich in natural dyes, such as madder root, indigo, or turmeric. When selecting, focus on sustainable harvesting to protect your local environment and ensure future yields. Look for healthy, mature plants and avoid overharvesting from wild populations. Consider these tips:
- Identify plants accurately using reputable guides or local experts
- Harvest responsibly, taking only what you need and leaving enough for the plant’s health
- Opt for plants readily available in your area to reduce environmental impact
- Understanding self-watering plant pots can help you better care for your dye plants, ensuring they stay healthy and productive for dye harvesting.
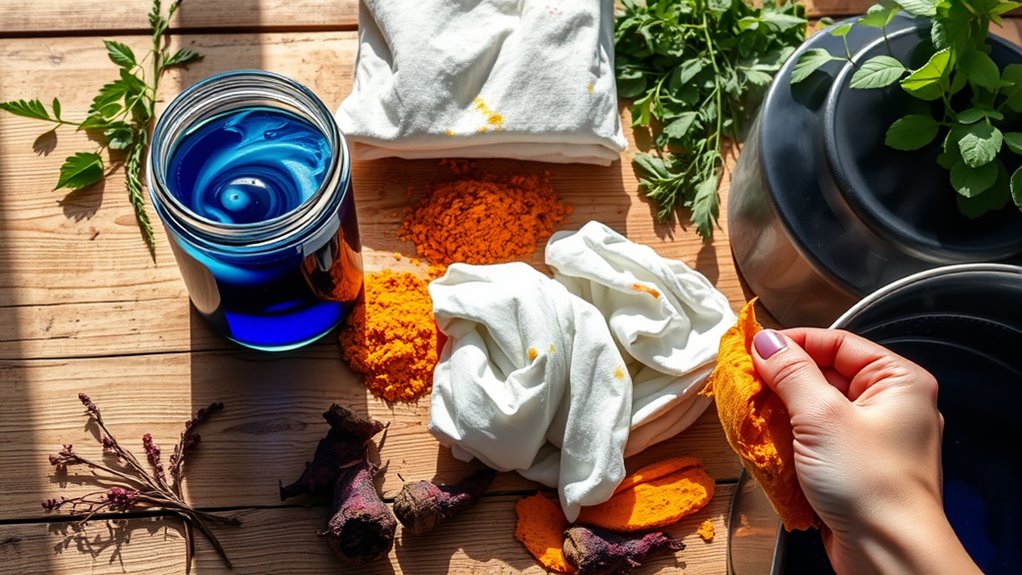
Preparing and Extracting Dyes
Have you ever wondered how to extract vibrant dyes from your chosen plants? To do this, chop your plant material and simmer it in water, releasing the pigments. Strain the mixture to remove solids, leaving a concentrated dye bath. For better color fastness, consider mordant techniques—using alum, iron, or tannin—to fix the dye to your fabric. Add the mordant before or after dyeing, depending on the method, to enhance vibrancy and longevity. Testing small fabric pieces first helps you gauge results and adjust mordant levels if needed. Keep in mind that some plants produce more stable dyes than others, so patience and experimentation are key. Proper extraction and mordanting ensure your textiles achieve rich color and lasting dye fastness. Understanding pinball mechanics can help you appreciate the mechanical aspects involved in dye extraction and fixation processes.

ARTMAN INSTRUMENTS Root Extraction Screw for Back Teeth – Dental Extraction Tool for Molar and Premolar Root Removal, Stainless Steel Surgical Instrument
The broken root of posterior teeth has always been a problem for the dentist. This small tool will…
As an affiliate, we earn on qualifying purchases.
As an affiliate, we earn on qualifying purchases.
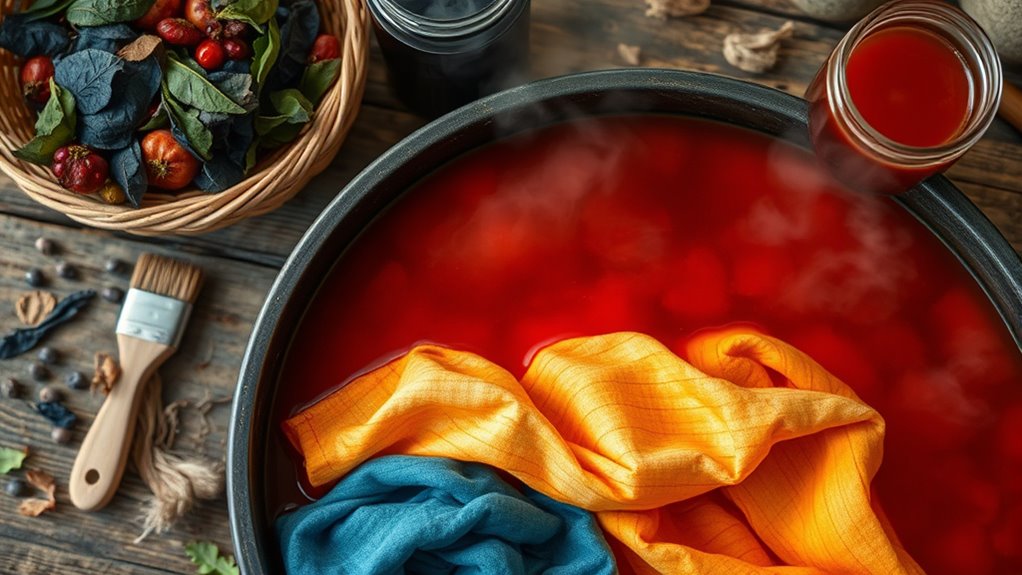
The Dyeing Process: Step-by-Step Guide

To begin the dyeing process, gather all your materials and prepare your workspace. Start by pre-wetting your fabric to guarantee even absorption. Next, immerse your textile in the dye bath, maintaining a gentle simmer. As you dye, keep these steps in mind:
- Stir the fabric regularly for uniform color
- Monitor dye bath temperature to prevent uneven dyeing
- Perform colorfastness testing on a small sample before full immersion
- Incorporating proper techniques such as layering and manipulation can enhance the final hue and texture of your textile.
Choosing the right mordant is vital for setting the dye and achieving the desired hue. Once the fabric has reached your preferred color, remove it from the dye bath and rinse thoroughly. Proper mordant selection and testing will help make certain the color stays vibrant and durable.
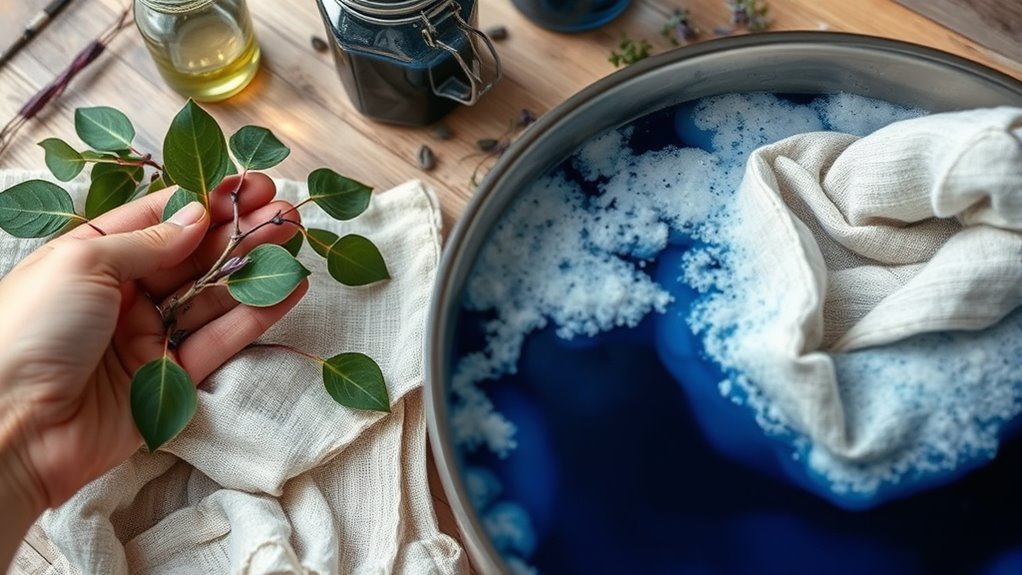
Fixing and Setting the Color
Once you’ve achieved the desired color, the next step is fixing and setting the dye to guarantee it remains vibrant and resists fading. Start with mordant application, which binds the dye to the fabric fibers and enhances colorfastness. Common mordants include alum, iron, and tannin, applied before or after dyeing depending on the material. After mordanting, perform colorfastness testing by gently washing a small fabric sample to check if the dye stays intact. If the color runs or fades, consider reapplying the mordant or repeating the dyeing process. Proper fixing techniques lock in the color, making your textile more durable and wash-resistant. Additionally, using appropriate headphone connections ensures better compatibility and sound quality during the process. This step is essential for long-lasting, beautifully dyed textiles that retain their natural hue over time.
Caring for Your Naturally Dyed Textiles
Caring for your naturally dyed textiles guarantees their vibrant colors last over time. To maintain colorfastness, always wash your textiles in cold water with gentle detergent and avoid harsh chemicals. Proper storage and preservation are essential: keep your textiles out of direct sunlight to prevent fading, fold them neatly to avoid creases, and store them in breathable containers to prevent mold and damage. Using appropriate storage methods can significantly extend the lifespan of your textiles. Keep textiles in a cool, dark place to extend their lifespan.
Creative Ideas for Natural Dye Projects
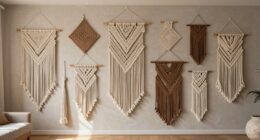
Natural dye projects offer endless opportunities to personalize and refresh your textiles, whether you’re creating vibrant scarves, unique wall hangings, or custom home decor. Get creative by experimenting with different dye techniques like tie-dye, shibori, or ombré effects. Incorporate eco-friendly packaging by presenting your finished pieces in reusable or biodegradable wraps, emphasizing your commitment to sustainability. When sourcing materials, choose fabrics and dyes from sustainable sources to reduce environmental impact. You can also design pieces that tell a story—using plant-based dyes inspired by local flora or seasonal hues. These projects not only enhance your space but also promote mindful consumption and eco-conscious practices. Understanding how to connect to the Vortex can inspire a more mindful and intuitive approach to your creative process, fostering a deeper emotional connection to your work. With thoughtful planning, your natural dyeing crafts become beautiful, sustainable expressions of your creativity.
Frequently Asked Questions
How Long Do Natural Dyes Typically Last on Textiles?
Natural dyes typically last anywhere from a few months to several years, depending on factors like fabric type, dyeing technique, and care. You can improve colorfastness longevity and fading resistance by fixing the dye properly and washing the textiles gently. To guarantee your dyed textiles look vibrant longer, avoid harsh detergents, excessive sunlight, and rough handling. Proper care helps maintain the beauty and durability of your natural-dyed textiles over time.
Can Natural Dyes Be Used on Synthetic Fabrics?
Think of synthetic fabrics as a slick, shiny dance floor that natural dyes struggle to grip. While you can use natural dyes on synthetic textiles, their synthetic compatibility is limited, and dye adhesion may be weak. To improve results, pre-treat the fabric with a mordant or a fixative. Keep in mind, though, that the vibrant, lasting colors seen on natural fibers are harder to achieve on synthetics.
Are There Safety Precautions for Handling Plant-Based Dyes?
Yes, you should take safety precautions when handling plant-based dyes. Always wear gloves and protective clothing to prevent skin sensitivity and avoid direct contact, as some plants can cause allergic reactions or skin irritation. Be aware of plant toxicity, especially if you’re working with unfamiliar species. Work in a well-ventilated area, and wash your hands thoroughly afterward to minimize any risks associated with natural dyes.
How Do Weather Conditions Affect the Dyeing Process?
You’ll find that weather impact plays a subtle but important role in natural dyeing. Humidity and temperature influence dye absorption, so a warm, slightly humid day can help colors deepen and set better, while a chilly, dry day might slow the process. Bright sunlight can fade dyes, so it’s best to work in overcast conditions or protect your textiles. Keep an eye on the forecast to guarantee ideal results.
Can Natural Dyes Be Combined for Unique Color Effects?
Yes, you can combine natural dyes for unique color effects through color blending and dye layering. By experimenting with different dyes, you create new shades and depth in your textiles. Start with a base color and add layers of other dyes to achieve complex hues. Be patient, as some colors may blend unpredictably, but this process allows you to craft truly one-of-a-kind pieces with rich, personalized tones.
Conclusion
As you wrap your hands around the cooled, sun-kissed fabric, you realize each hue is a silent story woven from nature’s palette. The gentle fade over time reveals the depth of your craft—like a sunset melting into dusk, your textile becomes a living canvas of earth’s whispers. With patience and care, you’ve created more than just colors; you’ve crafted a timeless connection to the natural world, forever etched into every thread.