
To start DIY glass etching for decorative windows, gather supplies like etching cream, stencils, gloves, and a clean workspace. Design simple or intricate patterns, then apply adhesive stencils carefully to your glass. Wear safety gear and follow the cream’s instructions to etch your design. Afterward, remove the stencil and clean the glass thoroughly for a professional finish. Keep exploring for tips and creative ideas to perfect your project and make stunning personalized windows.
Key Takeaways
- Choose simple, contrasting designs and transfer them onto adhesive vinyl stencils for easy application on windows.
- Apply etching cream carefully within the stencil boundaries, following safety precautions and manufacturer instructions.
- Use gloves and eye protection during the etching process and work in a well-ventilated area.
- Remove the stencil gently after etching, then clean the glass with a soft cloth and glass cleaner for a clear finish.
- Practice on scrap glass first to improve technique and ensure professional-looking, decorative window designs.

Armour Etch Glass Etching Cream – Starter 2.8oz Size – Bundled with Moshify Application Brushes
Armour Etching Cream for Glass 2.8oz Net Weight – Armour Etch is a fast acting specially formulated glass…
As an affiliate, we earn on qualifying purchases.
As an affiliate, we earn on qualifying purchases.
Gathering Supplies and Preparing Your Workspace
Before you begin etching, having all the necessary supplies and setting up a clean, well-lit workspace is vital. Start by gathering your tools, including etching cream, stencils, gloves, and protective eyewear. Proper workspace organization helps prevent accidents and keeps everything within reach. Remember, safety precautions are essential; always wear gloves and work in a ventilated area to avoid inhaling fumes. Clear your surface of clutter to prevent spills or damage to other items. Use a sturdy table covered with newspaper or a protective mat to catch drips. Good lighting ensures you can see your design clearly and apply the etching cream precisely. A well-prepared workspace not only keeps you safe but also makes the etching process smoother and more enjoyable. Additionally, understanding the proper handling of chemicals can help ensure a safe and effective etching experience.

VViViD Blue Stencil Vinyl Masking Film with Anti-Bleed Technology (12" x 6ft)
Low-tack adhesive backing is easy to place and remove. Applies easily to any smooth, non-porous surface such as…
As an affiliate, we earn on qualifying purchases.
As an affiliate, we earn on qualifying purchases.
Designing Your Pattern or Image
Your first step is choosing an image that reflects your style or message. Once you have that, you can create a stencil design that captures the details you want etched onto the glass. Focus on simplicity and contrast to make certain your pattern turns out sharp and clear. Incorporating a theme inspired by cultural or historical exploration can add meaningful context to your design.
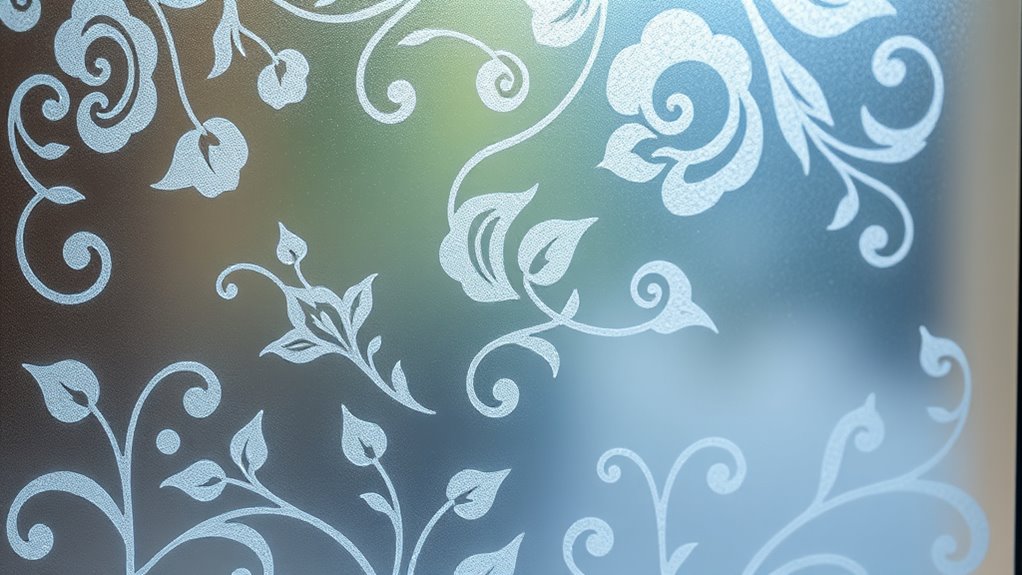
Choosing Your Image
Have you considered how the image you choose will impact the final look of your etched glass? Your design sets the tone and influences the overall effect. Think about color options—while etching creates a frosted appearance, incorporating colored backgrounds or backing can enhance your design. For example, a darker background makes the etched pattern stand out more vividly. When selecting an image, also consider different etching techniques; some produce fine, intricate details, while others create a more matte, textured finish. Keep your design simple if you’re new to etching, or go for complex patterns if you want a dramatic effect. Ultimately, your choice of image should complement your space and reflect your personal style, ensuring a stunning, customized result. Additionally, understanding environmental considerations such as minimizing impact can help you plan a more sustainable project.
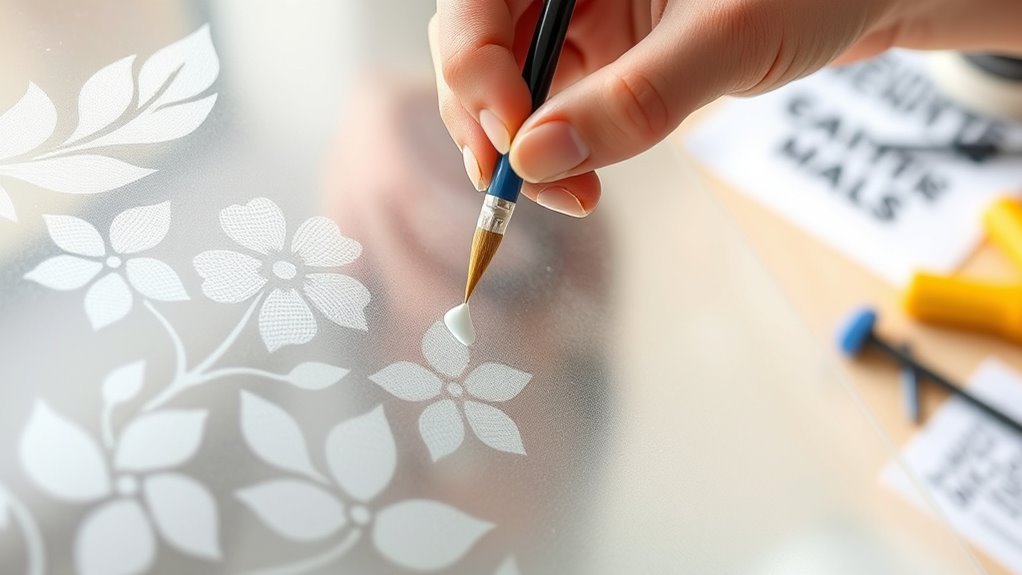
Creating a Stencil Design
Creating a stencil design is an essential step in customizing your etched glass, as it determines the clarity and detail of your final pattern. You should consider your color choices carefully—contrasting colors help create sharp, visible designs. Keep pattern complexity in mind; simpler patterns are easier to cut and etch, especially for beginners, while intricate designs require precision. Use a design program or paper to sketch your idea, then transfer it onto adhesive vinyl or stencil material. Here’s a helpful guide:
| Aspect | Tips | Examples |
|---|---|---|
| Color choices | Opt for high contrast to improve visibility | Black on clear glass |
| Pattern complexity | Start simple, progress to intricate patterns when ready | Floral or geometric designs |
| Material | Use durable, easy-to-cut stencil materials | Vinyl or contact paper |
| Transfer method | Ensure clean, smooth application for sharp edges | Tape or transfer film |
Additionally, ensuring your design is properly aligned before etching can prevent mistakes and produce a professional-looking result.

Wells Lamont Heavy Duty Rubber Gloves with PVC Coating, Chemical and Abrasion Resistant, Waterproof, 12-Inch Cuff, Large, Blue (174L)
CHEMICAL RESISTANT GLOVES: Durable PVC coating protects against harsh chemicals, adhesives, detergents, and diluted bases and acids, making…
As an affiliate, we earn on qualifying purchases.
As an affiliate, we earn on qualifying purchases.
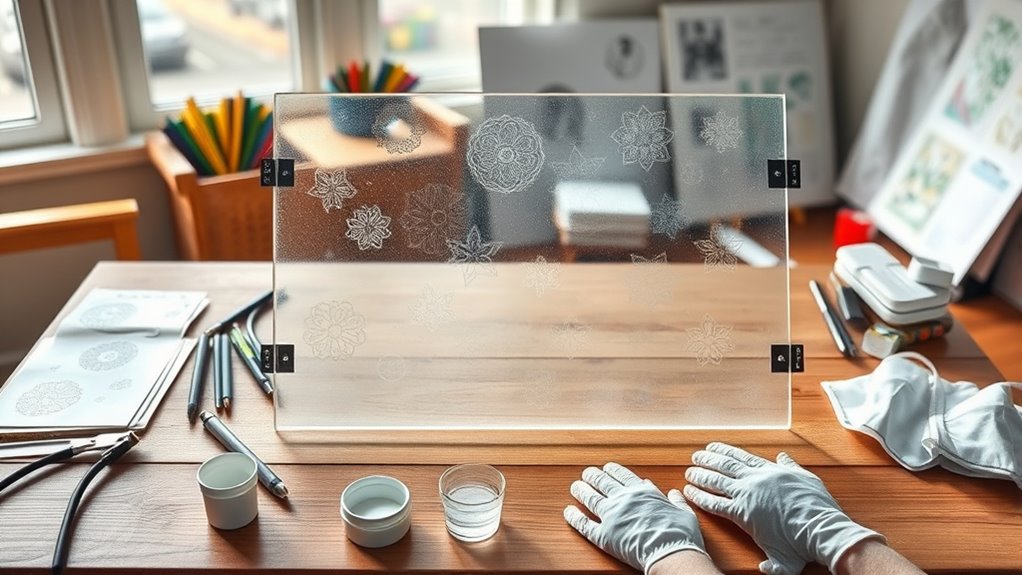
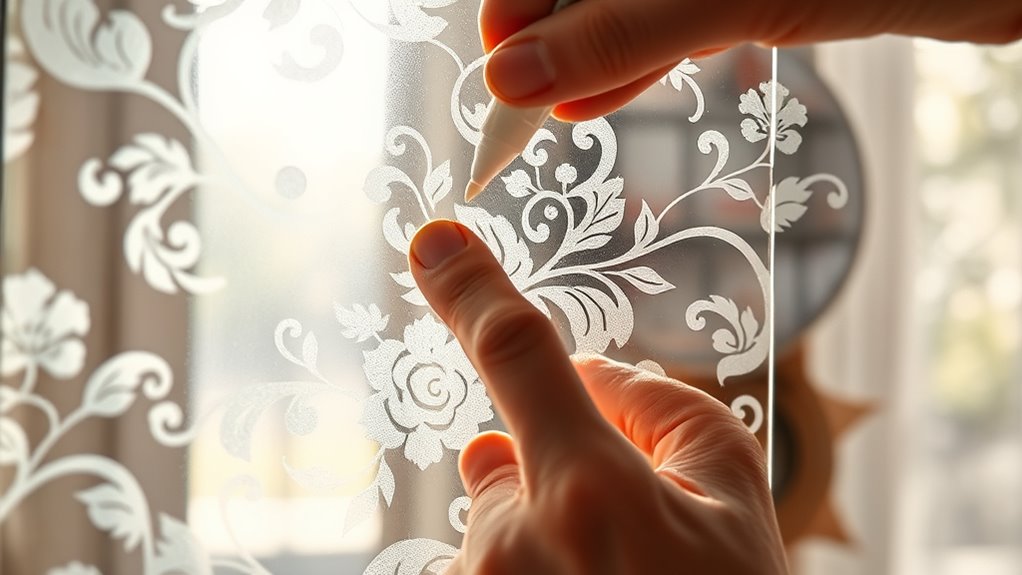
Applying the Adhesive Stencil to the Glass
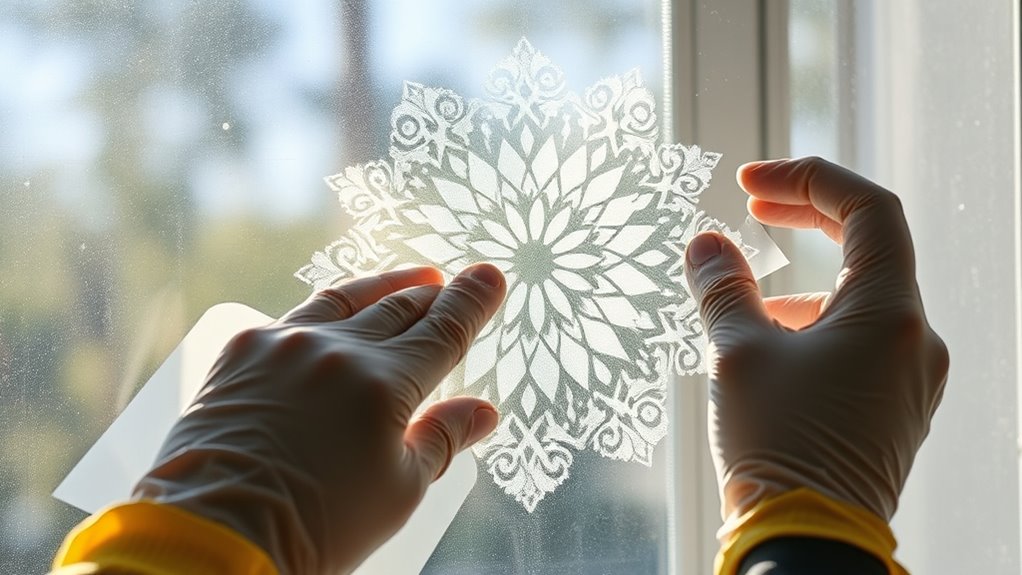
To begin applying the adhesive stencil to the glass, carefully peel the backing paper away from the stencil, revealing the sticky side. Choose the right adhesive types based on your project; some are more flexible, while others offer stronger adhesion. Make sure the stencil is clean and free of dust or oils before sticking it to the glass. Once positioned, press down firmly, starting from the center and working outward to eliminate air bubbles and ensure full contact. Proper application is key to maintaining stencil durability during the etching process. Take your time to smooth out any wrinkles or creases, as these can affect the final design. A well-applied stencil ensures clean lines and a professional-looking finished piece. Additionally, selecting the appropriate adhesive helps prevent peeling or shifting during the etching process.

Finish Line Glass Cleaner Plus – for Cars or Home
For: Windows
As an affiliate, we earn on qualifying purchases.
As an affiliate, we earn on qualifying purchases.
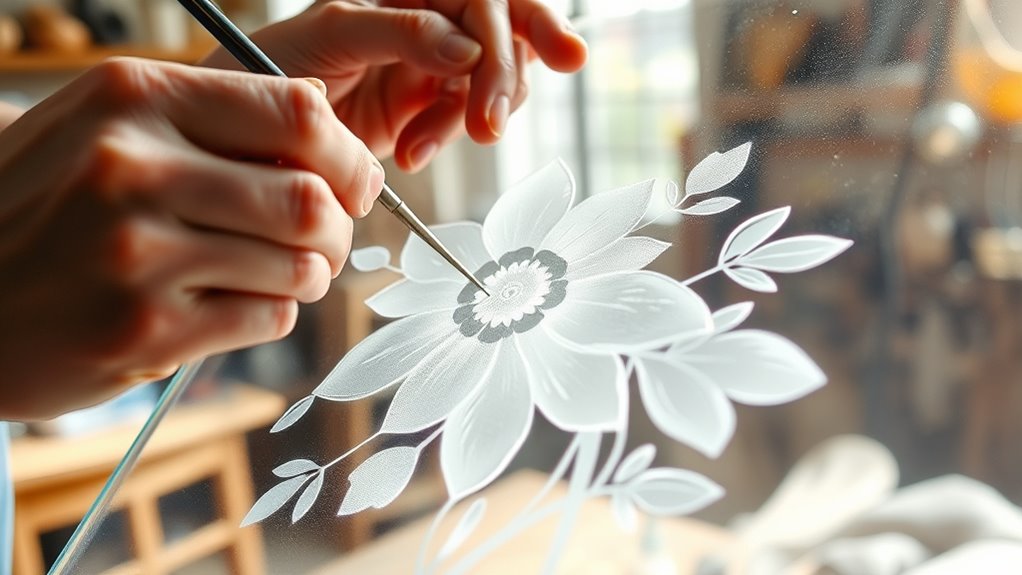
Choosing and Using the Etching Cream Safely
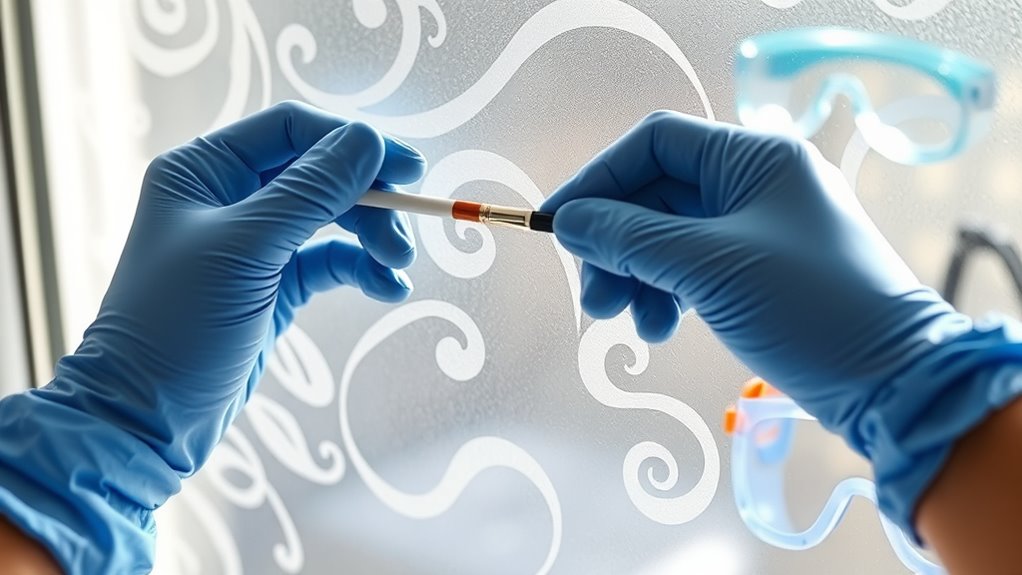
Choosing the right etching cream is essential for safe and effective glass etching. Always read the manufacturer’s safety precautions before use. Wear gloves and eye protection to avoid skin contact and splashes. Work in a well-ventilated area to prevent inhaling fumes. Follow the instructions carefully, applying the cream only to the stencil area. When finished, dispose of leftover etching cream properly—never pour it down the drain. Check local regulations for disposal guidelines, as improper disposal can harm the environment. Store the cream out of children’s reach and label it clearly. By respecting safety precautions and handling the cream responsibly, you ensure a safe etching process and achieve beautiful results without risking harm. Understanding the chemical properties of etching agents can help you select the safest products for your project.
Removing the Stencil and Cleaning the Glass
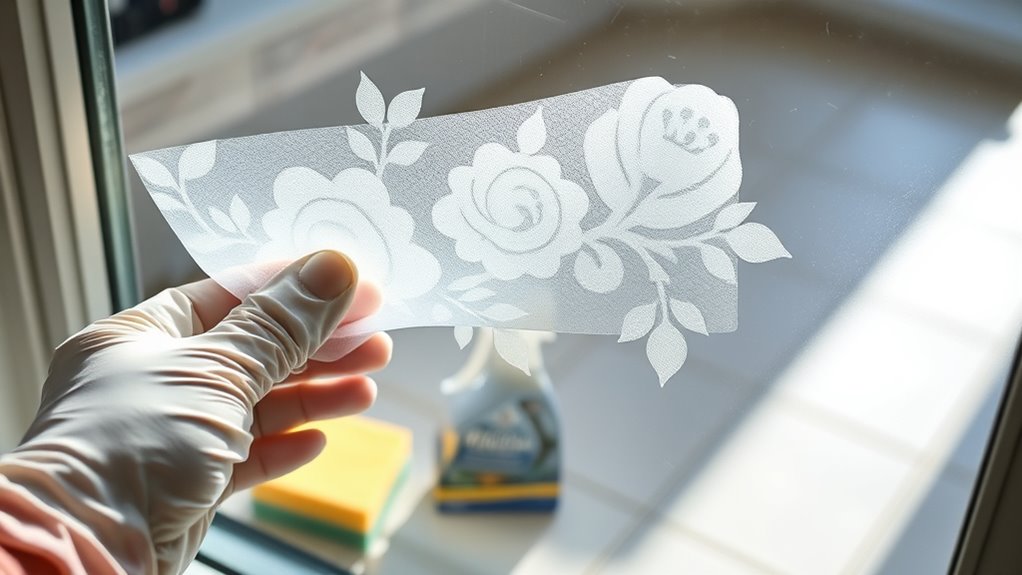
Once you’ve finished etching, carefully remove the stencil to reveal your design. Use gentle tools or warm water to lift off any residual adhesive without damaging the glass. Then, clean the surface thoroughly with a soft cloth and glass cleaner to guarantee a clear, professional finish. Incorporating proper cleaning techniques can also enhance the decorative appeal of your etched glass.
Stencil Removal Tips
After the etching process is complete, carefully peel away the stencil to reveal your design. Use gentle stencil removal techniques to prevent scratching or damaging the glass. Once the stencil is removed, proceed with glass etching cleanup by thoroughly washing the surface with warm, soapy water and a soft cloth. To evoke emotion, consider the following:
| Step | Purpose |
|---|---|
| Gently peel | Avoid damaging the etched design |
| Use warm water | Loosen residual adhesive or paint |
| Dry carefully | Prevent streaks or smudges |
Taking your time during stencil removal ensures a clean, professional look. Proper cleanup enhances your finished project, making your decorative window truly stand out. Your effort results in a stunning, personalized piece you can be proud of. For best results, understanding the resale value of your project can help you plan future designs more effectively.
Glass Cleaning Techniques
To effectively remove the stencil and clean your glass, start by gently peeling away the stencil using your fingers or a plastic scraper to prevent scratching the surface. Once removed, clean the glass thoroughly to eliminate any stubborn stains or residue. Use a mixture of glass cleaner and a lint-free cloth to wipe the surface, ensuring a streak-free finish. For stubborn stains, apply a small amount of rubbing alcohol or vinegar, letting it sit for a few moments before wiping away. Avoid abrasive scrubbers that can scratch the glass. Patience is key—take your time to achieve a crystal-clear, flawless look. Proper cleaning not only reveals your beautiful etching but also prolongs its lifespan, making your decorative window truly shine. Additionally, understanding AI safety measures can help in developing better protective techniques for delicate projects like glass etching.
Tips for Achieving Professional-Looking Results
Achieving professional-looking results with glass etching requires attention to detail and proper technique. Always prioritize glass safety by working in a well-ventilated area and wearing gloves and eye protection. Applying etching cream evenly is vital; use a squeegee or brush to avoid streaks and ensure consistent depth. Follow the manufacturer’s instructions carefully to maximize etching cream durability and effectiveness. Take your time during the application process—rushing can lead to uneven designs. When removing the cream, do so gently to prevent smudges or scratches. Clean the glass thoroughly afterward for a clear, polished look. Practicing on scrap glass first helps refine your technique. Understanding the importance of proper cleaning and maintenance ensures your tools stay in optimal condition for future projects. With patience and precision, you’ll achieve professional-quality results that elevate your DIY projects.
Creative Ideas for Custom Glass Etching Projects
Creative glass etching projects allow you to personalize everyday items and add a unique touch to your home decor. With your etching tools, you can transform plain glass into stunning art. Experiment with different glass color backgrounds to make your designs pop. For instance, etch heartfelt quotes on frosted wine glasses or create intricate patterns on clear vases. Consider adding monograms to mirrors or windowpanes to make them uniquely yours. Use contrasting glass colors to enhance your designs or add subtle details for a delicate effect. You can also craft personalized gifts like etched photo frames or even custom candle holders. These projects turn simple glass into meaningful, decorative pieces that reflect your style and creativity. Your etching tools are your gateway to endless inspiring possibilities. Additionally, understanding glass etching techniques can help improve your results and ensure your designs last.
Frequently Asked Questions
How Long Does Each Etching Project Typically Take?
Each etching project usually takes between 1 to 3 hours, depending on the design complexity and size. For better project planning, consider the timing estimates for preparation, application, and rinsing. Simple designs can be finished quickly, while intricate ones may require more time. Make sure to allocate enough time to avoid rushing, and keep in mind that taking your time guarantees cleaner, more precise results.
Can I Etch on Colored or Tinted Glass?
Yes, you can etch on colored or tinted glass, but the process might differ slightly. Darker shades can make your etchings pop more, while lighter or tinted glass may require more precision. You’ll want to test your design on a small, hidden area first to see how the etching appears. Remember, etching on colored or tinted glass adds a beautiful, personalized touch, creating mesmerizing, crafted decorations.
What Are Common Mistakes to Avoid During Etching?
To avoid common mistakes during etching, always prioritize design safety by planning your pattern carefully. Use quality etching equipment and follow instructions precisely, avoiding rushing or skipping steps. Protect areas outside your design with tape and guarantee your workspace is well-ventilated. Mistakes often happen when you neglect to clean the glass thoroughly beforehand or mishandle stencils. Take your time and double-check your setup for a clean, professional finish.
Is It Possible to Reverse or Fix Mistakes After Etching?
You can’t fully reverse or fix mistakes after etching, but restoration techniques like using glass polish or gentle sanding can help improve the surface. To prevent errors in the first place, focus on etching prevention by practicing on scrap glass and carefully applying stencils. If mistakes happen, act quickly with these techniques to minimize damage. Remember, patience and precision are key to achieving a professional look.
How Durable Is the Etched Design Over Time?
The etched design’s longevity depends on your care, but generally, it’s quite durable over time. You can expect the etching to maintain its clarity for years with proper maintenance. To maximize etching longevity, avoid abrasive cleaners and harsh scrubbing. Use gentle, non-abrasive cloths and mild soap. Regular maintenance tips, like cleaning with soft materials, help preserve the etched design’s appearance and guarantee your decorative window remains beautiful and lasting.
Conclusion
With your supplies ready and a steady hand, you’re like an artist painting a masterpiece on glass. Each step, from designing to etching, transforms a plain window into a canvas of your creativity. Remember, patience and safety are your guiding stars. As you peel back the stencil, watch your ideas come to life like a blooming garden. Your personalized glass piece is now a shining affirmation to your skill and imagination.