DIY and Crafts
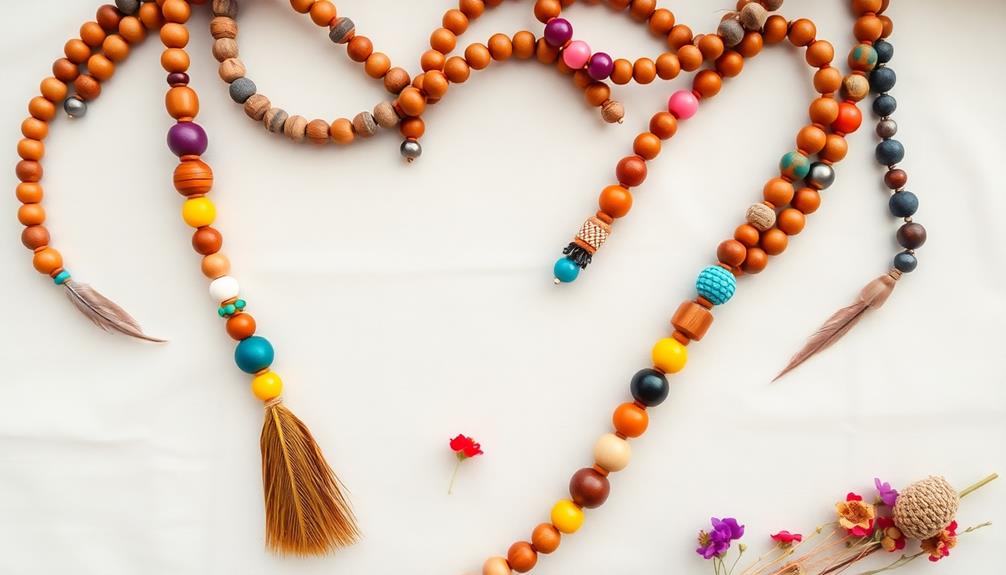
Creating Boho-Inspired Wooden Bead Garlands
Master the art of crafting boho-inspired wooden bead garlands that elevate your space—discover essential tips and techniques to make it uniquely yours.
You're about to transform your space with boho-inspired wooden bead garlands—an easy and chic DIY project. Start by gathering materials like wood beads in various sizes, jute twine, and scissors. Cut your twine, string the beads, and don't forget to alternate sizes for visual interest. Add tassels for a fun flair, and personalize your garland with wooden tags if you'd like. Drape your creation over shelves or mantels for a cozy vibe. With a few creative touches, you can really make it your own. Keep going to explore more tips and techniques for crafting that perfect garland!
Key Takeaways
- Gather essential supplies like wooden beads, jute twine, scissors, and a needle for easy assembly of the garland.
- Plan your bead arrangement to maintain symmetry and visual appeal, alternating between larger and smaller beads.
- Create tassels by wrapping jute around your fingers, tying them securely, and attaching them to the garland ends.
- Experiment with painting beads using spray or hand techniques for a personalized touch to your garland.
- Display your finished garland creatively by draping it over shelves, mantels, or using it as table decor.
Overview of Wooden Bead Garlands
Wooden bead garlands are a stylish and adaptable decor element that can brighten up any space, especially in Boho or farmhouse themes. These garlands not only add warmth and texture but also allow you to showcase your creativity.
They're perfect for those who love DIY boho projects since you can easily customize them with various bead sizes, colors, and patterns. Incorporating elements of farmhouse decor can enhance your garland, making it a wonderful addition to both modern and rustic interiors.
Creating a wood bead garland is beginner-friendly and cost-effective. You don't need to be an expert crafter to make something beautiful. A typical garland is around 35 inches long, featuring about 43 beads for a balanced look. You can enhance your design by incorporating tassels or wooden tags, making it suitable for seasonal themes or special occasions.
The versatility of wooden bead garlands means you can drape them over shelves, use them as table centerpieces, or even hang them on walls.
No matter how you choose to display them, they'll surely elevate your decor. So gather your supplies and get started on your DIY boho masterpiece that reflects your personal style!
Essential Supplies for Crafting
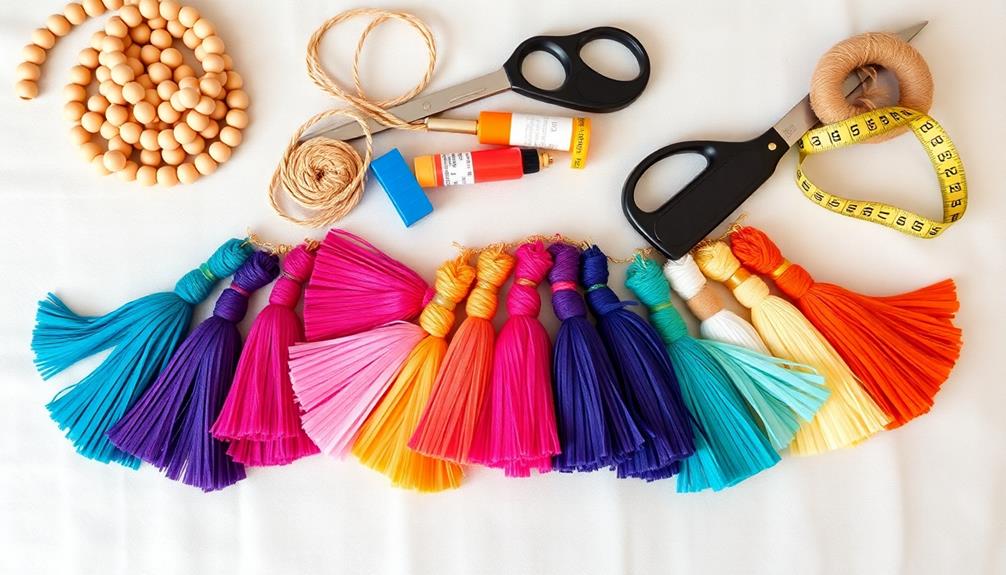
To craft your Boho-inspired wooden bead garland, you'll need a few essential supplies.
Gathering materials like wood beads, jute twine, and tools like scissors will set you up for success.
Plus, knowing where to source affordable options can keep your project budget-friendly and fun.
Required Materials Overview
Creating a Boho-inspired wooden bead garland requires a few vital supplies to guarantee your project is both beautiful and functional. First, gather a variety of wood beads in sizes like 20mm, 16mm, and 10mm. This mix will give your garland an appealing design and ensure it stands out.
Next, you'll need jute twine or fine yarn, which is essential for stringing the beads together and creating tassels. The rustic look of jute around your beads adds that perfect Boho touch.
Don't forget a pair of scissors; they'll be necessary for cutting the twine or yarn and trimming tassel loops to your preferred length. Additionally, consider including a wooden tag for labeling or decorative purposes, which gives your garland a personalized element.
Finally, a darning or large sewing needle will make it much easier to thread the twine or yarn through the beads during assembly.
With these materials on hand, you'll be well-equipped to craft stunning wood bead garlands that reflect your unique style. So gather your supplies, and get ready to start your creative journey!
Sourcing Affordable Supplies
Finding affordable supplies for your Boho-inspired wooden bead garlands can make a significant difference in your crafting experience.
Luckily, there are plenty of budget-friendly options available. Start by exploring various sources to gather everything you need without breaking the bank.
- Bulk wood beads: Check out Amazon for options like 20mm natural wood beads, typically priced around $14. This online convenience can save you time and hassle.
- Twine: The Dollar Store is your go-to for thinner twine in large quantities. It's perfect for lightweight projects, but if you need something sturdier, local home improvement stores like Home Depot and Lowe's offer thicker twine options.
- Paint: For a polished finish, pick up white acrylic or matte spray paint at craft stores. This will help you achieve a uniform look on your beads.
Don't forget to grab painters tape as well, as it's essential for managing the twine during assembly.
With these affordable supplies at your fingertips, you'll be well on your way to creating stunning garlands that capture that Bohemian vibe.
Tool Essentials for Crafting
Gathering the right tools is essential for crafting beautiful Boho-inspired wooden bead garlands. Start with 20mm and 16mm wooden beads, as these sizes create a lovely visual balance in your garland.
You'll need jute twine for stringing the beads and creating tassels, so be certain to have a good length on hand. Scissors are a must for cutting the twine to your desired lengths.
For a complete garland, aim for a total of 43 beads, resulting in an approximate final length of 35 inches, including tassels. To make threading easier, apply scotch tape to the end of your twine; this simple trick guarantees smoother assembly.
When creating your tassels, wrap jute around your fingers 30-50 times for fullness and charm.
Lastly, don't forget about personalization! A micron pen lets you write on wooden tags, adding a unique touch to your garland.
With these essential supplies in place, you'll be well on your way to crafting stunning wooden bead garlands that shine with your personal flair. Enjoy the process and let your creativity flow!
Step-by-Step Assembly Instructions
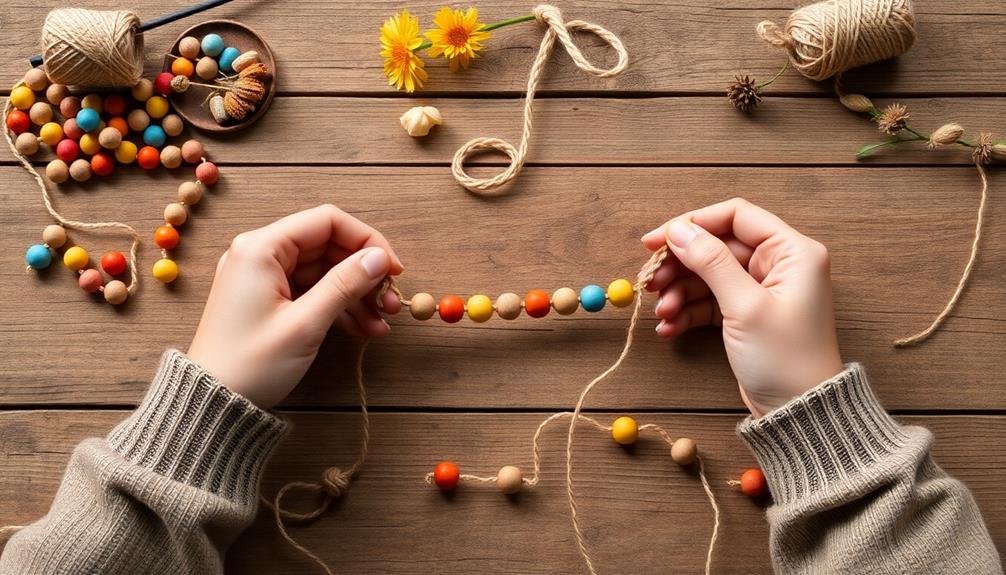
Now that you've gathered your materials, it's time to start assembling your boho-inspired wooden bead garland.
You'll create a beautiful tassel, string your wooden beads, and secure everything together for a polished finish.
Let's walk through each step to bring your vision to life!
Materials and Tools Needed
To create your boho-inspired wooden bead garland, you'll need to assemble a few essential materials. Start with a variety of wooden beads, as the mix of sizes will add visual interest to your design. Incorporating natural elements, like wooden beads, is a key aspect of Boho Wall Decor Living Room Ideas.
For this project, gather 43 beads in both 20mm and 16mm sizes. You'll also need jute twine to string your beads together, along with scissors to cut the twine.
Here's a list of the materials and tools needed for your DIY wood project:
- 20mm and 16mm wooden beads
- Jute twine
- Scissors
To make threading easier, apply some scotch tape to the end of the twine. This simple trick will streamline the assembly process.
Once you've threaded all your beads, verify that your knots are hidden within the beads for a polished finish. Maintaining symmetry in your bead pattern will enhance the overall aesthetics of your garland.
With these materials and tools at the ready, you're well on your way to crafting a beautiful boho-inspired wooden bead garland!
Tassel Making Techniques
Creating a tassel adds a charming touch to your boho-inspired wooden bead garland. It's one of the easiest tassel making techniques you can master, and you'll quickly see how simple it's to make.
Start by wrapping jute around your fingers 30-50 times, adjusting the number of wraps based on how full you want your tassel to be.
Once you've wrapped enough jute, tie a tight knot around the middle of the bundle using additional jute to secure the shape. Next, cut the loops at the ends of the jute strands to create the tassel fringe. Make certain to keep the strands even for a neat finish.
To attach the tassel to your garland, insert the jute through the bead head and secure it with a loop knot. For added stability, thread the jute back through the beads.
Bead Stringing Process
After adding your beautiful tassel, it's time to focus on the bead stringing process to complete your boho-inspired wooden bead garland.
Start by cutting a length of jute or yarn, ensuring you leave 6-8 inches on either end for flexibility. Insert one end through the tassel head and secure it with a knot. To prevent the twine from fraying, apply a small piece of scotch tape to the end before threading the beads.
Next, use a darning or large sewing needle to string the beads onto the jute. As you do this, keep these tips in mind:
- Alternate between larger and smaller beads for visual interest.
- Maintain tension in the jute to avoid gaps, ensuring a uniform look.
- Plan your bead arrangement ahead, so you're satisfied with the final design.
Once you've strung all your beads, secure the other end with a second tassel, mirroring the construction of the first for consistency.
This bead stringing process will help you create a stunning garland that perfectly fits your boho aesthetic!
Creative Styling Ideas
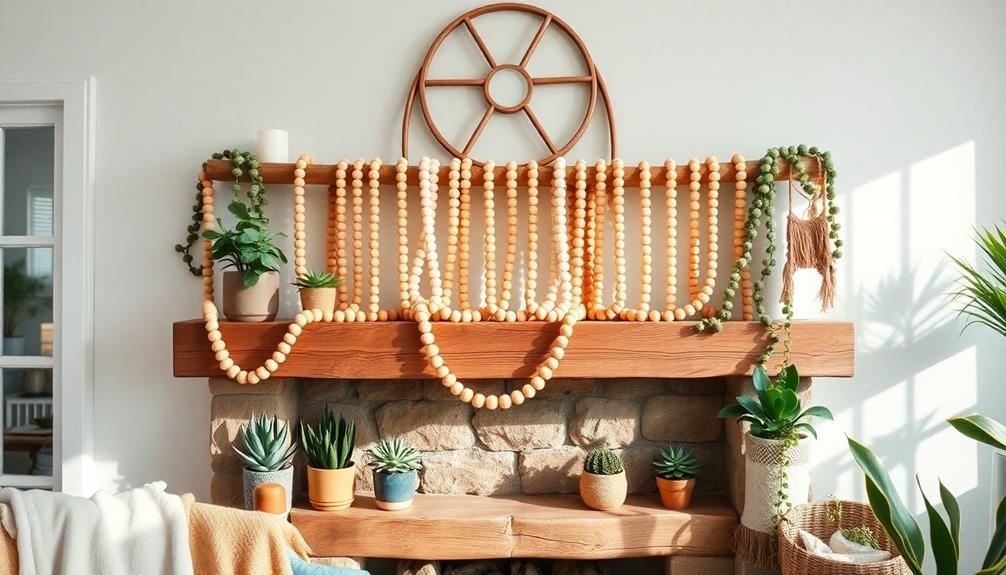
A boho-inspired wooden bead garland can transform your space with its versatile charm. One of the easiest ways to style your garland is to display it on tiered trays, adding depth and visual interest to your home decor.
You can also wrap the garland around demijohns or vintage bottles, enhancing their rustic appeal and creating an eye-catching focal point in any room. Consider incorporating unique, handcrafted decor items to further enhance the bohemian vibe.
To truly capture the bohemian aesthetic, mix different bead sizes and colors in your garland design. This unique and eclectic look will perfectly align with your style.
For seasonal flair, customize the garland with themed colors or floral elements, allowing it to complement various holidays and events effortlessly.
Don't forget to experiment with draping the garland across mantels, stair railings, or door knobs. This casual yet stylish touch infuses your home decor with a warm charm that feels inviting.
With these creative styling ideas, your boho-inspired wooden bead garland won't only enhance your decor but also reflect your personality and creativity throughout your living space.
Techniques for Painting Beads
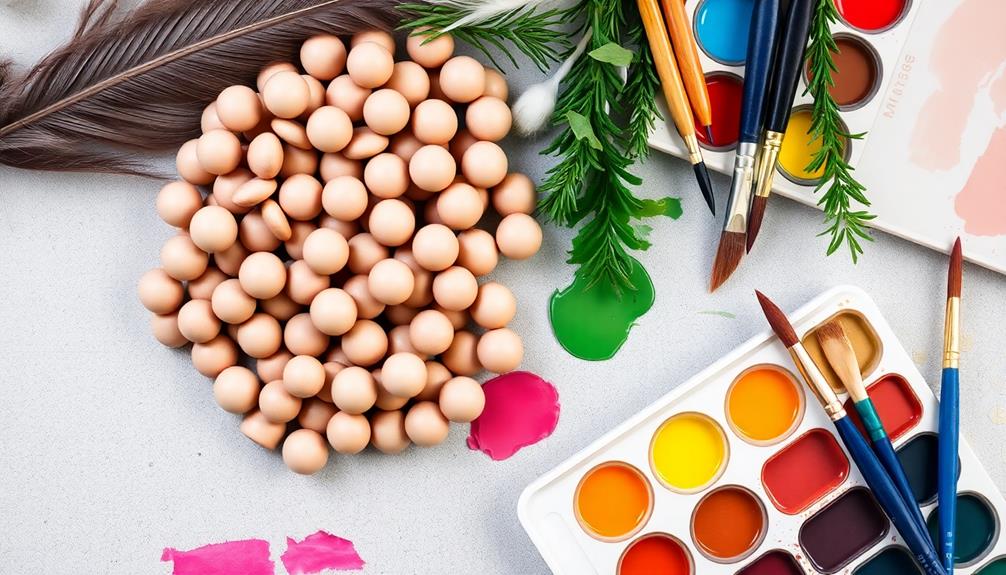
When you're ready to paint your wooden beads, there are a couple of effective techniques to achieve stunning results. You can choose between spray painting for an even finish or hand painting with a brush for intricate designs. Your choice of painting methods depends on your personal style and project needs.
For spray painting, consider using a wire method. Simply thread a wire through the beads, allowing you to rotate them easily for consistent coverage.
If you prefer hand painting, a steady hand and fine brush will help you create detailed patterns.
Here are some tips to enhance your painting experience:
- Use matte white spray paint for a clean, modern look that complements your boho-inspired decor.
- A notched cardboard box can hold beads securely during painting, preventing them from rolling away.
- Allow painted beads to dry for 30-40 minutes to guarantee they're completely set before moving on to assembly.
Adding Tassels and Tags
Tassels and tags can add a charming touch to your wooden bead garlands, enhancing their boho-inspired aesthetic. To attach a tassel, securely tie it to one end of the jute twine after stringing the beads. Make sure it's tightly knotted to prevent slipping.
For a fuller tassel, wrap jute around your fingers 30-50 times, then trim the loops at the end. Incorporating quirky and fun interior design ideas can elevate your overall decor. Once you've secured the tassel, loop the remaining jute back through the beads for added stability and a polished look.
Adding a wood tag is a simple yet effective way to personalize your garland. Use a loop knot to attach the tag at one end of the beads, allowing for easy labeling or decorative purposes.
To enhance the overall aesthetic, consider using a micron pen for clear and neat lettering on the wood tag. This small detail can tie the whole look together and give your garland a unique flair. By incorporating these elements, you'll elevate your wooden bead garlands, making them not just beautiful but also meaningful pieces of decor.
Placement and Decor Tips
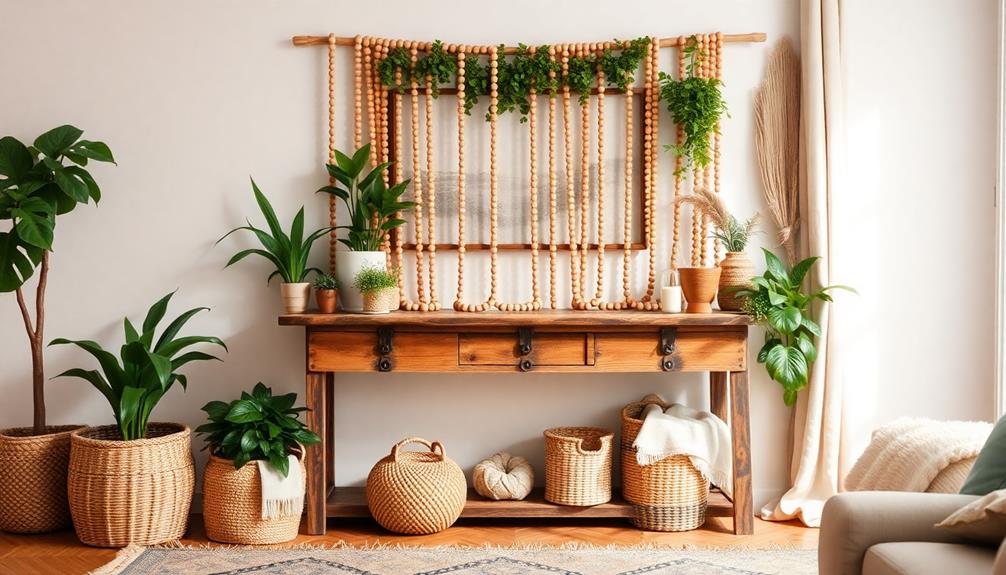
Drape your boho-inspired wooden bead garland across a decorative mantel to instantly enhance visual interest and create a cozy atmosphere. This simple placement can transform your space into a warm and inviting haven, much like how literary humor can bridge generational gaps in conversations.
Consider these additional decor tips to maximize the charm of your garland:
- Stair Railings: Weave the garland through balusters on your stairs for a colorful accent that welcomes guests into your home.
- Door Knobs: Adorn door knobs with the garland to create a whimsical touch that greets visitors.
- Seasonal Displays: Layer the garland with faux flowers or greenery to incorporate it into seasonal decor, ensuring a cohesive look throughout your space.
You can also place the garland in jars or bowls as table centerpieces. This adds a stylish and eclectic touch to your dining or coffee tables.
Frequently Asked Questions
How to Style Wooden Bead Garland?
To style wooden bead garland, drape it on tiered trays or around vases. Experiment with colors and sizes, and don't hesitate to incorporate seasonal themes, enhancing your decor and showcasing your unique taste throughout your home.
How Do You String Wooden Beads for Garland?
Stringing wooden beads for garland's like threading a necklace of dreams. You'll need a large needle to easily pass the jute through beads, ensuring you cut extra length for tying off ends or adding embellishments.
How to Attach Tassels to Wooden Bead Garland?
To attach tassels, first make your tassel by wrapping jute and securing it. Then, thread the excess jute through the last bead, tie a loop knot, and guarantee everything's tight and neat for stability.
How to Make Beads Garland?
To make a bead garland, gather your materials, string the beads onto the twine, and secure them with knots. You can add tassels for flair and adjust the design to suit your style.
Conclusion
In just a few simple steps, you can craft stunning boho-inspired wooden bead garlands that elevate any space. Did you know that nearly 70% of people believe handmade decor adds a personal touch to their home? By incorporating your unique style and creative flair, you'll not only beautify your surroundings but also create a meaningful connection to your decor. So grab your supplies and let your imagination run wild—your perfect garland awaits!
DIY and Crafts
Creating Boho Wall Hangings With Natural Materials
Join the journey of crafting stunning boho wall hangings using natural materials and discover tips that will elevate your artistic expression.
Creating boho wall hangings with natural materials is a fun way to express your style. Start by gathering sturdy branches, twigs, or wooden dowels as your base. Choose colorful yarn, fabric, or lace that inspires you, and use sharp scissors for precise cuts. Assemble your design by looping strands with knots, incorporating braids for depth, and layering materials for visual interest. Personalize your piece with beads, feathers, or meaningful charms to make it truly unique. Engaging in this creative process is rewarding and enhances your space. Stick around to uncover more tips and tricks for your bohemian masterpiece!
Key Takeaways
- Gather natural materials like branches, twigs, and yarn to create a sturdy base for your boho wall hanging.
- Use various colors and textures of yarn or fabric to add depth and reflect your personal style.
- Employ simple knots, like the lark's head knot, to securely attach strands to your chosen base.
- Incorporate embellishments like beads or feathers for added visual interest and unique flair.
- Experiment with layering fabrics and yarns to create a dynamic and eye-catching design.
Overview of Boho Style
Boho style, a vibrant blend of cultures and creativity, invites you into a world of color and texture. This eclectic design aesthetic, short for Bohemian, reflects a carefree lifestyle influenced by travel and artistic expression. With Boho decor, you can transform your living space into a sanctuary that showcases your personality and creativity.
At the heart of Bohemian home design is the use of natural materials like rattan, bamboo, and seagrass. These elements not only offer durability but also create a connection to nature, enhancing the overall ambiance of your space.
Imagine incorporating handmade items that tell a story, whether it's a woven wall hanging or a unique artisan craft. Each piece adds character and warmth to your home.
Boho style thrives on diversity, mixing patterns, colors, and textures from various cultures, creating a rich tapestry of design. This relaxed and cozy atmosphere makes it perfect for crafting inviting spaces that promote mindfulness and relaxation.
Embrace the essence of Boho decor, and let your home reflect your unique journey and artistic spirit.
Essential Materials and Tools
Creating stunning Boho wall hangings requires a few essential materials and tools that make the process enjoyable and straightforward. Whether you're a seasoned crafter or just starting out, gathering these items will set you up for success in your DIY Boho Wall project. Incorporate natural fibers and textures, which are key elements in Boho wall decor living room ideas, to achieve that perfect aesthetic.
- Natural Fibers: Choose yarn, lace, or fabric in various colors and textures to create the desired aesthetic for your boho wall hanging.
- Base Support: A sturdy branch, twig, or wooden dowel will serve as the foundation for your hanging, providing durability and support for the materials you'll use.
- Crafting Tools: You'll need crafting scissors for cutting your chosen fibers and a measuring tape to guarantee you achieve accurate lengths for a well-proportioned design.
Additionally, consider using cotton cord for hanging and optional embellishments like beads or feathers to personalize your wall hanging.
These essential materials and tools won't only make crafting easier but also allow your creativity to shine through in each unique piece! Get ready to plunge into the world of Boho decor and let your imagination run wild!
Preparation Steps for Crafting
Before diving into your crafting project, it's important to gather and prepare your materials effectively. Start by collecting branches, twigs, or sticks during your outdoor adventures; these will serve as the base for your boho wall hangings.
Next, choose yarn, lace, or fabric colors that resonate with your aesthetic, ensuring they complement the natural materials you've gathered.
Once you've selected your materials, use sharp scissors to make clean cuts. Measure and cut strands of fabric or yarn to be twice the desired hanging length for a neat finish. This allows you to fold the strands in half, creating a secure attachment point when looping over your twig or dowel.
Additionally, take some time to prepare your workspace. Organize your materials and tools to streamline the assembly process and spark your creativity. Having everything in its place will help you focus on crafting your beautiful wall hangings without unnecessary distractions.
Assembly Instructions for Wall Hanging
Gather your materials and let's get started on assembling your wall hanging. You'll need a few essentials to create a stunning boho piece for your room.
Begin by looping strands of yarn or fabric over a twig or dowel using a simple knot technique to secure everything in place. To truly capture the essence of boho decor, consider incorporating unique, handcrafted decor items that reflect your individuality, just like in Bedroom Boho Decor Ideas.
- Dowel or twig – This will be the foundation of your wall hanging.
- Yarn or fabric – Choose various textures and colors to enhance the boho vibe.
- Scissors – For trimming the ends to your desired length.
Now, use a lark's head knot to attach your yarn to the dowel, making sure the strands are evenly distributed for a balanced look.
To add depth, consider creating braids or twists with some strands. Layer your yarn in varying lengths to keep the design interesting.
Once you're satisfied with the assembly, trim the ends to your preferred shapes, or leave them natural for that polished, bohemian finish.
Your wall hanging is now ready to elevate your boho room with its unique charm! Enjoy the process and let your creativity shine!
Personalization Techniques for Unique Touch
To make your boho wall hanging truly yours, start by selecting a color palette that resonates with your style.
Experiment with embellishments like beads or feathers to add a unique flair and personal touch.
With these techniques, you can create a piece that not only decorates your space but also tells your story.
Color Palette Selection
Choosing the right color palette for your boho wall hanging is essential in making it a true reflection of your personal style. By selecting colors that resonate with you, you can create a harmonious aesthetic using natural materials.
Consider the psychological effects of colors; warm tones evoke coziness, while cool shades promote tranquility. Here are some ideas to help you curate the perfect palette:
- Earthy Tones: Incorporate terracotta, sage green, and soft neutrals for a grounded, boho vibe.
- Gradient Blends: Experiment with blending multiple shades of a single color to add depth and visual interest.
- Contrasting Colors: Use vibrant jewel tones against muted pastels to create striking focal points.
You can also achieve sustainable and organic hues by using natural dyes from plants, like indigo or beetroot.
By thoughtfully selecting your color palettes, you not only enhance your wall hanging's beauty but also guarantee it reflects your unique personality.
Embellishment Ideas
Now that you've selected your color palette, it's time to add those personal touches that make your boho wall hanging truly unique. Start by incorporating natural elements like feathers, twigs, or dried flowers to enhance the organic feel of your piece. These additions not only bring texture but also connect your hanging to the beauty of nature.
Next, use colorful beads made from wood, glass, or clay to infuse vibrancy into your design. Choose beads that complement your color palette, creating a cohesive look that pops.
Layering different fabrics and yarns, such as lace, burlap, and cotton, adds depth and visual interest, making your wall hanging stand out.
Don't forget to personalize your creation! Adding meaningful charms or trinkets that reflect your personality or past travels will make it a statement piece in your decor.
Creative Project Ideas
Plunge into the world of Boho wall hangings by exploring creative project ideas that let your imagination run wild.
By using natural materials, you can craft stunning wall decor that embodies the free-spirited essence of boho home decor. Incorporating elements like essential oils for skin conditions can enhance the ambiance of your creative space, making it even more inspiring.
Get ready to release your creativity with these exciting project ideas:
- Rattan and Driftwood Fusion: Combine rattan and driftwood to form a sturdy base. Secure strands of yarn or cotton cord with simple knots, layering different lengths for a textured look.
- Beaded Yarn Cascade: Create a cascading effect by incorporating beads and feathers into your yarn strands. Use a variety of colors to express your personal style while maintaining an organic feel.
- Floral Embellished Hanging: Enhance your wall hanging by adding dried florals or metallic fabrics for a unique touch. Play with shapes and colors to reflect both your creativity and a sustainable approach.
These project ideas invite you to experiment with forms and textures, transforming your space into a vibrant showcase of bohemian artistry.
Benefits of DIY Wall Hangings
Creating DIY wall hangings often brings a sense of joy and fulfillment, as it allows you to express your unique style and preferences. By choosing natural materials, you not only enhance the aesthetic of your space but also embrace eco-friendly practices. This connection to nature can foster a sense of tranquility in your home.
Additionally, engaging in the crafting process can improve your creativity, which is essential for producing high-quality content that resonates with others, as effective content creation encourages content relevance and authority.
Engaging in the crafting process promotes mindfulness and relaxation, contributing to improved mental well-being. As you immerse yourself in creating DIY wall hangings, you'll find a creative outlet that helps alleviate stress and anxiety. The act of designing and assembling your pieces offers a rewarding feeling of accomplishment, boosting your overall satisfaction with your living environment.
Moreover, DIY wall hangings are a cost-effective alternative to store-bought decor. You can customize your creations to suit your tastes without a significant financial investment. This personal touch not only reflects your style but also adds a unique character to your space.
Ultimately, the benefits of creating DIY wall hangings extend beyond mere decoration; they nurture your mental well-being and cultivate a deeper connection to your home environment.
Frequently Asked Questions
What Types of Natural Materials Work Best for Wall Hangings?
When considering natural materials for wall hangings, think about using driftwood, cotton rope, feathers, or dried flowers. These elements add texture and warmth, making your space feel inviting and stylish. Choose what resonates with you!
How Can I Maintain My Wall Hanging's Appearance Over Time?
To maintain your wall hanging's appearance, regularly dust it to prevent buildup. Keep it away from direct sunlight to avoid fading, and gently spot clean any stains. With care, it'll stay beautiful for years.
Are There Eco-Friendly Alternatives to Traditional Crafting Materials?
Imagine weaving dreams from nature's embrace. You can choose eco-friendly alternatives like organic cotton, bamboo, or reclaimed wood. These materials breathe life into your creations while nurturing the earth, making every piece a sustainable treasure.
Can I Hang My Wall Hanging Outdoors?
Yes, you can hang your wall hanging outdoors. Just make sure it's made from durable materials that can withstand the elements. Consider using weather-resistant options to keep it looking great despite exposure to sun and rain.
What Are Some Common Mistakes to Avoid While Crafting?
While crafting, aren't you enthusiastic to avoid unnecessary pitfalls? Common mistakes include neglecting measurements, using poor-quality materials, and rushing the process. Take your time, double-check your work, and enjoy the creative journey!
Conclusion
Incorporating boho wall hangings into your space not only adds a personal touch but also showcases your creativity. Imagine transforming your living room with a stunning piece made from driftwood and macramé, reflecting your love for nature. As you experiment with different materials and techniques, you'll find that each creation tells a story, making your home truly unique. So, gather your supplies and let your imagination run wild—your next masterpiece awaits!
DIY and Crafts
DIY Boho-Inspired Aromatherapy Blends
Kickstart your journey into DIY boho-inspired aromatherapy blends and discover how to create enchanting scents that elevate your space beautifully.
Creating DIY boho-inspired aromatherapy blends is a fun way to enhance your space. Start by selecting earthy scents like sandalwood or patchouli for relaxation. Try mixing uplifting oils like bergamot and orange for a cheerful blend, or calming ones like lavender and cedarwood for serene evenings. Use carrier oils, like Fractionated Coconut Oil, for safe application. You can disperse the scents through diffusers or reed sticks to add a touch of style. Don't be afraid to experiment and personalize your blends! Explore more blends and tips to truly capture that bohemian vibe in your home.
Key Takeaways
- Combine vibrant essential oils like bergamot and orange for a cheerful "Happy Blend" that enhances your boho space.
- Utilize natural materials and earthy scents such as sandalwood and patchouli for a calming and inviting atmosphere.
- Create personalized blends by mixing complementary oils, like lavender and cedarwood for a tranquil "Dreamy Blend."
- Set up a crafting area with DIY supplies, encouraging guests to express creativity while making their unique aromatherapy blends.
- Use stylish diffusers or reed diffusers to disperse your boho-inspired scents throughout your home, enhancing the overall aesthetic.
Understanding Boho Aesthetics
Embracing the essence of Boho aesthetics invites a sense of freedom and creativity into your space. This style thrives on a blend of natural elements, vibrant colors, and eclectic patterns, making your home feel relaxed and inviting.
To achieve this look, consider incorporating high-quality home decor that reflects your personality. Vintage and handmade pieces, like macramé wall hangings and woven textiles, not only add character but also connect you to artisanal craftsmanship.
One of the most vital components of Boho design is the use of natural materials such as wood, rattan, and ceramics. These elements enhance the earthy feel typical of this style.
Additionally, plants play a significant role in Boho spaces, bringing life and tranquility to your surroundings. Adding live greenery not only promotes well-being but also complements the layered look that defines Boho aesthetics.
To elevate your home further, think about integrating essential oil blends that resonate with the vibrant ambiance of your decor.
This thoughtful combination of textures, colors, and scents will create a cozy environment that truly reflects your unique style.
Essential Oil Blend Recipes
Immerse yourself in the world of essential oil blends and discover how they can elevate your space and mood. By creating your own DIY essential oil recipes, you can tailor fragrances to fit any occasion.
It's important to reflect on proper dilution guidelines for safe application, especially when using these oils topically. Start with the "Happy Blend," a lively mix of bergamot, orange, grapefruit, and lemon. This blend is perfect for brightening your day.
For a calming evening, try the "Dreamy Blend," combining lavender, cedarwood, and frankincense. This aroma helps you unwind and relax.
If you're looking to boost your wellness, the "Wellness Blend" of orange, clove, eucalyptus, and cinnamon bark not only smells delightful but also promotes a positive atmosphere.
To cozy up your home during winter, create a "Cozy Winter Blend" with cinnamon, clove, and pine, making your space inviting.
If you're ready to refresh your environment, the "Breathe Blend" combines eucalyptus, lemon, peppermint, and rosemary to invigorate your senses and clear the air.
Use essential oil rollers to apply these blends easily on your skin or in your diffuser.
Experiment with these best essential oils to create a boho-inspired oasis in your own home!
Crafting Your Aromatherapy Experience
Creating your ideal aromatherapy experience begins with selecting essential oils that resonate with you and your surroundings. For a boho vibe, earthy scents like sandalwood, patchouli, and lavender can promote relaxation and grounding, while citrus oils like lemon can uplift your mood and energize your space.
Once you've chosen your oils, experiment with different Carrier Oils, such as Fractionated Coconut Oil or Jojoba, to dilute your essential oils for safe skin application or use in diffusers. You can create a personalized aroma by blending complementary oils. For example, try mixing 3 drops of lavender, 2 drops of bergamot, and 1 drop of cedarwood to evoke a calming atmosphere.
Utilize an essential oil diffuser to disperse your chosen blends throughout your space or craft your own reed diffuser for a stylish touch.
To enhance your experience, keep a journal to note which combinations work best for your mood and environment. This practice allows you to tailor your essential oil room to suit different occasions and times of the year.
By thoughtfully selecting and blending your oils, you'll transform your space into a cozy and inviting haven that reflects your unique boho-inspired aesthetic.
Aromatherapy can enhance mood and alleviate anxiety symptoms, making it a valuable addition to your self-care routine.
Tips for Hosting DIY Activities
Hosting a DIY essential oil activity can be a fun and memorable way to share the joy of aromatherapy with friends and family. To guarantee a smooth experience, set up a designated crafting area stocked with essential oils, rollerball bottles, and spray bottles. This will streamline the process and make it easy for everyone to jump in.
Consider incorporating a theme, like "Relaxation" or "Energizing," to guide your guests in selecting their oils for room sprays or diffuser blends. Providing recipe cards will help them recreate their favorite mixes at home. Encourage creativity by allowing guests to mix and match oils, creating personalized blends tailored to their moods.
To keep the memories alive, offer small take-home containers or bags for their DIY creations. This not only reinforces the enjoyment of the gathering but also provides a lasting reminder of the fun.
Here's a quick visual guide to help you prepare:
Essential Oils | Suggested Uses |
---|---|
Lavender | Relaxation |
Peppermint | Energizing |
Lemon | Uplifting |
Tea Tree | Revitalizing |
With these tips, your DIY essential oil activity will surely be a hit!
Sourcing Quality Ingredients
When you're on the hunt for quality essential oils for your DIY aromatherapy blends, it's crucial to seek out reputable suppliers who prioritize purity and authenticity. For instance, essential oils like eucalyptus oil are known for their powerful decongestant effects, making them a fantastic addition to your blends.
I highly recommend checking out Rocky Mountain Oils (RMO). They guarantee their oils' quality through third-party GC/MS testing, confirming you get authentic products with every bulk order.
Always opt for 100% pure and natural oils. Synthetic or diluted oils can compromise your blends' effectiveness, so be discerning.
You'll also want to take into account carrier oils, like Fractionated Coconut Oil or Sweet Almond oil, to dilute those potent essential oils. These carrier oils enhance application and help you craft the perfect blend.
Don't forget to keep an eye on promotions through supplier emails or social media. You can snag discounts on essential oils and ingredients for your DIY projects.
Plus, some suppliers offer affiliate links, which can lead to even more savings. When purchasing, look for products in convenient sizes, like 15 ml or 30 ml oz bottles, to guarantee you're well-stocked for all your creative endeavors.
Happy blending!
Frequently Asked Questions
What Essential Oils Can You Mix to Smell Like Fall?
To smell like fall, mix essential oils like cinnamon, clove, and cedarwood for warmth. Add bergamot and orange for brightness, or try pine and frankincense for a deep, forest-like aroma that captures autumn's essence.
What Essential Oils Make Your House Smell Amazing?
To make your house smell amazing, try mixing Lavender, Sweet Orange, and Bergamot for a revitalizing vibe. For warmth, combine Cinnamon, Clove, and Pine. Experiment with different blends to find your perfect scent!
What Are Some Good Combinations to Mix of Essential Oil Scents?
You'll love experimenting with essential oil combinations! Try Lavender and Frankincense for relaxation, or Sweet Orange and Bergamot for uplifting vibes. Cedarwood, Ylang Ylang, and Patchouli create grounding warmth, while Peppermint, Eucalyptus, and Lemon invigorate focus.
What Are the Most Attractive Essential Oils?
When considering attractive essential oils, you'll find Lavender's calming scent inviting, while uplifting citrus oils like Bergamot energize your space. Floral notes from Ylang Ylang and earthy Cedarwood add warmth, creating a cozy atmosphere you'll love.
Conclusion
In the world of DIY boho-inspired aromatherapy, you're not just creating scents; you're crafting an experience that nourishes your spirit. By blending essential oils, you tap into the healing power of nature, transforming your space into a sanctuary of tranquility. Remember, it's not just about the aromas but the intention behind them. So gather your ingredients, release your creativity, and let each blend tell your story. You'll find that the right scent can truly elevate your mood and mindset.
DIY and Crafts
How to Make a Boho-Chic Terrarium
Make your own boho-chic terrarium with simple steps and unique materials that will transform your space into a vibrant oasis. Discover the details inside!
To create a boho-chic terrarium, start by gathering materials like a unique glass container, baby succulents, pebbles, and moss. Begin with a 2-3 inch layer of pebbles for drainage, followed by a layer of soil. Layer in your succulents, varying their heights and colors for visual interest. You can personalize your terrarium with decorative items like twine, crystals, or driftwood to reflect your style. Water sparingly and place it in indirect sunlight to keep your plants healthy. This fun crafting project can become a unique focal point in your space, and there's more to explore about enhancing your design!
Key Takeaways
- Choose a unique glass container and layer with pebbles, charcoal, and topsoil for proper drainage and stability.
- Select 3-5 diverse baby succulents and arrange them for visual interest and height variation.
- Incorporate natural elements like moss, driftwood, and colorful pebbles to enhance the boho-chic aesthetic.
- Personalize with decorative items such as crystals, twine, or small figurines that reflect your style.
- Maintain your terrarium by watering sparingly, placing it in indirect sunlight, and regularly checking for mold or algae.
Materials Needed
Creating a stunning terrarium begins with gathering the right materials. For your boho-chic design, you'll want a glass container, like a bowl or a bell jar, to beautifully showcase your plants. This is the foundation of your terrarium, so choose one that fits your style.
Next, include 3-5 varieties of 2" baby succulents. These vibrant plants will add diversity and life to your terrarium, making it an eye-catching centerpiece. When selecting succulents, consider different colors and textures to enhance the visual appeal.
You'll also need assorted pebbles for the bottom layer. This guarantees proper drainage and adds a natural aesthetic to the overall design.
Don't forget a bag of moss! It adds texture and color, creating an earthy feel that complements your succulents nicely.
Lastly, keep a spoon and a wet rag handy. The spoon will help you arrange your plants and pebbles, while the rag keeps your workspace neat during assembly.
With these materials needed, you're well on your way to crafting a beautiful terrarium that captures the essence of boho-chic style.
Step-by-Step Instructions
Now that you have your materials ready, let's get into the step-by-step instructions for creating your terrarium.
You'll start with layering techniques to guarantee proper drainage, followed by adding potting soil and arranging your plants.
Essential Materials Required
To craft a stunning terrarium, you'll need a few essential materials that won't only support your plants but also enhance the overall design.
First, gather a glass container, like a jar or vase, to serve as the primary vessel for your boho-chic terrarium. This transparent base allows you to showcase your beautiful plants while ensuring they get the light they need.
Next, select 3-5 varieties of 2" baby succulents. Mixing different colors and textures adds visual interest and creates a vibrant display.
After that, acquire assorted pebbles; these are vital for drainage and will also contribute to the aesthetic appeal of your terrarium.
You'll also want to use a bag of moss. This essential material adds natural texture, creating a harmonious backdrop for your greenery.
Finally, have a spoon and a wet rag on hand. These tools are invaluable for clean assembly and ongoing maintenance, ensuring your terrarium stays in top shape throughout its lifecycle.
With these essential materials ready, you're set to create a beautiful and thriving terrarium that reflects your personal style!
Layering Techniques Explained
As you begin layering your terrarium, start by adding a 2-3 inch thick base of small pebbles or slate shale to the bottom of your glass container, which guarantees proper drainage for the plants. This step is essential to prevent water from pooling and causing root rot.
Next, if desired, follow the pebbles with a layer of activated charcoal. This helps filter the air and keeps the environment fresh, promoting healthy plant growth.
After that, add a layer of topsoil about 1-2 inches thick. Lightly press it down to create a stable foundation for your plants.
Once the soil is in place, create holes with your finger or a small tool for the roots of your chosen plants. Make sure they're spaced appropriately to allow for growth.
After planting, mist the terrarium lightly with water to provide moisture, ensuring your plants settle in well.
Lastly, you can consider adding decorative elements like moss or crystals on top of the soil for added texture and visual interest, enhancing the overall look of your terrarium while maintaining its health at the bottom of your terrarium.
Personalization and Styling Tips
When personalizing and styling your terrarium, start by selecting a glass container that boasts unique shapes or textures, which can elevate the overall aesthetic. This step sets the stage for your boho-chic design.
Next, reflect on incorporating a variety of natural elements to enhance depth and interest.
Here are some elements to contemplate:
- Driftwood for a rustic touch
- Colorful pebbles to brighten the scene
- Assorted succulents and air plants in varying heights
- Decorative items like feathers or small figurines
As you layer your plants, choose an assortment of succulents and air plants in different colors and heights. This creates a dynamic and engaging look.
Don't forget to add decorative elements that reflect your personality; twine and figurines can really make your terrarium stand out.
Personalization Ideas
How can you make your terrarium truly unique? Personalization ideas are essential to reflect your style and interests. Start by incorporating natural elements like driftwood, feathers, and stones to enhance the greenery. Choose a color palette featuring earthy tones—think terracotta, greens, and soft pastels—for a cohesive look.
Next time you're at a craft store, consider unique glass containers, such as geometric shapes or hanging globes, to add visual interest. You can also include small decorative items like crystals, miniature figurines, or macramé hangers that resonate with you.
Experiment with layering different plant heights and types for depth and that whimsical boho-chic vibe.
Here's a quick table for inspiration:
Element | Personalization Ideas |
---|---|
Textures | Driftwood, feathers, stones |
Color Palette | Earthy tones, soft pastels |
Container Style | Geometric shapes, hanging globes |
Decorative Items | Crystals, figurines, macramé |
Make sure you mix and match these ideas to create a terrarium that's not only beautiful but also a true reflection of what you wanted to make.
Design Inspiration
When designing your terrarium, think about how natural elements can enhance its appeal.
Incorporating vibrant colors and textures, similar to Boho Wall Decor Living Room Ideas, can really set the tone for your creation.
Selecting a unique vessel can add a personal touch and elevate your design.
Natural Elements Integration
Incorporating natural elements into your terrarium not only enhances its aesthetic appeal but also creates a harmonious environment for your plants.
When you embrace natural elements integration, you'll find that driftwood, pebbles, and stones can beautifully complement your green friends, adding an organic touch.
Consider using unique planters that reflect your style, such as unique and wicked planters that come in diverse designs.
Start with layers of moss as a base; it introduces texture and color while helping to retain moisture for your succulents and cacti.
Here are some ideas to inspire your design:
- Driftwood: Use pieces of driftwood to create a striking focal point.
- Pebbles and Stones: Scatter these around your plants for added visual interest.
- Crystals and Feathers: Personalize your terrarium with unique decorative items that reflect your style.
- Succulent Variety: Choose succulents in different shapes and colors to enhance the overall look.
Color Palette Selection
A well-chosen color palette can transform your terrarium into a stunning focal point in any space. For a natural boho-chic aesthetic, consider earthy tones like terracotta, sandy beige, and soft greens. These colors evoke a sense of tranquility and connect your terrarium to nature.
Don't shy away from incorporating pops of vibrant colors, such as deep purples, rich blues, or jewel tones, through decorative elements like crystals or colorful pebbles. This adds visual interest and excitement to your design.
If you prefer a more cohesive look, opt for a monochromatic scheme with varying shades of a single color, like different greens. This creates a calming effect that's perfect for a boho vibe.
To enhance the organic feel, utilize natural textures by combining materials like moss, wood, and stones that complement your chosen palette.
Experiment with layering colors and materials to achieve depth and dimension, ensuring that each element harmonizes with the overall theme.
Unique Vessel Choices
Exploring unique vessel choices can elevate your terrarium design and make it truly stand out. By selecting unconventional containers, you can enhance the overall aesthetic and bring your boho-chic vision to life. Here are some ideas to inspire your creativity:
- Geometric glass terrariums: These modern vessels provide a 360-degree view of your plant arrangement, making them visually striking.
- Vintage apothecary jars: Their whimsical, nostalgic feel adds charm and unique shapes that perfectly align with boho aesthetics.
- Hanging terrariums: Crafted from glass globes or macramé holders, these options introduce verticality to your decor, maximizing space and creating a playful ambiance.
- Rustic wooden boxes or crates: Transforming these into terrariums offers an earthy vibe, harmonizing with natural materials often found in boho design.
Additionally, consider repurposing items like teacups or old fish bowls to showcase your personal style while embracing sustainability.
With these unique vessel choices, you can create a terrarium that's not only beautiful but also a true reflection of your individuality. So go ahead, let your creativity shine!
Maintenance Tips
Maintaining your terrarium is essential for keeping it healthy and vibrant. One of the key maintenance tips is to water your boho-chic terrarium sparingly. Allow the topsoil to dry out between waterings to prevent root rot, especially if you've chosen succulent varieties.
Additionally, using efficient heating solutions can help create a comfortable environment for both you and your plants. Placing your terrarium in a spot with indirect sunlight will help guarantee your plants thrive without scorching.
It's also important to regularly check for mold or algae growth. If you notice any, remove the affected areas promptly to maintain a healthy environment for your plants.
To keep your terrarium looking tidy, trim any dead or overgrown leaves. This encourages new growth and enhances the overall aesthetic.
In drier environments, misting the plants occasionally can help maintain humidity, but be cautious not to over-saturate the soil.
These maintenance tips are easy to create and follow, allowing you to enjoy your terrarium's beauty without the burden of constant upkeep. By staying attentive to your plants' needs and making small adjustments, you'll guarantee your boho-chic terrarium remains a vibrant centerpiece in your home.
Additional Resources
Keeping your terrarium thriving is just the beginning of your journey into the world of plant care. To take your skills to the next level, you'll want to explore additional resources that can inspire and guide you. Here are some great options to evaluate:
- Visit [Meaghan Clare Photography](http://www.meaghanclarephotography.com) for various design ideas and techniques that'll spark your creativity.
- Check out the blog section at [Meaghan Clare Photography's blog](http://www.meaghanclarephotography.com/blog) for step-by-step tutorials and tips tailored for DIY projects.
- Follow Meaghan on social media platforms like Facebook and Instagram to stay updated on new terrarium designs and creative home decor ideas.
- Stop by Michaels Stores to find a variety of materials and supplies specifically curated for crafting unique terrariums.
Engaging with the community is essential too. Share your terrarium creations on social media using relevant hashtags to connect with other enthusiasts.
This way, you can learn from others and share your own experiences. As you explore these resources, you'll find new inspiration for your next terrarium project!
Frequently Asked Questions
How Do You Make a Pretty Terrarium?
To make a pretty terrarium, choose a glass container you love, layer drainage material, add potting soil, and arrange your favorite plants. Finish it off with decorative elements to create a stunning, personalized display.
How to Make Your Own Terrarium Centerpieces?
Creating your own terrarium centerpieces is like crafting a magical miniature world! Start with a stylish glass container, layer rocks and soil, choose vibrant plants, and finish with whimsical decorations for a stunning display.
How to Make a Fake Terrarium?
To make a fake terrarium, you'll need a clear glass container, artificial plants, decorative stones for the base, faux moss for texture, and optional mini decorations. Secure everything with adhesive spray to keep it stable.
How to Make a Terrarium Without Buying Anything?
Think of your terrarium as a tiny jungle waiting to thrive! You can use a clear jar, soil, pebbles, and plant cuttings from your garden. Get creative with decorative items you already have at home!
Conclusion
Now that you've crafted your boho-chic terrarium, watch it come alive like a tiny jungle in a glass. With the right materials and a sprinkle of creativity, you've transformed a simple container into a vibrant world of greens and textures. Remember to personalize it to reflect your style and maintain its beauty. Each glance at your terrarium will remind you of nature's artistry, bringing a touch of tranquility to your space. Enjoy your green masterpiece!
-
Boho Home Decor4 weeks ago
Cheap Boho Decor Ideas That Look Expensive!
-
Boho Home Decor4 weeks ago
Boho Bedroom Wall Decor Ideas to Transform Your Space!
-
Boho Home Decor4 weeks ago
Haus and Hues Boho Rainbow Classroom Decor Ideas!
-
Boho Home Decor4 weeks ago
Gorgeous Boho Wedding Decor Ideas for a Dreamy Wedding!
-
Boho Home Decor4 weeks ago
Boho Wall Decor Ideas That Will Transform Your Walls!
-
Boho Home Decor2 weeks ago
Mixing Patterns in Boho Decor: A Beginner’s Guide
-
Boho Home Decor4 weeks ago
Boho Halloween Decor Ideas for a Spooky Yet Stylish Look!
-
Boho Home Decor2 weeks ago
Small Space Solutions: Boho Decor for Apartments