TL;DR

Get furniture and decor delivered free with Prime
- Fast, free delivery on millions of items
- Prime Video, Amazon Music and more included
- Member-only deals all year
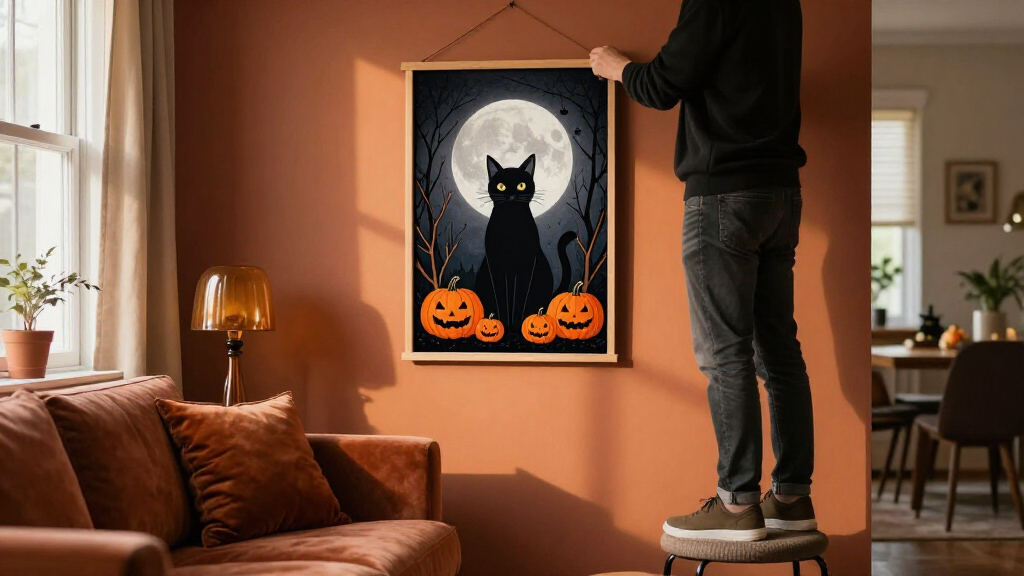
Spooky Halloween wall art helps set the mood for a room or seasonal display, from playful pumpkin prints to eerie portraits. Choose a style and size that suit your space, hang pieces with wall-safe hardware suited to their weight, keep them away from heat and moisture, and store them dry after Halloween.
A bare wall can make a Halloween party feel like an ordinary Tuesday; one crooked portrait and a cluster of paper bats can change the room in minutes. Spooky Halloween wall art is an easy way to set a seasonal mood without repainting, drilling a row of holes, or filling every corner with plastic decorations.
You’ll find ideas for choosing a style, sizing and arranging pieces, hanging them with care, and keeping them in good shape for next October. Whether you want friendly ghosts in the kitchen or a shadowy gallery wall in the hallway, a few thoughtful choices make the display feel like yours.
Choose a mood—playful, vintage, gothic, or eerie—that suits the room and the people who use it.
Repeat one detail, such as black frames or rust-orange accents, to make a mixed gallery wall feel connected.
Measure the wall and check a digital file’s print guidance before choosing a size.
Match hanging hardware to the artwork’s weight and your wall surface; keep decorations away from exits, heat, and candles.
Store art in a dry place and protect prints and frames from scratches between seasons.
Choose a spooky style that fits your room
Spooky Halloween wall art works best when its mood matches the people and purpose of the room. Designs range from playful pumpkin prints and smiling ghosts to gothic ravens, vintage horror graphics, and eerie portraits. A cheerful kitchen display can invite a grin; a dim hallway can handle a little more mystery.
Think of “spooky” as a volume knob, not a single setting. In a home with young children, try soft orange, cream, and friendly black cats; for a dinner party, muted earth tones and old-fashioned haunted-house scenes can feel like candlelit stories. For example, a family that loves classic monsters might pair a smiling Frankenstein print with a silly skeleton instead of adding graphic horror imagery. Matching the mood to the room helps the decorations feel welcoming to the people who use it, while still creating contrast with everyday décor.
Current home décor influences include vintage-inspired graphics, earthy colors, handmade-looking art, and maximalist gallery walls. These are broad trends, not rules, and popular motifs change each season. Treat trends as a source of ideas rather than a shopping checklist: a display built around what your household enjoys is more likely to feel personal and worth bringing out again. Personal touches—like a custom pet portrait with a tiny witch hat—can make familiar decorations feel memorable.
Pick a format you can hang, print, and reuse
Halloween wall art comes as framed prints, posters, canvas pieces, removable decals, paper cutouts, handmade art, and digital downloads. Your choice depends on where you’ll display it, how much you want to spend, and whether you plan to reuse it. A downloadable design offers flexibility; a ready-made framed print saves setup time. Format also affects how much care the display needs: a framed print is easier to protect and store, while loose cutouts are inexpensive and simple to arrange but easier to crease or lose.
A digital download is a file you print yourself or through a local print shop, while a physical print arrives already produced. A download can be useful when you want control over size or plan to print several coordinated pieces, though you’ll need to check the file’s resolution and account for printing and framing costs. A physical print is more convenient, but its available dimensions and finish may be fixed. If you find a tiny illustration you love, printing it at several sizes can help you build a coordinated display. Just check the file’s recommended dimensions and resolution before enlarging it, or the fine lines may turn fuzzy.
For a renter, removable decals or lightweight paper art might suit a short-term display; a collector may prefer a framed vintage-style poster that comes out each year. Removable products reduce holes, but their hold depends on the wall surface and conditions, and removal can still affect delicate finishes. Paper prints generally suit dry indoor areas. Canvas or materials labeled for outdoor use may work in a covered porch, but a roof alone won’t protect art from damp air, wind, or direct sun. Choosing for the actual location can save a print from damage and prevent a display that needs replacing after one season.
Build a gallery wall that looks collected, not cluttered
A Halloween gallery wall looks intentional when you repeat one or two details across different pieces. You might use matching black frames, a shared color such as rust orange, or a common vintage paper tone. That repeated detail acts like a quiet thread, tying ghosts, moons, and haunted houses together. Without it, a mix of images can feel like unrelated decorations; with too many repeated details, the arrangement can look overly matched. One or two shared elements leave room for variety.
Try this simple sequence before you hang anything:
- Choose an anchor. Pick one larger print, such as a 16-by-20-inch haunted house, to lead the arrangement. A clear anchor gives the eye somewhere to land and makes smaller pieces feel like supporting details.
- Gather supporting pieces. Add smaller prints, a paper bat, or a framed family drawing. Mix shapes, but repeat a color or frame finish. Different sizes create movement, while a shared feature keeps that movement from becoming visual noise.
- Lay out the pattern. Arrange the pieces on the floor or trace their outlines onto paper. Aim for consistent gaps of about 2 to 3 inches. A paper layout makes it easier to spot crowded areas before you put holes or adhesive on the wall.
- Check the scale. A grouping should relate to the furniture beneath it. Over a narrow console, a tall cluster may work better than a wide sprawl. The furniture provides a visual boundary; ignoring it can make the art seem disconnected from the room.
- Hang and adjust. Use hardware rated for each piece and suitable for the wall surface, then step back and check the balance. Small shifts can matter because the arrangement is seen as one composition, not just a set of individual pictures.
For example, over a 48-inch entryway table, a 16-inch central print with two smaller pieces on either side can make a tidy focal point. If you prefer a looser look, add a paper moon or handmade ghost between the frames—but leave enough breathing room for each image to read clearly. More pieces add personality, but crowding reduces the impact of each one.
Hang Halloween art without a wall full of holes
You can decorate without drilling by using removable hooks or adhesive strips that match the artwork’s weight and your wall surface. Read the product’s weight limit and surface guidance; textured paint, wallpaper, dust, and humidity can affect how well adhesive holds. Test a discreet spot first if you’re unsure. The convenience of adhesive is that it avoids a drilled hole, but it depends more on clean, compatible surfaces and correct installation than a mechanical hook does.
For instance, a lightweight paper print in a simple frame may suit a picture-hanging strip, while a heavy glass frame may need a properly installed hook. A heavier piece puts more strain on its hanger, so the consequence of choosing poorly is not only a fallen frame but possible damage to the wall or artwork. Clean the wall as the product instructions direct, press the strip firmly, and give it any required setting time. Rushing the process can leave your artwork on the floor—and a patch of paint on the strip.
Keep every piece clear of exits, walkways, heaters, and candles. Avoid fragile glass frames or small detachable decorations where children or pets can reach them. A spooky portrait above a console can create atmosphere; one leaning where a dog’s tail can knock it over creates a mess. Placement matters as much as the hardware: a secure frame can still become a hazard if people brush against it or it sits near an open flame.
Adhesive hanging products have limits: choose them for the wall and load they’re rated for, and follow the manufacturer’s directions.
Match print size and placement to the wall
The right print size depends on the wall, the viewing distance, and what sits below it. One small print can disappear above a large sofa, while an oversized poster may crowd a narrow hallway. Measure the available space first, then compare the art’s dimensions with the furniture and nearby doors or windows. The aim is for the art to read clearly in the room without competing with its boundaries or blocking its practical features.
As a starting point, try a larger statement piece where you want one clear focal point, such as above a console; use a cluster of smaller images where you want a more playful, layered effect. These are design starting points, not strict formulas. A 12-by-16-inch print can feel substantial in a small powder room and tiny on a broad living-room wall. Viewing distance changes perceived scale too: details that are charming up close may disappear across a large room, so choose bold shapes for spaces where people will see the art from farther away.
Consider lighting before you settle on a location. Direct sunlight can fade colors, and a lamp aimed straight at glass can create glare that hides the image. A family might place a bright pumpkin print near the dining table, then reserve a darker raven illustration for a shaded hallway where it can keep its moody look. Balancing visibility with protection may mean moving a favorite print away from the brightest wall, even if that spot first seemed like the obvious focal point.
Protect prints from moisture, heat, and fading
Halloween art lasts longer when you keep it dry, away from heat, and out of strong direct sunlight. Moisture can warp paper and damage frames; nearby heaters can dry or discolor materials. A covered porch may still get wind-driven rain or damp air, so outdoor placement calls for materials made for those conditions. These risks build over time: even brief exposure each season can leave colors faded or paper wavy, making a reusable decoration less appealing to display next year.
If you’re setting up a seasonal display in a kitchen, avoid hanging a paper print right beside a steamy kettle or oven. In a sunny room, move the display to a wall that gets less direct light, or use an appropriately protected print. A little distance from the window can save a favorite orange-and-black design from becoming pale and washed out. These choices involve a small tradeoff in placement or materials, but they preserve the image and reduce the chance of replacing it after one season.
When the season ends, store prints flat in a dry place, with protective paper between delicate surfaces. You can roll flexible posters loosely if their material allows it, but don’t crease them or press heavy objects on top. Before putting framed pieces away, wipe the glass and protect the corners so next October’s decorations emerge without fresh scratches. Dry, careful storage prevents small defects from spreading while the art is packed away and makes setup easier when the season returns.
Make a DIY display feel personal, not homemade in a bad way
A handmade Halloween display can look polished when you limit the palette and repeat a simple shape. Try black, cream, and one warm orange; cut bats from sturdy paper and pair them with a hand-drawn moon or a printed haunted house. The texture of paper and ink can feel as inviting as a basket of old postcards. A limited palette gives varied handmade pieces a shared context, so irregular lines read as character rather than as unrelated scraps.
For an easy weekend project, print a set of public-domain or properly licensed illustrations, place them in inexpensive frames, and add one drawing from someone in your household. A child’s lopsided ghost can become the centerpiece when you give it the same black frame as the rest. If you sell or share artwork, check the usage rights for the images and fonts you download. The tradeoff is time: making or assembling art takes more effort than buying a finished print, but it gives you control over the subject, scale, and mix of personal details.
Digital downloads make it easy to test different sizes and styles, but screen colors can differ from printed colors. Print one sample first, especially if you want a precise rust or pumpkin orange. That quick check can prevent a whole set from arriving too red, too dark, or too small for the wall. Sampling takes an extra step, but it is less costly than reprinting several pieces that do not work together.
Use these quick checks before guests arrive
A finished Halloween wall should feel fun to look at and easy to move around. Before guests arrive, walk through the room from the doorway and check that the display reads clearly, stays secure, and leaves the route to exits open. This perspective matters because a display that looks balanced while you’re standing close may disappear from the entrance or intrude on a busy route. A few small adjustments can turn a charming setup into a safe one.
- Step back: Can you spot the main image from the entrance?
- Check the edges: Are frames and cutouts clear of doors, handles, and busy walkways?
- Look for heat: Is the display away from candles, fireplaces, and heaters?
- Consider little hands and paws: Could someone pull down a fragile frame or swallow a loose piece?
- Check the wall: Are adhesive strips secure, and does each hanger suit the item’s weight?
At a party, a gallery wall above a sideboard can be a backdrop for snacks and photos, as long as guests won’t brush against hanging frames while reaching for a plate. If the room gets crowded, move loose cutouts higher and keep decorations well away from candles. A display should support the room’s use; if guests must squeeze past it, shifting a few pieces can preserve both the festive effect and an easy path through the space.
Frequently Asked Questions
How do I decorate a wall without damaging it?
Try removable hooks or adhesive strips rated for the artwork’s weight and suitable for your wall surface. Follow the product directions, including surface preparation and setting time, and test a hidden area if you have delicate paint or wallpaper.
Can I use Halloween wall art outdoors?
Use materials labeled for outdoor conditions, and choose a sheltered spot. Covered areas can still get damp air, wind-driven rain, or direct sunlight, which may damage ordinary paper prints.
How can I make a Halloween display spooky without making it too scary?
Choose friendly ghosts, smiling pumpkins, or whimsical black cats, then use softer colors such as cream and warm orange. Keep graphic horror imagery out of shared family spaces and save darker pieces for a room where that mood fits.
What is the difference between a digital download and a physical print?
A digital download is a file you print at home or through a print service, often in a size you choose. A physical print arrives already printed; check its dimensions, paper or canvas type, and framing details before buying.
How should I store Halloween wall decorations after the season?
Store prints in a dry place, flat or loosely rolled if their material allows, and protect them from creases and scratches. Keep framed art from knocking together, and avoid damp basements or hot storage areas that can damage paper and finishes.
Conclusion
Start with one wall, one clear mood, and a print that fits the space; then add a few details that make the display feel personal. Keep the art secure and away from heat, moisture, and direct sun, and next October you can bring it back like an old friend waiting in the attic.
Halloween Picks
halloween
As an affiliate, we earn on qualifying purchases.