
Transform your empty glass bottles into beautiful DIY crafts by selecting the right bottles, cleaning them thoroughly, and then decorating with paint, stencils, or embellishments. You can turn bottles into vases, lanterns with string lights, or stylish candle holders. Sealing and protecting your creations guarantees they last. Explore eco-friendly tips and creative techniques to make stunning, sustainable upcycled decor—continue on to discover more inspiring ideas and step-by-step guides.
Key Takeaways
- Select suitable bottles by color, size, and project purpose, then thoroughly clean and remove labels for a smooth surface.
- Use paints, stencils, and textured techniques to decorate bottles with vintage, modern, or personalized designs.
- Transform bottles into functional items like candle holders, planters, or lanterns by carving, drilling, or adding lighting elements.
- Incorporate eco-friendly materials such as recycled twine, fabric, or natural dyes for sustainable embellishing.
- Seal and protect finished crafts with eco-friendly varnishes or sealants to ensure durability and a polished look.

O.U.A.T ONCE UPON A TIME SproutCycle Upcycled Glass Germinator Jar Kit, 500 ml / 17 oz Handmade Reclaimed Wine Bottle Sprouting Jar with Bio PLA Lid
Complete 500 ml / 17 oz sprouting kit with 1 upcycled glass germinator jar and Bio PLA lid…
As an affiliate, we earn on qualifying purchases.
As an affiliate, we earn on qualifying purchases.
Selecting the Perfect Bottles for Upcycling
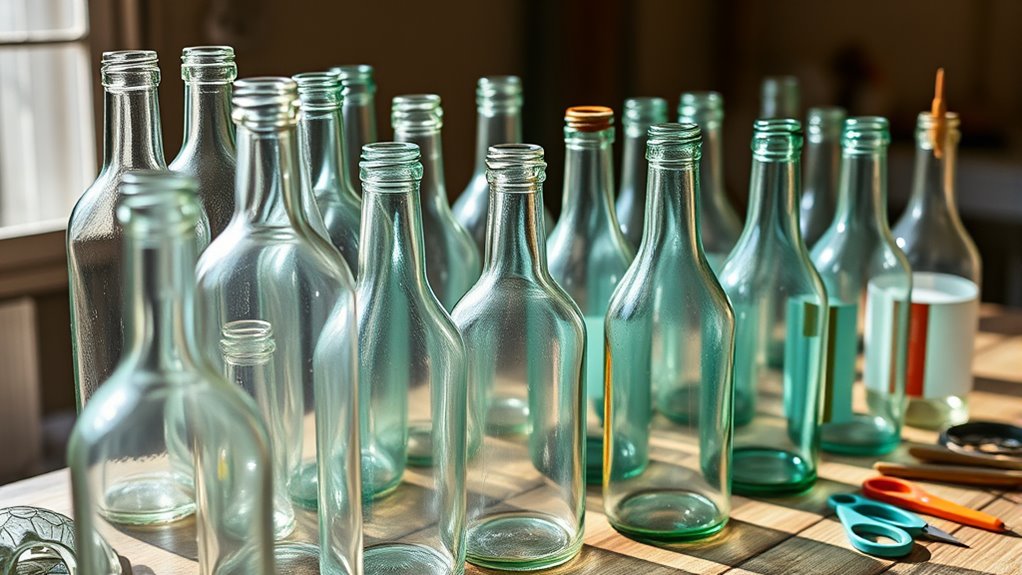
Have you ever wondered how to choose the best bottles for your upcycling projects? Start with bottle color selection; opt for shades that complement your decor or add a pop of color. Clear bottles are versatile, perfect for transparent designs, while colored or frosted ones create moodier, more decorative looks. Next, consider bottle size considerations—small bottles work well for miniature vases or candle holders, whereas larger bottles are ideal for statement pieces like lamps or centerpieces. Think about how you’ll use the bottle and the scale of your project. Selecting the right size and color guarantees your finished craft looks cohesive and appealing. Additionally, understanding different bottle types can help you choose the most suitable bottles for your specific craft projects. By paying attention to these details, you’ll set a solid foundation for creating stunning upcycled glass bottle crafts.

Nicpro 18 Colors Stained Glass Paint Set, 1oz / 30ml Waterproof Acrylic Enamel & Ceramic Glass Painting Kit for Arts on Transparent Wine Glasses Jars Windows with 6 Brushes & 1 Palette, Opaque Finish
NICPRO ENAMEL ACRYLIC PAINT SET: Complete 18-color set (1 oz bottles each) including White, Orange, Sky Blue, Spring…
As an affiliate, we earn on qualifying purchases.
As an affiliate, we earn on qualifying purchases.
Cleaning and Preparing Your Glass Bottles

Before you start your craft projects, you need to clean and prepare your bottles thoroughly. This means removing labels and glue, washing them properly, and ensuring they’re completely dry. Following safety tips will help you handle the bottles effectively and avoid accidents. Additionally, understanding the cookie privacy implications can ensure your online browsing remains secure while researching craft ideas.
Removing Labels and Glue
Wondering how to get those stubborn labels and sticky residue off your glass bottles? Labels removal can be tricky, but with the right approach, it’s simple. Start by soaking the bottle in warm water with a bit of dish soap for 15-20 minutes; this helps loosen the adhesive. For stubborn glue cleanup, apply rubbing alcohol, nail polish remover, or a commercial adhesive remover directly to the label and let it sit for a few minutes. Use a scraper or your fingernail to gently peel off the label, then wipe away any remaining glue with a cloth. For extra stubborn spots, repeat the process or try vinegar or lemon juice. Proper labels removal and glue cleanup prepare your bottles for upcycling, ensuring a smooth surface free of residue. Additionally, understanding the best heat pump can help you maintain a comfortable home environment year-round.
Proper Washing Techniques
Proper washing techniques are essential to guarantee your glass bottles are thoroughly cleaned and ready for upcycling. First, examine the glass texture; some bottles have smooth surfaces, while others may be rough or embossed. Use warm water and a mild detergent to scrub gently, paying attention to the bottle shape to reach all crevices. For stubborn residue or labels, soak the bottle in a mixture of warm water and vinegar or baking soda for 15-20 minutes, then scrub with a bottle brush. Rinse thoroughly to remove any leftover debris, ensuring no soap or residue remains that could interfere with your craft project. Properly cleaned bottles will have a clear, smooth surface, making them easier to work with and ensuring your finished craft looks polished. Additionally, data privacy challenges underscore the importance of handling personal information carefully during any online research or shopping related to your craft supplies.
Drying and Safety Tips
Once you’ve thoroughly cleaned your glass bottles, it’s important to dry them completely to prevent water spots and mold growth. To guarantee safety, always wear safety glasses when handling cleaning solutions or scrubbing stubborn residue. When drying, follow these steps:
- Use a clean, lint-free cloth or air dry upside down to avoid trapping moisture.
- Place bottles in a well-ventilated area, following proper ventilation precautions to dissipate fumes from cleaning agents.
- Avoid using heat sources like a dryer or heater, as rapid temperature changes can cause glass to crack.
- Ensure that all residues of cleaning agents are completely removed before storage or reuse.
Decoart DuraClear Varnish, Gloss DS19-9, 8 fl oz Bottle
As an affiliate, we earn on qualifying purchases.
As an affiliate, we earn on qualifying purchases.
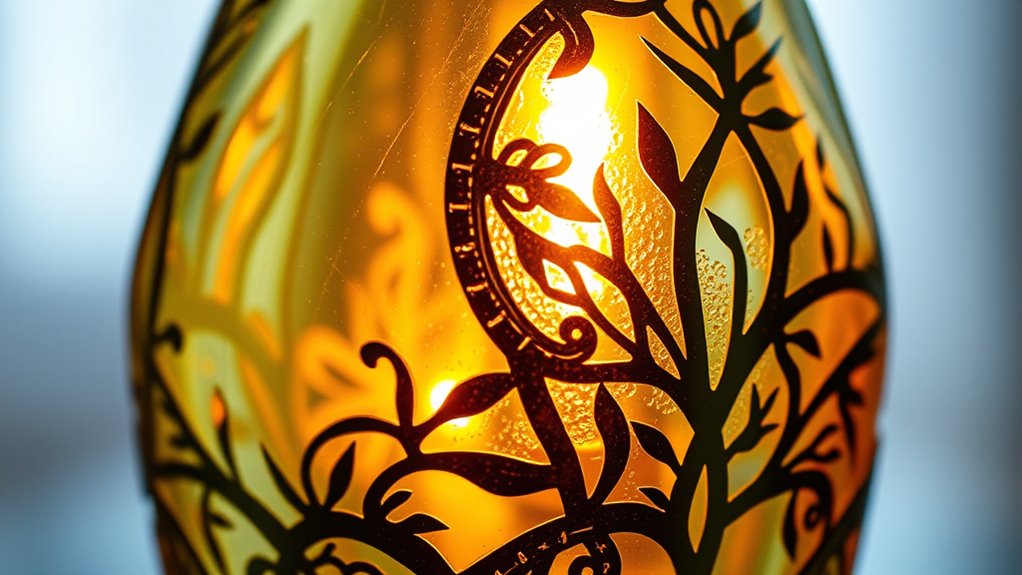
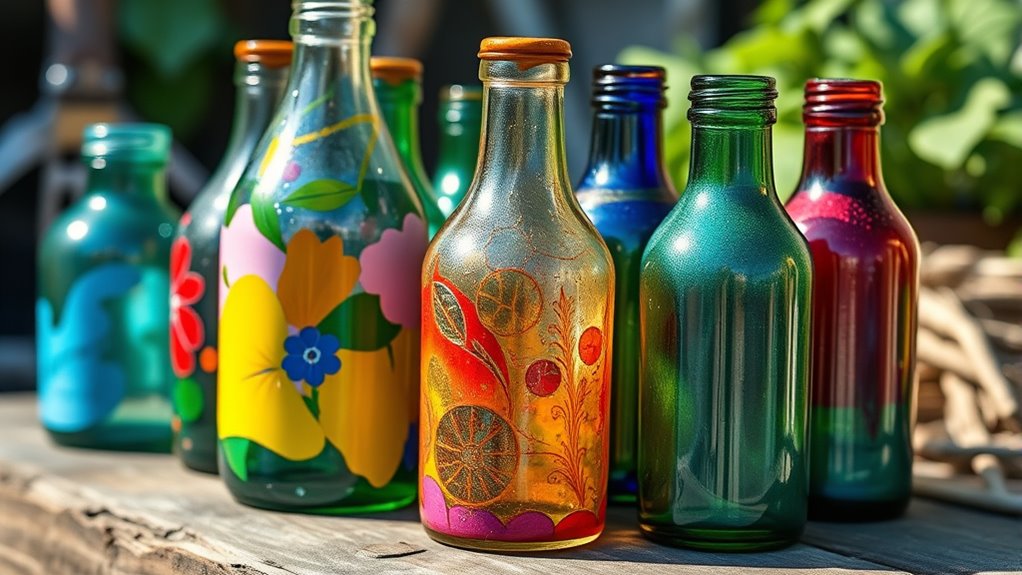
Painting and Decorating Techniques
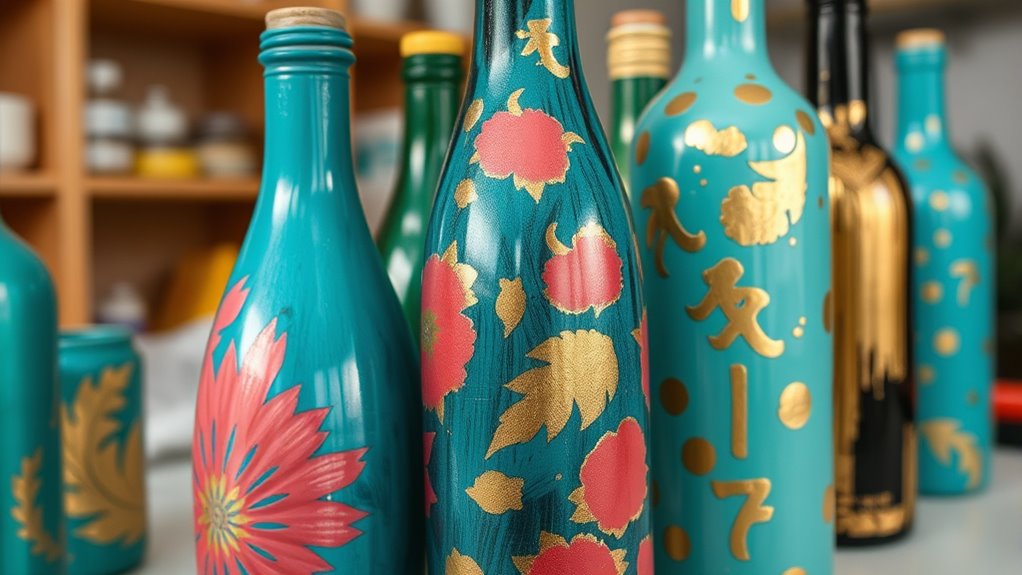
Painting and decorating glass bottles allows you to transform their appearance with creativity and personal flair. To achieve a vintage look, try using chalk paint or applying a distressed finish, which gives your bottles charming, aged appeal. Metallic accents, like gold or silver leaf, add a touch of elegance and sophistication; apply these selectively for a subtle shimmer or cover entire sections for a bold statement. Use stencils or freehand designs to enhance your bottles’ character, or add textured patterns with brush strokes or decoupage techniques. Always prepare your surface properly with a primer or base coat to make certain smooth application. Seal your work with a clear varnish for durability. These techniques let you craft unique, eye-catching pieces that reflect your style. Additionally, surface preparation is essential for ensuring that your paint and decorative elements adhere properly and last over time.

VOOKRY Solar Wine Bottle Lights, 8 Pack 20 LED Solar Powered Cork Lights Waterproof Outdoor Fairy String Lights Wine Bottle Decorations for DIY, Party, Wedding, Garden, Patio, Tabletop(Warm White)
Solar Bottle Lights(Wine Bottle Not Included): Fits for wine bottles, glass bottles, soda bottles, beer bottles and many…
As an affiliate, we earn on qualifying purchases.
As an affiliate, we earn on qualifying purchases.
Creating Beautiful Painted Bottle Vases
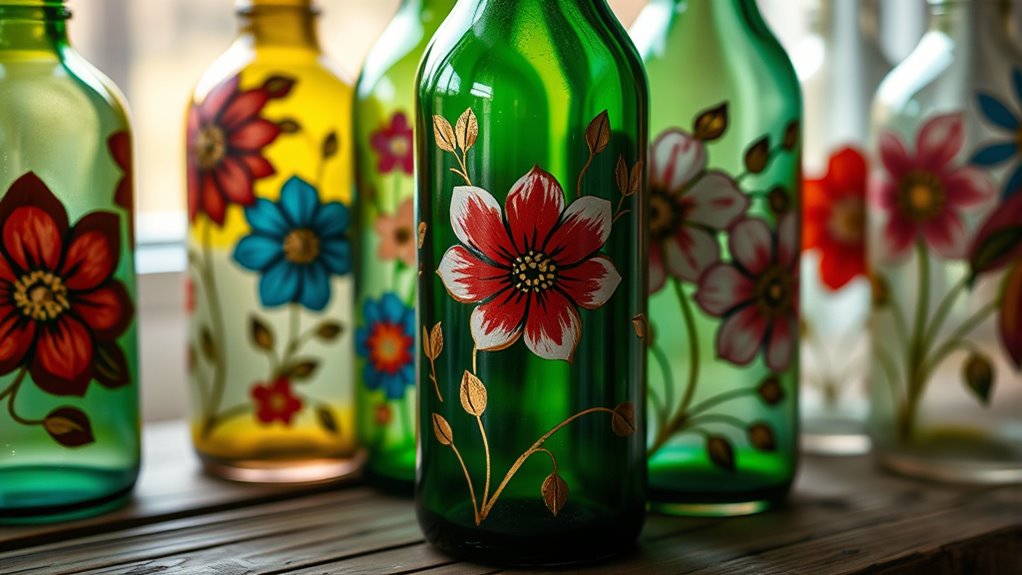
Transforming a painted bottle into a stunning vase is a simple yet rewarding project that lets your creativity shine. To start, consider recycling tips like repurposing leftover paint or using eco-friendly paints to stay environmentally conscious. When creating your painted bottle vase, focus on:
- Choosing non-toxic, eco-friendly paints for safe, sustainable decorating.
- Applying bold patterns or soft pastel tones for a personalized look.
- Sealing the paint with a clear, eco-friendly sealant to protect your design and prolong the vase’s life.
- Incorporating market demand to select the best type of painted bottles for your project and ensure your upcycled decor remains stylish and desirable.
These practices promote eco-friendly habits while giving your upcycled bottle a fresh, artistic touch. Experiment with brush techniques or stencils to add unique flair. Your painted bottle vase becomes not just a decorative piece but a statement of eco-conscious creativity.
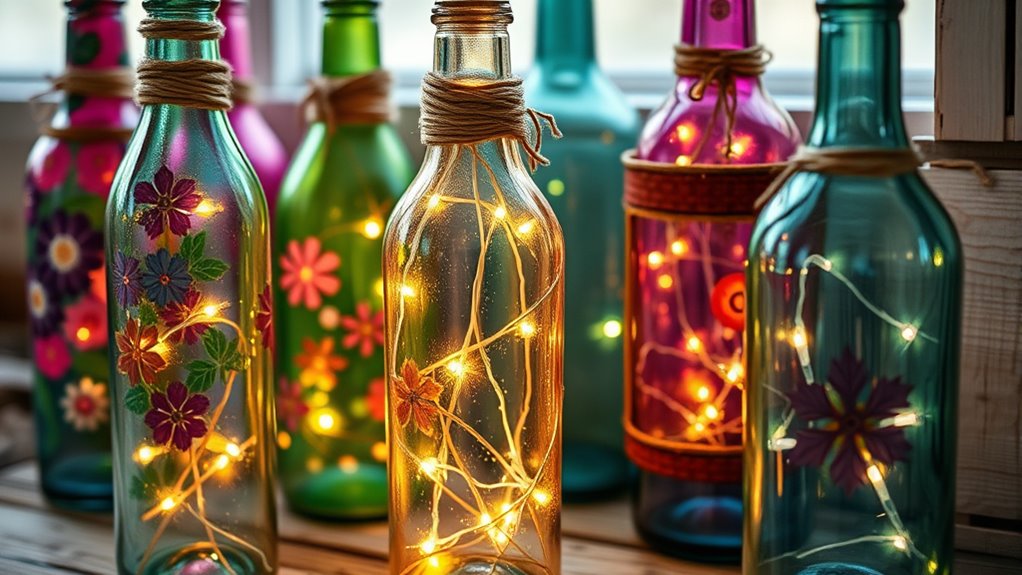
Transforming Bottles Into Lanterns With Lighting Elements
Adding lighting elements to your glass bottles can instantly turn them into charming lanterns that brighten up any space. To do this sustainably, consider using eco-friendly methods like solar-powered LED lights or battery-operated candles. When choosing lighting, make sure to select energy-efficient options that reduce waste and minimize environmental impact. Recycling tips include repurposing old string lights by carefully removing damaged sections or swapping out bulbs for more eco-conscious versions. For a safe and effective setup, drill small holes near the bottle’s base or cap for easy wiring, ensuring you handle glass carefully. This approach not only creates beautiful, functional decor but also promotes eco-friendly practices by reusing materials and reducing waste. Incorporating biodiversity-friendly lighting options can also help support local ecosystems while you enjoy your handcrafted lanterns. Your upcycled lanterns will add warmth and charm while supporting sustainable habits.
Adding Textures and Embellishments for Unique Designs
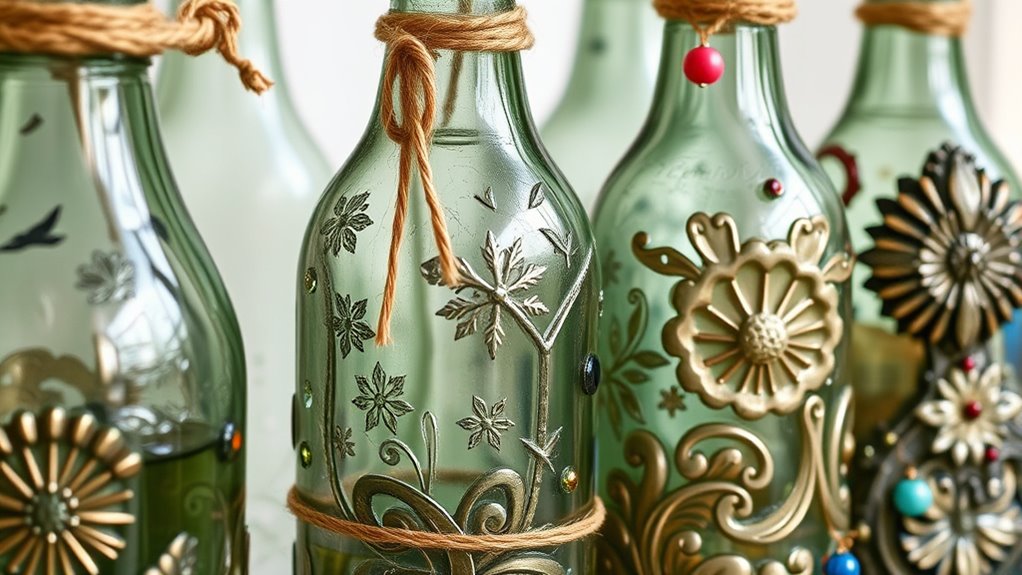
You can create eye-catching textures on your bottles using techniques like etching, applying textured paints, or adding embossed details. Embellishments such as beads, charms, or metallic accents let you personalize your design further. Experimenting with different patterns and materials helps you craft truly unique and creative bottles. Incorporating embellishment techniques can elevate your upcycled projects to a professional level.
Textured Surface Techniques
Creating textured surfaces on glass bottles opens up a world of design possibilities, making each piece uniquely yours. To achieve stunning decorative finishes, try these techniques: 1. Use a hot glue gun to create raised patterns, adding tactile interest and a textured surface. 2. Apply layers of textured paint or paste with a brush or sponge for a varied, dimensional look. 3. Wrap the bottle with jute or wire, then coat with paint or glue to add a rough, layered texture. These methods not only enhance visual appeal but also give your glass bottles a distinct, handcrafted feel. Incorporating textured surfaces allows you to experiment with different decorative finishes, transforming simple bottles into artfully crafted pieces. Mastering these techniques helps you create personalized, textured designs that stand out. Understanding the importance of surface techniques can elevate your craft projects to a new level of creativity.
Embellishment Options Available
To make your glass bottle crafts truly stand out, incorporating a variety of embellishment options can add depth and personality. Decorative accents like rhinestones, beads, and metallic foils instantly elevate your design. You can also add textured elements such as fabric wraps, burlap, or lace for a tactile feel. Using paint techniques, like stenciling or metallic finishes, further enhances visual interest. Consider applying adhesive gems or sequins for a touch of sparkle, or wrapping twine and ribbons for a rustic charm. These embellishment options allow you to customize each piece, making it uniquely yours. Play with different materials and placements to create layered, eye-catching effects. The key is to experiment with various decorative accents until you achieve the perfect balanced look for your upcycled glass bottles. Incorporating textile art techniques can also add an innovative dimension to your designs, blending different textures and materials seamlessly.
Creative Pattern Ideas
Adding textures and embellishments transforms plain glass bottles into eye-catching art pieces. To create unique designs, consider these creative pattern ideas: 1. Use eco-friendly materials like recycled twine or fabric for wrapping, adding a tactile dimension. 2. Incorporate recycling tips by painting with natural dyes or DIY stencils for intricate patterns. 3. Attach textured embellishments such as beads, lace, or metal charms for a layered look. These techniques not only enhance visual appeal but also promote sustainable crafting. Embrace eco-friendly materials to reduce waste and make your project more environmentally conscious. Experiment with different textures to give your upcycled bottles a distinctive personality, turning simple recyclables into stunning, personalized decor. Incorporating mindful design principles can also help you create more harmonious and aesthetically pleasing finished pieces.
Crafting Stylish Candle Holders From Glass Bottles
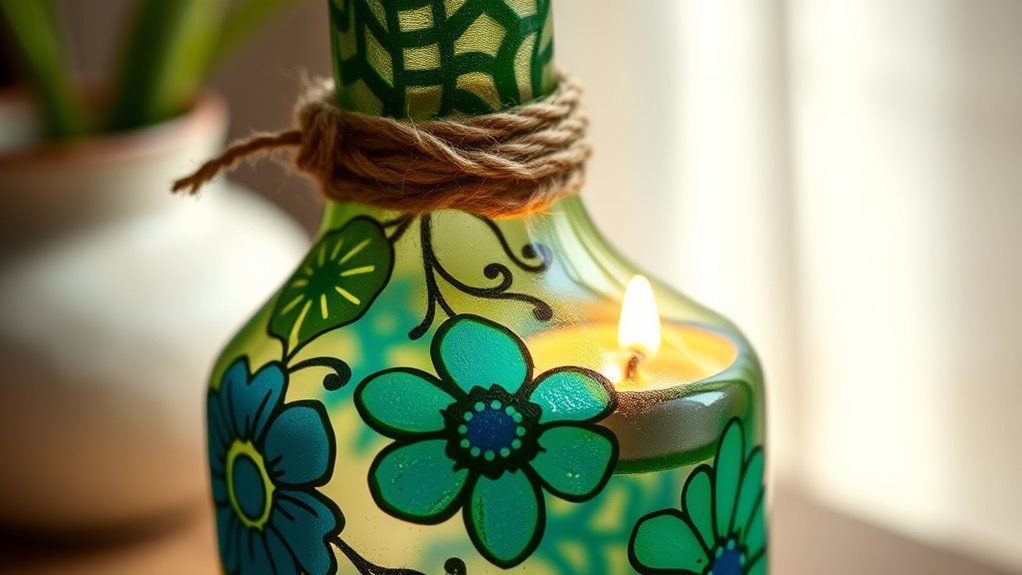
Transforming glass bottles into stylish candle holders is a simple yet impactful way to elevate your home decor. By repurposing bottles, you contribute to recycling benefits, reducing waste that would otherwise end up in landfills. This process also lessens the environmental impact associated with producing new glass products, making your craft eco-friendly. To make your candle holder, clean your bottle thoroughly and remove labels. You can carve or paint the exterior for a custom look, then add a candle inside—tea lights work perfectly. The transparency of the glass enhances the candle’s glow, creating a warm ambiance. Not only do you create a beautiful decor piece, but you also support sustainability efforts. Be sure to research reliable companies before purchasing supplies to ensure quality and safety. Overall, upcycling bottles into candle holders is a rewarding project that combines style with environmental consciousness.
Making Planters and Herb Gardens From Recycled Bottles
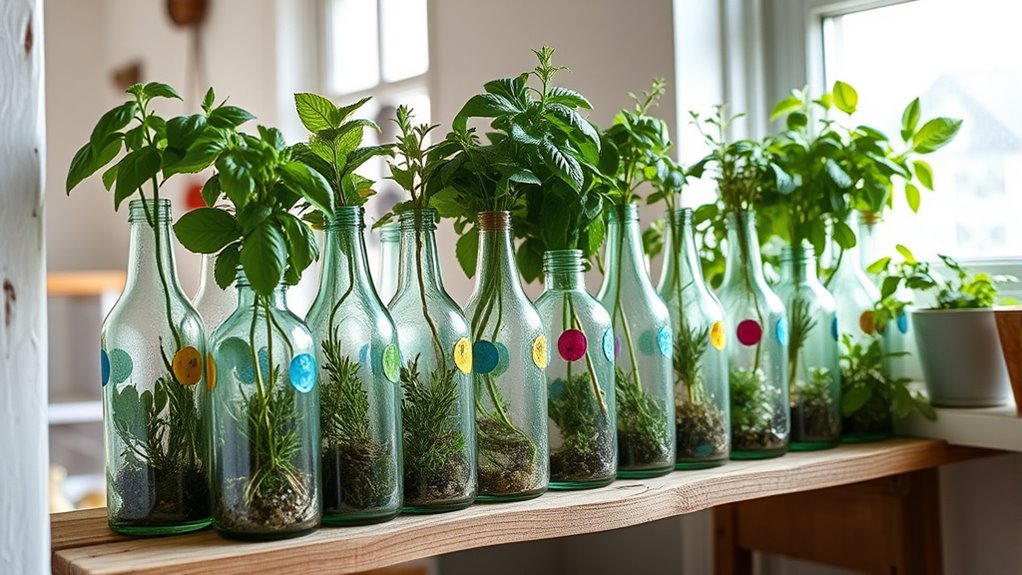
Building on your success with turning bottles into stylish candle holders, repurposing glass bottles as planters and herb gardens offers a practical and attractive way to bring greenery indoors or outdoors. Don’t fall for recycling myths that bottles aren’t worth reusing—bottle recycling statistics show that upcycling reduces waste and conserves resources. To get started:
- Cut the bottle’s top for a mini greenhouse or herb pot.
- Drill small drainage holes to prevent overwatering.
- Fill with soil and your favorite herbs or succulents.
This eco-friendly project not only beautifies your space but also challenges misconceptions about recycling. By transforming bottles into planters, you actively reduce landfill waste and promote sustainability, proving that small efforts make a big difference in environmental impact. Sustainable materials in Waldorf toys highlight the importance of eco-friendly practices in crafting durable, natural playthings that support holistic development.
Incorporating String Lights for a Cozy Glow
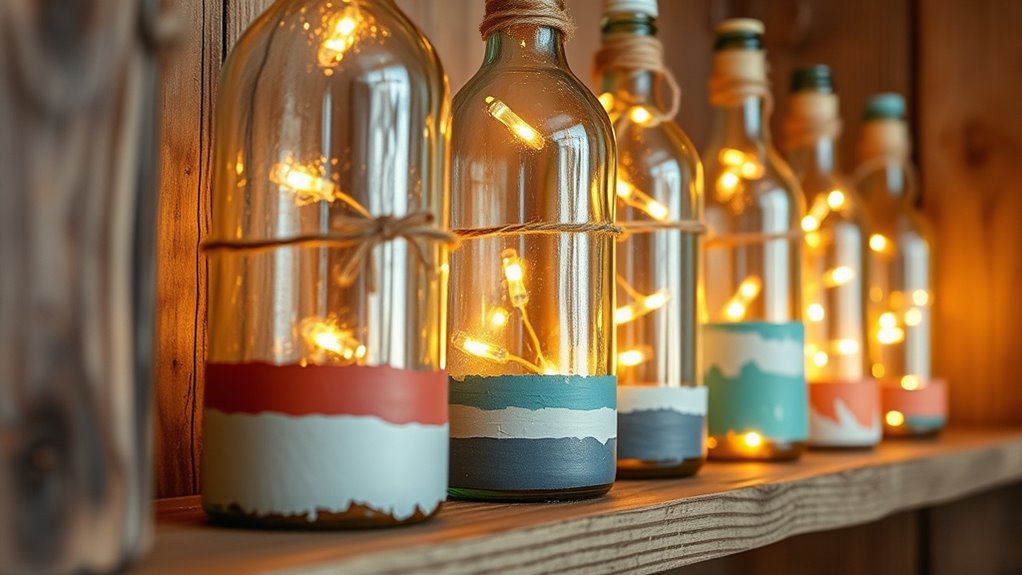
When choosing string lights for your glass bottle craft, pick ones that are safe and suitable for indoor or outdoor use. Make sure to follow safe wiring practices to avoid electrical issues or accidents. By carefully selecting and installing your lights, you can create a warm, inviting ambiance that transforms your space.
Choosing the Right Lights
Choosing the right lights can make or break the cozy ambiance of your upcycled glass bottle craft. To create the perfect glow, consider these options:
- LED string lights – they’re energy-efficient, long-lasting, and emit a warm, inviting light that enhances your bottle’s charm.
- Solar-powered lights – they’re eco-friendly, require no wiring, and automatically turn on at dusk, making setup simple.
- Color temperature – opt for warm white LEDs (around 2700K) to add a cozy, inviting atmosphere.
Matching your lights to your bottle’s style and placement ensures a stunning result. Whether you’re aiming for a subtle glow or a vibrant display, selecting the right lights enhances your upcycled craft’s beauty while keeping it practical.
Safe Wiring Practices
Incorporating string lights into your upcycled glass bottle craft can create a warm, inviting glow, but safety should always come first. Before wiring, put on safety gear like gloves and insulated tools to protect yourself from electrical shocks. Always follow electrical codes to prevent hazards; guarantee your lights are rated for indoor or outdoor use, depending on your project. Check that the wiring is intact, with no exposed wires or frayed insulation. When connecting the lights, avoid overloading circuits or using extension cords that aren’t rated for the load. Keep connections dry and away from water or moisture. If you’re unsure about any wiring step, consult a professional. Proper wiring practices not only keep your craft safe but also ensure it remains a beautiful, glowing centerpiece. Additionally, understanding electrical safety is essential when working with any wiring projects to prevent accidents and ensure long-lasting results.
Enhancing Ambiance Effect
Adding string lights to your upcycled glass bottle craft instantly creates a cozy, inviting ambiance that transforms the piece into a charming focal point. To maximize this effect, consider these tips: 1. Choose color schemes that match your mood or decor—warm whites create intimacy, while colorful LEDs add playfulness. 2. Experiment with different lighting techniques, like wrapping lights tightly for a sleek look or loosely for a whimsical vibe. 3. Vary the brightness levels to set the perfect tone—dimming options can make your craft suitable for relaxing evenings or lively gatherings. Incorporating ambient lighting can further enhance the overall atmosphere of your space.
Tips for Sealing and Protecting Your Upcycled Creations
Sealing and safeguarding your upcycled glass bottle crafts is essential to guarantee they last and maintain their beauty. Proper sealant application creates a protective barrier that prevents damage from moisture, dirt, and UV rays. Choose the right protective coatings based on your project’s purpose—whether you want a glossy finish or a matte look. Before applying, confirm the surface is clean and dry. Use a brush or spray to evenly distribute the sealant, avoiding drips or bubbles. Multiple thin coats often yield better results than one thick layer. Once dry, your creation will be more resilient and attractive. Regularly inspect and reapply sealant as needed to preserve the integrity of your upcycled art. The contrast ratio of your project can also influence how vibrant and detailed the final appearance looks. Proper sealing ensures your craft remains stunning for years to come.
Frequently Asked Questions
What Safety Precautions Should I Take When Cutting Glass Bottles?
When cutting glass bottles, you should always wear protective gear like gloves and safety goggles to prevent cuts and eye injuries. Use proper cutting techniques, such as scoring the glass smoothly and applying gentle pressure, to guarantee a clean cut. Work on a stable surface and keep your hands away from the blade’s path. Taking these precautions helps you stay safe and achieve better results with your upcycling projects.
How Can I Prevent Paint From Chipping or Peeling Over Time?
Think of your painted glass as a delicate canvas; proper surface preparation and paint sealing are key. Before painting, clean and sand the surface to guarantee good adhesion. Once dry, apply a high-quality sealant designed for glass. I once painted a bottle, and sealing it thoroughly made the design last for years. This prevents paint from chipping or peeling over time, keeping your craft looking fresh and vibrant.
Are There Eco-Friendly or Non-Toxic Paints Suitable for Upcycling Bottles?
Yes, you can use eco-friendly paints and non-toxic bottle paints for your upcycling projects. These paints are made from natural or low-toxicity ingredients, making them safe for you and the environment. Look for brands that specify eco-friendly or non-toxic labels, and choose water-based paints for easier cleanup and less odor. Using these options helps guarantee your decorated bottles stay vibrant without harmful chemicals leaching over time.
What Tools Are Essential for Upcycling Glass Bottles Safely and Effectively?
Did you know that over 90% of glass bottles are recyclable? To upcycle safely and effectively, you need a glass cutter to shape your bottles precisely. Always wear protective gloves to prevent cuts and injuries. These tools ensure your project is both safe and successful. A glass cutter helps you achieve clean cuts, while gloves protect your hands, making your upcycling process smoother and more enjoyable.
How Do I Choose the Right Lighting Elements for Bottle Lanterns?
You should consider lighting placement carefully to guarantee your bottle lanterns glow beautifully. Opt for LED fairy lights or small battery-operated bulbs to avoid heat issues. Choose bulb types that suit your desired ambiance—warm white for coziness or colorful LEDs for a fun vibe. Position the lights centrally or along the sides to maximize illumination, and secure them firmly to prevent shifting. This way, your lanterns will look stunning and safe.
Conclusion
So, as you proudly display your upcycled glass bottle masterpieces, remember—those bottles once held something ordinary. Now, they brighten your space, save the planet, and maybe even spark a conversation. It’s amusing how a simple bottle can become a focal point, proving that with a little creativity, even trash can turn into treasure. The real lesson? Sometimes, the most unexpected changes bring the most meaningful beauty—if you’re willing to see the potential.