To begin DIY silk painting, select a smooth silk fabric like charmeuse or habotai for vibrant results. Prepare your surface by cleaning and stretching it to prevent wrinkles, then apply a mordant or sizing for better dye absorption. Use fine brushes and quality dyes to create smooth color shifts, and experiment with layering and resist techniques for detail. Properly fix your colors to guarantee longevity. Continue exploring to learn how to make stunning, professional-looking silk artworks.
Key Takeaways
- Choose silk fabrics like charmeuse or habotai for vibrant, even dye absorption and smooth painting surfaces.
- Prepare silk by cleaning, stretching, and treating with mordants or sizing to enhance dye adhesion and vibrancy.
- Use high-quality silk dyes or paints with fine brushes for detailed work, layering colors from light to dark.
- Fix colors through steaming, heat-setting, or rinsing, following manufacturer instructions to ensure color permanence.
- Combine silk with textured fabrics or metallic accents for creative, visually striking DIY silk painting projects.
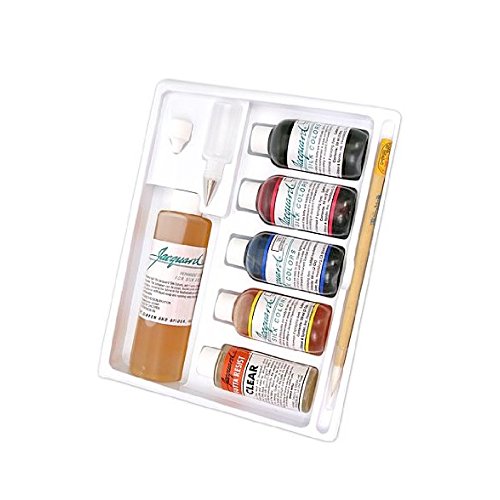
Jacquard Silk Painting Kit with Gutta Resist
Excellent way to get started in the beautiful art of painting
As an affiliate, we earn on qualifying purchases.
As an affiliate, we earn on qualifying purchases.
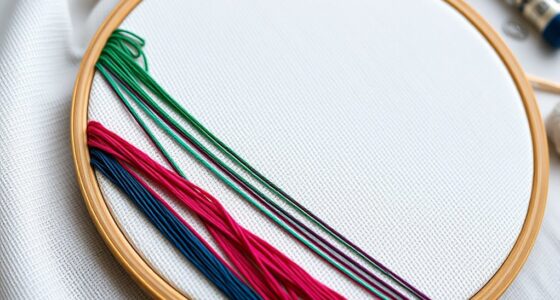
Choosing the Right Silk Fabric for Painting

Choosing the right silk fabric is essential for achieving vibrant and smooth silk paintings. Different silk fabric types, such as charmeuse, habotai, and crepe de chine, each have unique characteristics that affect your artwork. For vivid colors and sharp details, opt for silk with good dye absorption properties, like charmeuse or habotai, which absorb dyes evenly and intensify hues. Silk that doesn’t absorb dye well, like some textured or heavily woven fabrics, can result in dull colors and uneven shading. Your choice impacts how easily dyes penetrate the surface, influencing the final look of your painting. Selecting a silk fabric with ideal dye absorption properties ensures your colors stay vibrant and your brushstrokes stay smooth, giving you a beautiful canvas for your creative expression. Additionally, understanding the fiber content of the fabric can help you choose the best type for your specific painting techniques.

Pebeo Initiation Set 6X20ML Setasilk, Assorted (Model: 756485)
Water-based silk fabric paints
As an affiliate, we earn on qualifying purchases.
As an affiliate, we earn on qualifying purchases.
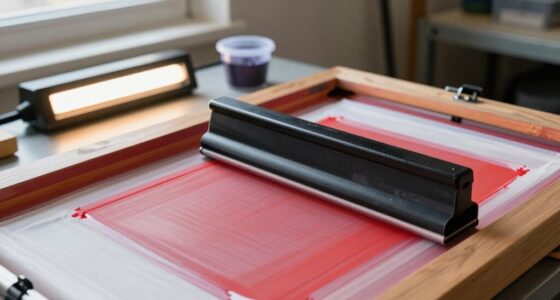
Preparing Your Silk Surface for Painting

Once you’ve selected the right silk fabric, preparing its surface guarantees your painting will turn out smoothly and vibrantly. Different silk fabric textures can affect dye absorption properties, so proper preparation is key. To ensure best results:
Proper silk surface prep ensures vibrant, smooth, professional-quality paintings.
- Stretch and secure the silk to prevent wrinkles and uneven dyeing.
- Clean the surface gently with a damp cloth to remove dust and oils, promoting better dye absorption.
- Treat the silk with a mordant or sizing solution if necessary, which can enhance dye adhesion and vibrancy, especially on delicate textures.
- Understand how fabric textures influence dye absorption and color vibrancy, which is essential for achieving desired visual effects.
These steps help create an even, receptive surface, guaranteeing your colors stay bright and your details crisp. Proper preparation is crucial for achieving professional-looking results in your silk painting project.
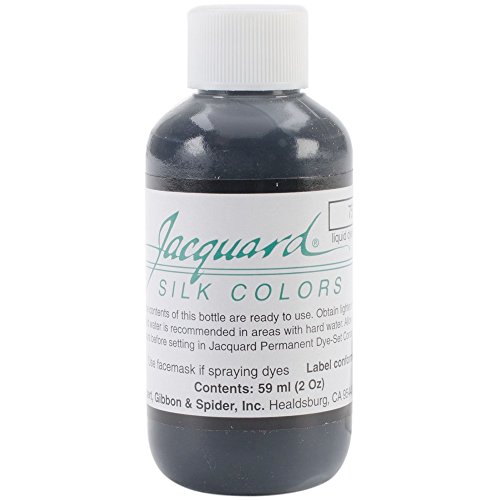
Jacquard Products Jacquard Silk Colors Dyes, 2-Ounce, Black
These dyes are used primarily for direct application silk painting! the essential rudiments for an infinite palette of…
As an affiliate, we earn on qualifying purchases.
As an affiliate, we earn on qualifying purchases.
Essential Tools and Materials for Silk Painting

To create stunning silk paintings, you’ll need a selection of essential tools and materials that guarantee precision and vibrant results. Start with high-quality silk fabric suited for silk dyeing, ensuring a smooth surface for even color application. You’ll also need silk dyes or paints designed specifically for dyeing silk, which provide bright, long-lasting colors. Fine brushes and applicators are vital for detailed work and creating intricate fabric embellishments. Masking fluids or resist techniques help preserve areas of your design. Additionally, keep a palette, water containers, and paper towels nearby for blending and cleaning. Having these tools ready guarantees your silk dyeing process is smooth and your fabric embellishments stand out. Proper knowledge of performance tuning can also help you understand how different techniques affect the final appearance and durability of your silk artwork. With the right materials, your silk painting projects will come to life with vibrant, professional-looking results.
Jacquard Silk Painting Kit with Gutta Resist
Excellent way to get started in the beautiful art of painting
As an affiliate, we earn on qualifying purchases.
As an affiliate, we earn on qualifying purchases.
Basic Techniques for Applying Color on Silk

Applying color to silk involves several fundamental techniques that help achieve vibrant and precise results. First, practice color blending by gently merging hues on the fabric to create smooth gradations. Using clean, damp brushes allows you to blend colors seamlessly without harsh lines. Second, master brush techniques such as stippling, feathering, and light strokes to control the texture and intensity of the paint. Third, work in layers, starting with light washes and gradually adding depth, which gives your design dimension and vibrancy. These methods help you manipulate the paint effectively while maintaining the silk’s delicate surface. Focus on gentle, controlled brushwork and thoughtful blending to bring your silk painting to life with rich color and smooth gradations.
Advanced Brushwork and Detailing Methods

Building on your basic techniques, mastering advanced brushwork allows you to add intricate details and nuanced textures to your silk paintings. One effective method is calligraphy brushwork, which gives your strokes expressive variation and fluidity. Use fine-tipped brushes to create delicate lines and subtle shading, enhancing depth and realism. Focus on control and precision to achieve intricate detailing, such as fine patterns or delicate foliage. Practice layering different brush pressures to produce rich textures and dynamic contrasts. Incorporate techniques like dry brush for rough textures or smooth, flowing strokes for elegant elements. By refining your brush control, you can elevate your artwork with sophisticated details that bring your silk painting to life. Understanding my art techniques can help you develop greater control and expressiveness in your brushwork.
Using Resist Techniques to Create Patterns

Resist techniques are essential for creating striking patterns on silk, as they allow you to preserve areas of the fabric while applying dyes or paints elsewhere. Resist dyeing involves applying a substance that blocks dye from penetrating certain areas, creating sharp, defined designs. To master pattern creation, consider these methods:
- Wax resist: Use hot beeswax or paraffin to draw detailed patterns, then dye. The wax resists the dye, resulting in crisp lines.
- Resist paste: Apply a thick resist paste with a brush or squeeze bottle to outline designs before dyeing.
- Silk masking: Use adhesive resist or masking tape to cover sections, preventing dye from reaching those areas.
These techniques help you create intricate, visually appealing designs while maintaining control over your pattern creation process. Fabric decorating markers can also be used to add fine details or touch-ups to your designs after dyeing.
Blending and Shading for Depth and Dimension

To create the illusion of depth and dimension in your silk painting, blending and shading techniques are essential tools. You’ll use color blending to smoothly transition between hues, enhancing realism. Shadow techniques add contrast, making elements pop and appear three-dimensional. Practice gradually building darker shades in areas where shadows fall, which gives your artwork greater depth. Remember, subtle transitions create a natural look. Use the table below to understand how blending and shadow techniques work together:
| Technique | Purpose | Effect |
|---|---|---|
| Color Blending | Smooth transitions between colors | Soft, realistic tones |
| Shading | Adding shadows for contrast | Depth and dimension |
| Layering | Building complexity | Rich, textured look |
Additionally, incorporating glycolic acid products into your skincare routine can improve skin texture and radiance, which can complement the visual depth achieved through painting by ensuring your skin looks healthy and luminous.
Fixing and Setting Colors on Silk

Once you’ve applied your colors, it’s essential to fix them securely on the silk. Using proper fixing techniques guarantees your design stays vibrant and intact over time. Learn the best methods to set your colors effectively without damaging your artwork. Incorporating cultural impact insights can also help you understand how technological advancements influence artistic expression and the importance of community engagement in creative practices.
Fixing Techniques for Silk
Proper fixing techniques are essential to guarantee that your silk painting retains its vibrant colors and remains durable over time. Using dye fixatives helps lock in the pigments, ensuring effective color stabilization. To achieve the best results, consider these key methods:
- Apply a commercial dye fixative after painting, following the manufacturer’s instructions for ideal fixation.
- Rinse the silk gently with cold water to remove excess dye and prevent color bleeding.
- Fix the colors by steaming or heat-setting, which helps solidify the dye molecules within the silk fibers.
- Materials available to suit personal preferences can enhance the fixation process and overall artwork quality.
These steps ensure your colors stay vibrant longer and resist fading. Proper fixing not only enhances durability but also preserves the artwork’s original brilliance.
Proper Color Setting Methods
Are you wondering how to guarantee your silk painting’s colors stay vibrant and lasting? Proper color setting methods are key. Start with careful color mixing to achieve the desired hue, ensuring your shades are balanced before applying to silk. Once your design is complete, dye fixation becomes essential. Use heat setting by placing the silk between sheets of paper and pressing with an iron on a low to medium setting, or follow the dye manufacturer’s instructions for fixation. Some dyes require steaming or soaking in fixatives to lock in color. These techniques help ensure the dye bonds permanently with the silk fibers, preventing fading or running over time. Proper dye fixation and precise color mixing give your silk painting a professional, durable finish that lasts. Additionally, understanding color fixation techniques can significantly improve the longevity of your artwork.
Care and Maintenance of Your Silk Artwork

To keep your silk artwork looking vibrant and beautiful over time, you need to handle its care and maintenance carefully. Proper care prevents dye extraction and preserves the integrity of different silk fiber types. Here are essential tips:
- Gently hand wash your silk painting in cold water with mild detergent, avoiding harsh chemicals that can cause dye extraction.
- When drying, lay the piece flat or hang it in a shaded area to prevent fading and damage to delicate silk fibers.
- Store your artwork in a cool, dry place away from direct sunlight, which can weaken silk fibers and fade colors over time.
- Being mindful of data privacy challenges and ethical considerations in handling digital images of your artwork can also help ensure its long-term preservation.
Understanding your silk fiber types helps determine the best cleaning approach. Avoid machine washing and vigorous scrubbing to maintain your artwork’s vibrancy.
Creative Ideas and Projects to Inspire Your Art

Explore how vibrant color techniques can make your silk paintings stand out and express your creativity fully. Try pairing silk with different fabrics to create unique textures and effects that surprise and inspire. These ideas will help you experiment and develop your own signature style in silk art. Incorporating diverse materials can further enhance your projects and add distinctive touches to your work.
Vibrant Color Techniques
Have you ever wondered how to make your silk paintings burst with vivid, eye-catching colors? One effective way is by mastering vibrant color techniques. First, experiment with metallic accents to add shimmer and depth, applying metallic dyes or foils for a striking effect. Second, leverage dye resist techniques like wax or gutta to create sharp contrast and intricate patterns, allowing bright colors to pop against resistant areas. Third, layer colors carefully, letting each dry completely before adding the next to enhance intensity and richness. Combining these methods transforms your silk art into a luminous masterpiece. Using metallic accents and dye resist techniques lets you push the boundaries of color vibrancy, giving your work an energetic, dynamic feel that truly captures attention. Additionally, understanding how to prepare your fabric with appropriate pimple patches can help ensure a smooth, damage-free surface for painting.
Unique Fabric Pairings
Pairing silk with unexpected fabrics can elevate your artwork and create stunning visual effects. Combining silk with textured or matte fabrics like burlap, linen, or cotton allows for unique fabric dyeing techniques that produce interesting color variations and depth. Textile printing on these contrasting surfaces can add intricate patterns that stand out against the smooth silk. For example, you might dye silk alongside rougher fabrics to emphasize their differences or use textile printing to transfer motifs onto mixed fabrics, blending textures seamlessly. Experimenting with fabric pairings encourages you to explore new color interactions and surface qualities, resulting in mesmerizing art pieces. Incorporating texture contrast can further enhance the visual interest of your work and highlight the distinct qualities of each fabric. These creative combinations push your boundaries and open up fresh possibilities for your silk painting projects.
Frequently Asked Questions
Can I Use Synthetic Dyes for Silk Painting?
Yes, you can use synthetic dyes for silk painting, but keep in mind that their color fastness might not be as good as professional silk dyes. Synthetic dyes are often more affordable and easier to find, making them a popular choice for beginners. However, to guarantee your artwork stays vibrant over time, test the dyes first and follow proper setting techniques to improve color fastness on your silk fabric.
How Long Does Silk Paint Typically Last?
A stitch in time saves nine, so taking care of your silk painting guarantees longevity. Typically, silk paint lasts several years if you follow proper care, but color fading can occur over time due to exposure to sunlight and washing. To maximize fabric longevity, wash gently and avoid direct sunlight. With proper maintenance, your artwork can remain vibrant for many years, making it a treasured piece that stands the test of time.
Is Silk Painting Suitable for Beginners?
Yes, silk painting is suitable for beginners. You’ll find it easy to learn, especially since you can practice simple designs while exploring color blending techniques. Start with quality fabric selection, like smooth silk, to make your work easier. Don’t worry about mistakes; they’re part of the learning process. With patience and practice, you’ll develop your skills and create beautiful, vibrant silk artworks.
What Are Common Mistakes to Avoid in Silk Painting?
You should watch out for common mistakes like color bleeding, which happens when colors run together, and improper drying, leading to smudges or uneven finishes. To avoid these, use quality dyes and let your piece dry completely in a flat, dust-free area. Don’t rush the drying process or overload your brush with paint. Paying attention to these details guarantees your silk painting turns out vibrant and professional-looking.
Can I Wash Silk Paintings Without Damaging the Colors?
Sure, you can wash silk paintings without damaging the colors if you handle them carefully. To prevent pigment peelings, prioritize gentle washing techniques and consider colorfastness concerns. Use cool water and mild, silk-friendly detergents, avoiding harsh scrubbing. Hand wash softly and avoid excessive agitation, ensuring your artwork stays vibrant and vivid. This careful care keeps your silk painting pristine, preserving its beauty beautifully beyond the brushstroke.
Conclusion
Now that you’ve revealed the secrets of silk painting, your creations will leap off the fabric with vibrant life and stunning detail. Imagine your masterpieces transforming plain silk into breathtaking works of art that captivate every eye. With your newfound skills, you’re unstoppable—turning simple fabrics into dazzling, shimmering tapestries of color and imagination. Get ready to amaze the world, one exquisite silk piece at a time. Your artistic journey has just begun—dive in and make magic happen!