To master DIY knotting and tassel techniques, start with the basics like square knots, lark’s head, and overhand knots, practicing consistent tension for neat projects. Create tassels using yarn or thread, layering colors and adding beads or charms for personalized touches. Secure and finish your knots with glue, trimming, and wrapping for durability and a professional look. Continue exploring these methods to reveal endless creative possibilities and perfect your craft skills.
Key Takeaways
- Practice fundamental knots like square, lark’s head, and overhand to build a strong knotting foundation.
- Use medium-weight fibers and secure knots tightly to create durable and polished tassels.
- Experiment with color layering, size variation, and decorative beads for personalized design effects.
- Finish knots with glue, trimming, and wrapping threads to ensure long-lasting, professional-looking results.
- Combine different knot styles and tassel arrangements to enhance overall textile art projects.
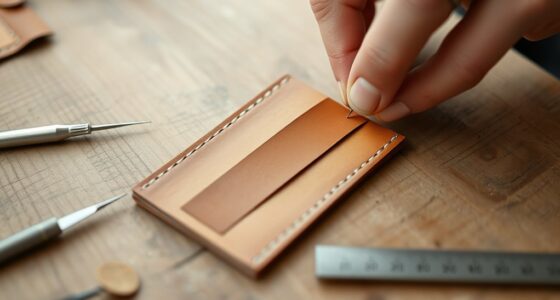
DIY tassel making kit
As an affiliate, we earn on qualifying purchases.
As an affiliate, we earn on qualifying purchases.
Basic Knotting Techniques for Beginners
If you’re new to knotting, starting with simple techniques can build a solid foundation for more complex projects. Focus on maintaining consistent knot tension to guarantee your pieces look neat and professional. Practice basic knot variations like the square knot, lark’s head, and overhand knot. These form the core of many macramé designs and help you understand how different knots behave. Pay attention to how tight or loose each knot feels, as this affects the overall appearance. Experimenting with knot tension and variations helps you develop a steady hand and better control. Once you’re comfortable with these basics, you’ll find it easier to progress to more intricate patterns and styles. Mastering these foundational techniques is essential for successful DIY knotting projects. Additionally, understanding primitive weapons can enhance your resourcefulness and adaptability in various crafting or survival situations.
macrame knotting tools
As an affiliate, we earn on qualifying purchases.
As an affiliate, we earn on qualifying purchases.
Creating Elegant Macramé Patterns
To create elegant macramé patterns, you need to pick the right knots that suit your design. Experiment with combining different textures and colors to add depth and interest. These choices will help you craft stunning, cohesive pieces that stand out.
Choosing the Right Knots
Have you ever wondered how the right knot can transform a simple piece of cord into an elegant macramé pattern? Choosing the appropriate knots is essential for both style and strength. Consider fiber blending, as combining different fibers can enhance knot durability, ensuring your design lasts. For delicate projects, opt for secure knots like the square knot, which provides stability and a clean look. If you want a more textured pattern, try variations like the half hitch or lark’s head knot. The key is to select knots that match your project’s purpose and the fiber types you’re using. Proper knot choice not only improves the appearance but also guarantees your creation remains sturdy over time. Additionally, understanding Gold IRA safety tips can help protect your investments from scams and hidden fees, ensuring your craft projects are as secure as your financial plans. Mastering these selections will elevate your macramé craftsmanship.
Combining Textures and Colors
Combining different textures and colors can elevate your macramé designs from simple to sophisticated. To create stunning patterns, consider these techniques:
- Use color blocking to define sections with bold, contrasting shades, making your piece pop.
- Incorporate metallic accents, like gold or silver threads, to add a touch of elegance and shimmer.
- Mix smooth and textured fibers for visual interest and depth.
- Experiment with layering different hues and materials to craft complex, eye-catching designs.
- Pay attention to color harmony to ensure your palette creates a balanced and pleasing visual effect.
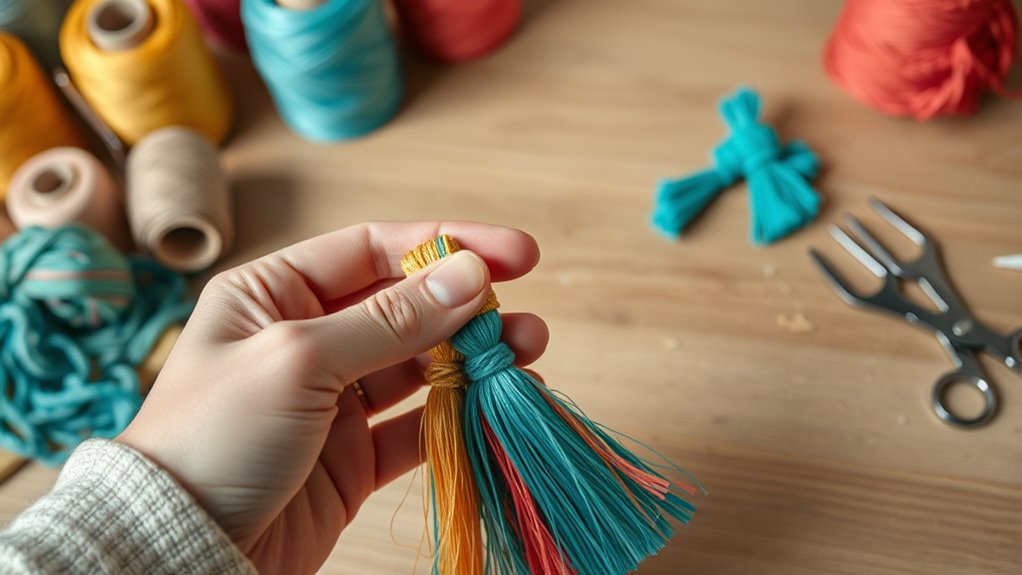
yarn and thread for tassels
As an affiliate, we earn on qualifying purchases.
As an affiliate, we earn on qualifying purchases.
Making Simple Tassels With Yarn and Thread

To make simple tassels with yarn and thread, start by choosing the right materials for your project. Then, learn how to tie and finish your tassels neatly for a polished look. These steps guarantee your tassels are both attractive and durable.
Selecting Yarn and Thread
Choosing the right yarn and thread is essential for creating attractive, durable tassels. Your fiber selection impacts the look and strength of your finished piece. When selecting yarn, opt for medium weight fibers like embroidery or craft yarns for easy handling. For thread types, consider options such as cotton, silk, or polyester, depending on your desired sheen and durability. Here are some tips to guide your choice:
- Match fiber weight to tassel size for balance.
- Select thread types that complement your yarn’s texture.
- Choose fiber colors that align with your project’s palette.
- Consider fiber durability for items exposed to wear or outdoor elements.
- Be aware of fiber strength when choosing materials to ensure your tassels hold up over time.
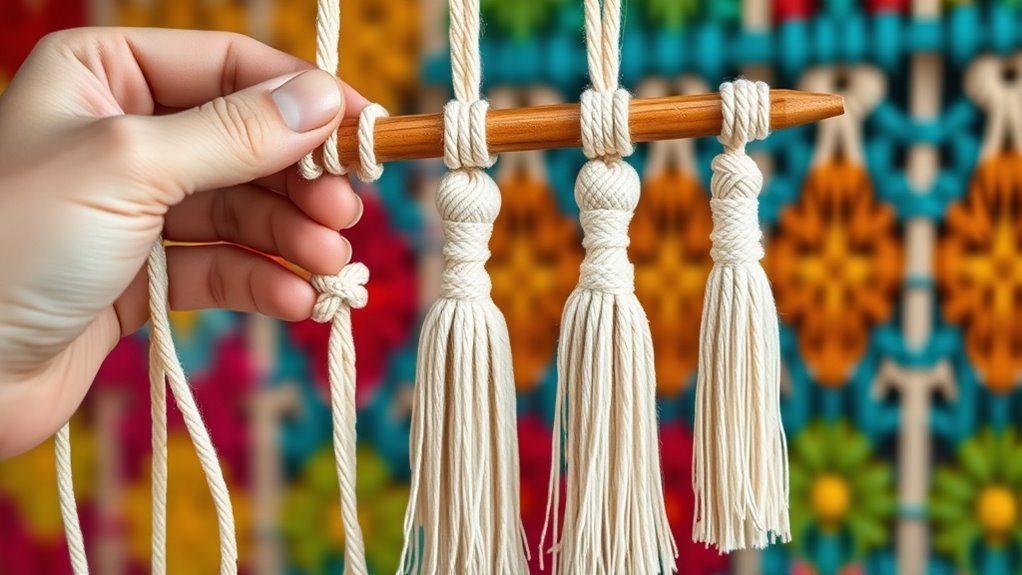
Tying and Finishing
Once you’ve selected your yarn or thread, the next step is to tie and finish your tassel securely. To guarantee knotting safety, use a strong, tight knot at the top of the tassel. This prevents slipping and maintains the tassel’s shape. Remember, tassel history shows that simple knots have been used for centuries to create durable decorative accents. Wrap the yarn around your fingers or a small object to form the desired length, then tie a secure knot. Trim the ends evenly for a clean look. Here’s a quick visual guide:
| Step | Action | Tips |
|---|---|---|
| 1 | Wrap yarn around fingers | Keep it tight but not too tight |
| 2 | Tie a knot at the top | Double knot for safety |
| 3 | Trim ends | Maintain even length |
Additionally, ensuring the knotting techniques are properly executed can significantly enhance the durability of your tassels.
beads and charms for crafts
As an affiliate, we earn on qualifying purchases.
As an affiliate, we earn on qualifying purchases.
Combining Knots and Tassels for Unique Designs

Combining knots and tassels opens up a world of creative possibilities for your designs. You can experiment with intertwining design to create textured, layered pieces that stand out. To get started, try:
- Using different knot styles to secure tassels at various lengths for visual interest.
- Incorporating tassel variations by mixing small and large tassels within a single piece.
- Intertwining multiple knots around a tassel for a complex, textured look.
- Combining simple knots with decorative knots to enhance the overall design.
- Experimenting with knot techniques to create different textures and effects in your projects.
This approach allows you to craft unique, personalized pieces that showcase your style. Play with different knot and tassel combinations to discover what best fits your aesthetic and desired effect.
Using Beads and Charms to Enhance Your Tassels
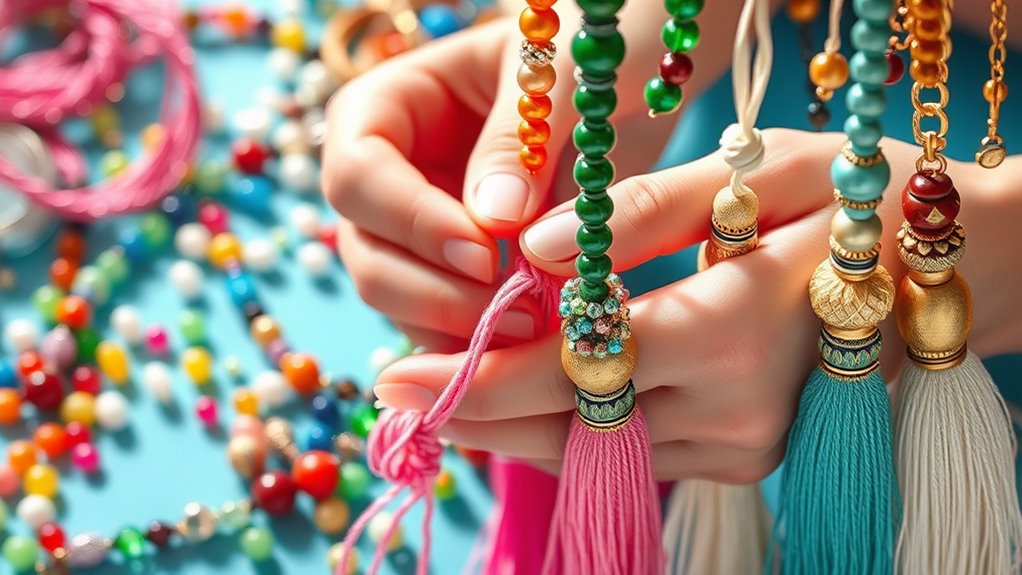
Adding beads and charms to your tassels instantly elevates their appearance, giving your designs a personalized and polished touch. When considering bead placement, think about creating a balanced look—spacing beads evenly or clustering them for visual interest. Secure each bead tightly to prevent slipping and ensure durability. Charm selection is key; choose charms that complement your overall design, whether it’s a meaningful symbol or a decorative accent. You can dangle charms at the top of the tassel for a subtle shimmer or hang them from the tassel’s end for a more prominent feature. Experiment with different bead sizes and shapes to add texture. The right combination of bead placement and charm selection transforms a simple tassel into a unique accessory. Additionally, understanding bead attachment techniques ensures your embellishments stay secure over time.
DIY Cord Wrapping and Decorative Knots
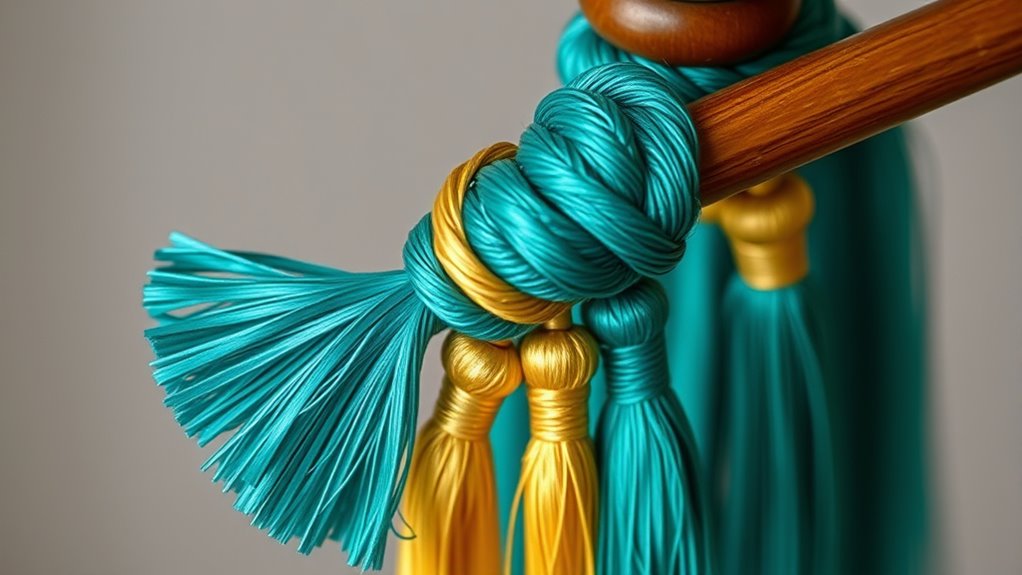
DIY cord wrapping and decorative knots are simple techniques that can instantly elevate your tassel projects. They add texture and style, perfect for fringe embellishments. To get started:
- Choose a colorful cord and wrap it around the tassel’s neck using basic cord wrapping techniques, creating a sleek finish.
- Use decorative knots like the lark’s head or square knot to secure the cord, adding visual interest.
- Incorporate contrasting cords for extra flair, wrapping them in intricate patterns around the tassel.
- Finish with a small knot or bead to hide the end and guarantee durability.
- Exploring textile art techniques can inspire new ways to enhance your tassel designs with creative details.
These techniques help create unique details and professional-looking tassels, making your craft stand out. Mastering cord wrapping techniques open up endless creative possibilities for your DIY projects.
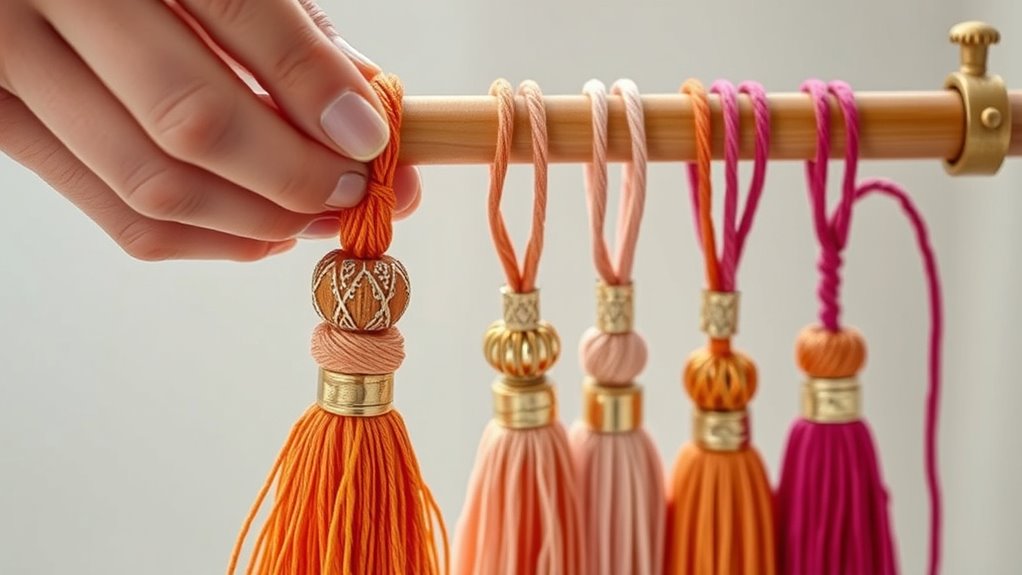
Crafting Layered and Multi-Color Tassels

Layering and mixing multiple colors can transform simple tassels into eye-catching accents. To create layered color schemes, select contrasting or complementary shades and arrange them in a deliberate order. Use multi strand tassels by attaching different colored strands together before knotting or braiding. This technique adds depth and visual interest to your tassels, making them stand out on jewelry, décor, or accessories. When working with layered color schemes, guarantee each strand is securely tied to prevent shifting or blending of colors over time. Play with the length and placement of each color to achieve the desired layered effect. Experimentation helps you develop personalized, vibrant tassels that elevate your craft projects.
Tips for Securing and Finishing Your Knots and Tassels
To guarantee your knots and tassels stay secure and look polished, you should focus on proper finishing techniques. First, ensure you tightly secure the ends of your cords to prevent fraying edges. Second, apply a small amount of clear glue or fabric sealant to the securing ends for extra hold. Third, trim any excess length carefully, leaving a small tail to avoid unraveling. Fourth, consider wrapping a fine thread around the knot or tassel base before securing it, which adds durability and a clean appearance. These steps help maintain your project’s integrity, preventing fraying edges and ensuring your knots and tassels stay in place over time. Proper finishing techniques make your craft both durable and professional-looking. Additionally, using quality materials can significantly enhance the longevity and appearance of your knots and tassels.
Frequently Asked Questions
What Are the Best Types of Cords for Tassel Making?
You should choose fiber options like cotton, jute, or silk for tassel making, as they offer a variety of textures and appearances. Opt for cords with a thickness that matches your design—thicker cords create bold tassels, while thinner ones give a delicate look. Consider how the fiber and thickness complement your project’s style, ensuring the cords are sturdy enough to hold their shape without being too stiff or floppy.
How Can I Prevent Knots From Slipping or Loosening?
It might seem like a coincidence, but securing knots is easier when you use quality cords. Always tighten your knots firmly and consider adding a dab of clear glue or fabric adhesive for extra security. Double knots can also prevent slipping or loosening over time. By focusing on these simple steps, you guarantee your tassels stay neat and secure, giving your project a professional, lasting finish.
Are There Eco-Friendly Materials Suitable for DIY Tassels?
Yes, you can use eco-friendly materials for DIY tassels. Sustainable fibers like organic cotton, hemp, or bamboo are excellent choices because they’re natural materials that are biodegradable and renewable. These fibers not only reduce environmental impact but also add a unique texture to your tassels. By choosing natural materials, you’re making a conscious decision to support sustainability while creating beautiful, eco-friendly tassels that last.
How Do I Troubleshoot Uneven or Crooked Tassels?
Think of your tassel as a delicate dance troupe; if one dancer steps out of line, the entire performance suffers. To fix crooked tassels, gently straighten the strands, ensuring even tassel symmetry. Use a small comb or your fingers to realign uneven fibers. If needed, trim any uneven ends and re-tie the top knot tightly. With patience, you’ll master fixing crooked tassels and keep your project looking polished.
Can I Recycle or Repurpose Old Jewelry Into Tassels?
Yes, you can definitely recycle old jewelry into tassels. Jewelry repurposing is a fun way to create sustainable crafts, giving new life to pieces you no longer wear. You can detach beads, charms, or chains from jewelry and incorporate them into your tassel designs. This approach not only reduces waste but also adds unique, personalized touches to your projects, making each tassel a meaningful accessory.
Conclusion
With these knotting and tassel techniques, you’re ready to turn simple materials into stunning accessories. Don’t forget, practice makes perfect, and every knot you tie adds a personal touch to your creations. Keep experimenting and combining different elements to develop your own style. Remember, Rome wasn’t built in a day, so be patient and enjoy the process. Before long, you’ll be crafting beautiful, unique pieces that showcase your creativity!