
To make a DIY glass mosaic lamp, start by gathering colorful glass pieces, cutting tools, and safety gear. Design your pattern on a flat surface, then clean and prepare your lamp base. Carefully arrange and glue the glass pieces, ensuring they fit snugly. Once the adhesive dries, apply grout to fill gaps and seal the surface. Finish by attaching the electrical components and testing your lamp—continue following these steps to create a stunning mosaic masterpiece.
Key Takeaways
- Select and arrange colorful glass pieces on a prepared lamp surface following a chosen pattern or theme.
- Secure glass pieces with appropriate adhesive, pressing firmly and allowing proper curing time.
- Fill gaps between pieces with grout for durability and a polished finish, then clean excess grout thoroughly.
- Assemble the lamp, ensuring electrical wiring is safe, insulated, and compliant with safety standards.
- Finish with cleaning, sealing, and installing lighting components like LED bulbs for a stunning, functional mosaic lamp.

BOHMR DIY Turkish Mosaic Lamp Kit, Stained Glass Table Lamp Making Kit- Easy and Fun, No Experience Needed, Mosaic Art & Craft Project Kits for Adults & Teens, Make Your Own Table Lamp,Blue
【Create Your Unique Masterpiece】Unleash your creativity with BOHMR DIY Turkish Mosaic Lamp Kit, designed for crafting a personalized…
As an affiliate, we earn on qualifying purchases.
As an affiliate, we earn on qualifying purchases.
Gathering Materials and Tools
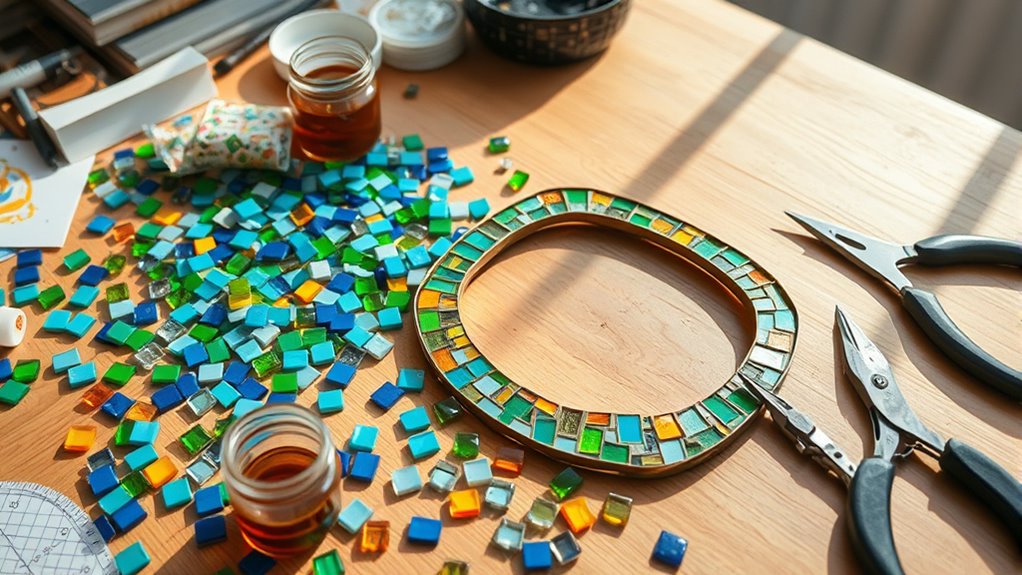
Before you begin your DIY glass mosaic lamp, it’s important to gather all the necessary materials and tools. Start with different types of glass, such as stained, colored, or clear tiles, depending on your design. Having a variety of glass pieces allows for creativity and unique patterns. You’ll also need tools for cutting, like glass cutters, nippers, or tile pliers, to shape the glass accurately. Safety gloves and eye protection are essential when handling sharp glass edges. Additionally, gather a sturdy base or frame for your lamp, adhesive suitable for glass, grout, and sealing materials. Having everything ready beforehand guarantees a smooth workflow and helps you focus on creating a beautiful mosaic without interruptions. Incorporating high-quality tools and materials can also improve the overall outcome of your project.

Csdtylh 1100 Pcs Mosaic Tiles, Glass Mosaic Tiles for Crafts Bulk, Stained Mosaic Glass Pieces, Mosaic Supplies for Home Decoration, Art Crafts, DIY Projects, Transparent (Mixed Shape)
Package&Size: 1100 PCS Mosaic tiles. Square shape is 1 by 1 cm(approx.750 pieces), Rhombus shape is 1 by…
As an affiliate, we earn on qualifying purchases.
As an affiliate, we earn on qualifying purchases.
Designing Your Mosaic Pattern
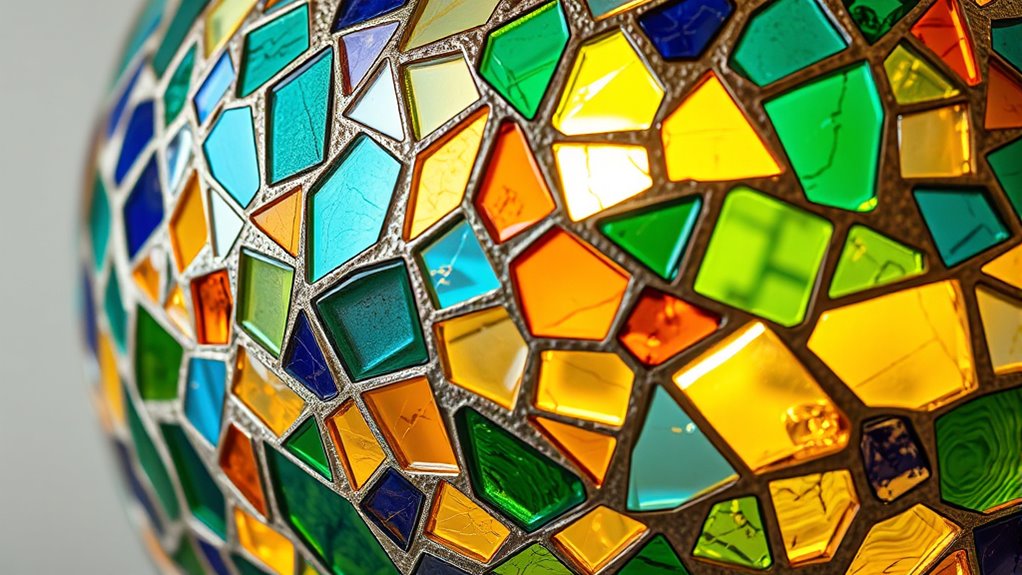
When designing your mosaic pattern, consider your color scheme and how different shades will complement each other. Think about how to arrange the glass pieces to create a balanced and eye-catching design. Don’t forget to incorporate personal themes or symbols that make your lamp uniquely yours.
Choosing Color Schemes
Choosing the right color scheme is essential to creating a compelling and visually balanced mosaic lamp. You want colors that establish harmony and highlight key areas. Start with a base palette that reflects your mood or theme. Use color harmony principles, like complementary or analogous schemes, to guide your choices. Accent accents, such as brighter or contrasting tiles, add visual interest and depth. Here’s a simple example layout:
| Theme | Main Colors | Accent Accents |
|---|---|---|
| Coastal | Blue, teal, sandy | White, coral |
| Earthy | Brown, green, beige | Rust, terracotta |
| Vibrant | Red, yellow, purple | Gold, silver |
This table helps visualize how to balance your palette and make your mosaic truly stand out. Incorporating contrast ratios ensures the colors work well together and enhance overall visual appeal.
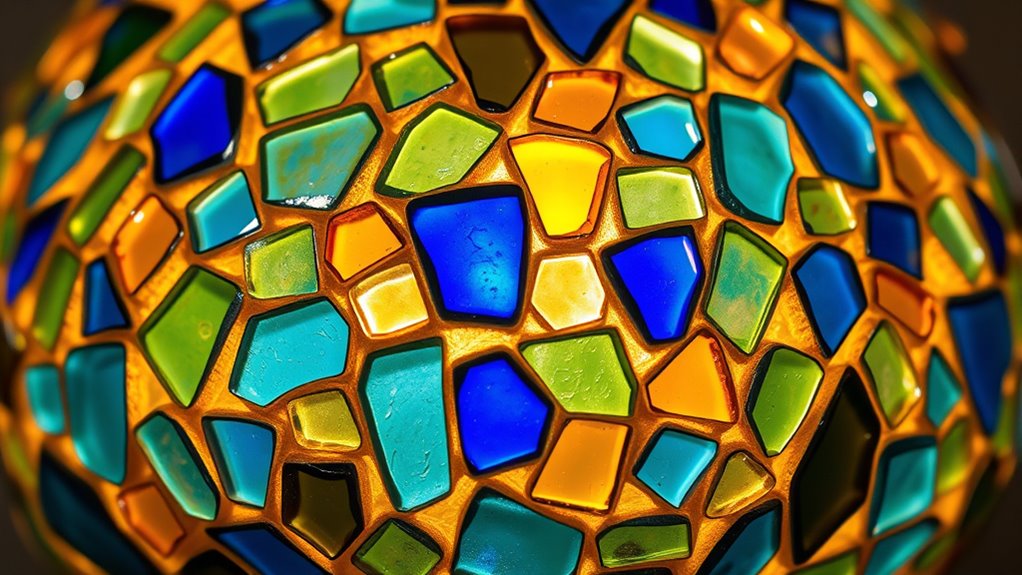
Arranging Glass Pieces
Designing your mosaic pattern begins with visualizing how each glass piece will fit together to create a cohesive image or abstract design. Pay attention to glass texture, as smooth pieces reflect light differently than textured ones, adding depth and interest. When arranging, consider mosaic symmetry to achieve balance in your design, whether you prefer a mirrored, radial, or asymmetrical layout. Think about how colors and textures interact, ensuring they complement each other and enhance your overall vision. Lay out the pieces without adhesive first, adjusting as needed to refine the pattern. This step allows you to experiment with placement, ensuring that each piece contributes to the harmony of the design. Incorporating mosaic symmetry can help create a more professional and visually appealing result. A well-arranged pattern forms the foundation for a stunning, professional-looking mosaic lamp.
Incorporating Personal Themes
Incorporating personal themes into your mosaic pattern adds meaningful depth and uniqueness to your lamp. You can express personal symbolism by choosing images or colors that hold special significance, making your piece truly one-of-a-kind. Consider integrating cultural motifs that resonate with your background or interests, adding layers of meaning and storytelling to your design. Think about symbols that evoke emotions or memories, and translate them into glass pieces with vibrant colors and shapes. This approach not only enhances the visual appeal but also creates a connection between your personal identity and your artwork. By thoughtfully selecting motifs and symbols, you craft a mosaic that reflects your story, transforming your lamp into a meaningful conversation piece. Additionally, selecting themes that are popular at seafood restaurants and festive gatherings can inspire vibrant and lively designs that evoke celebration and joy.

Glass Cutter 2mm-20mm, Upgrade Glass Cutter Tool, Pencil Style Oil Feed Carbide Tip for Glass Cutting/Tiles/Mirror/Mosaic.
【UPGRADED CUTTER HEAD 】Are you worried about unsmooth glass cutting? Now our product can crack this problem as…
As an affiliate, we earn on qualifying purchases.
As an affiliate, we earn on qualifying purchases.
Preparing the Glass Surface
Before applying your mosaic, you need to prepare the glass surface properly. Start by cleaning it thoroughly to remove any dirt or grease that could interfere with adhesion. Then, lightly sand the surface to create a better grip for the glue and mosaic pieces. Incorporating techniques from tuning practices can help ensure a smooth and durable finish.
Cleaning the Glass Thoroughly
To guarantee your mosaic lamp looks professional and the adhesive bonds properly, you need to clean the glass thoroughly before starting. Proper glass cleaning is essential for effective surface preparation, ensuring no dust, fingerprints, or oils interfere with adhesion. Use a gentle glass cleaner or a mixture of water and isopropyl alcohol to wipe down the entire surface. Avoid harsh chemicals or abrasive scrubbers that could scratch or damage the glass. Dry the surface completely with a lint-free cloth to prevent streaks or residue. Taking the time to clean the glass properly creates a smooth, clean surface that helps your mosaic tiles stay securely in place. This initial step is vital for achieving a polished, durable finish on your DIY mosaic lamp. Ensuring the glass is free of contaminants is key to a successful project.
Sanding for Better Adhesion
Sanding the glass surface creates tiny abrasions that improve adhesion by giving the adhesive a better grip. This process enhances the surface texture, increasing adhesion strength between the glass and the mosaic pieces. Use fine-grit sandpaper and gentle pressure to avoid scratches or damage. To help guide you, here’s a quick overview:
| Step | Tip |
|---|---|
| 1 | Use light, consistent strokes for even texture. |
| 2 | Focus on areas where adhesive will be applied. |
| 3 | Clean the surface afterward to remove dust. |
| 4 | Ensure no sharp edges remain. |
| 5 | Test adhesion on a small section first. |
Proper sanding results in a rougher surface, making your mosaic more durable and securely bonded. Additionally, surface preparation plays a crucial role in ensuring your mosaic pieces adhere properly and last longer.

GOGERS E12 LED Bulb for Turkish Mosaic Lamp Replace E12 30 Watt Halogen Equivalent Warm White 3000K Non-dimmable Candle Base Light Bulbs for Ceiling Fan, Chandelier (Warm White, 2 Pack)
Energy Saving: This 4W E12 LED Bulb (not-dimmable) saves 90% of energy, well replace 40Watt e12 candelabra bulb.
As an affiliate, we earn on qualifying purchases.
As an affiliate, we earn on qualifying purchases.
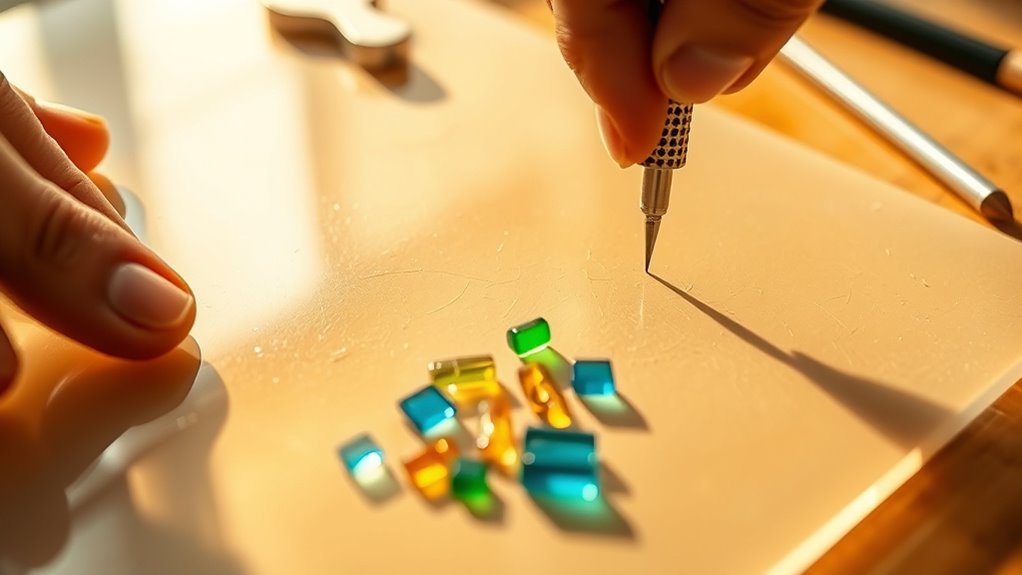
Applying the Mosaic Pieces
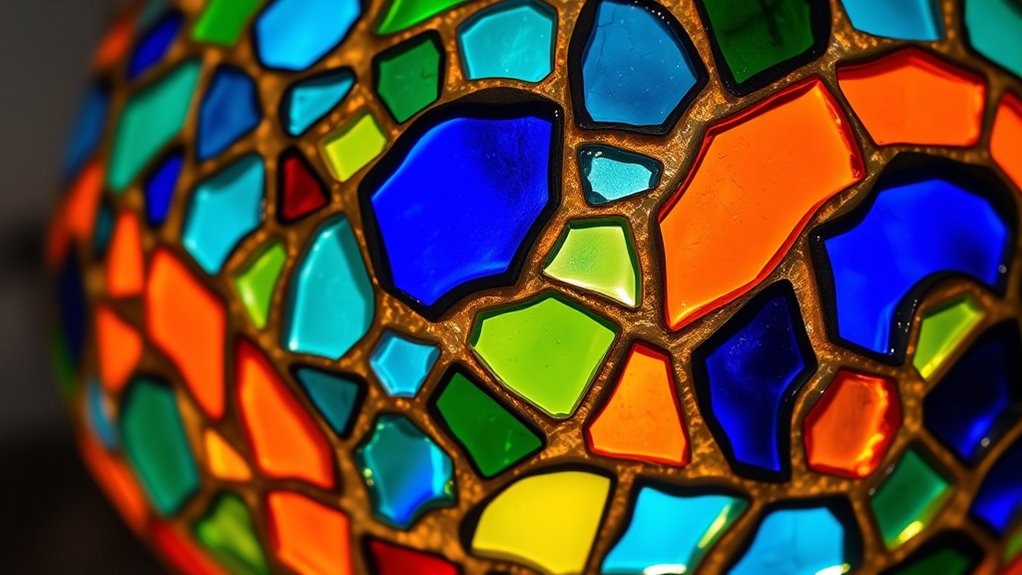
Once you’ve prepared your mosaic design, it’s time to start applying the glass pieces. Use your glass cutting skills to shape each piece accurately, guaranteeing they fit snugly within your pattern. Place the pieces carefully onto your surface, pressing gently to secure them. Keep in mind that the arrangement of glass pieces will influence light diffusion through your lamp, so consider spacing and orientation for maximum glow. Small gaps or uneven placements can affect the overall aesthetic and light quality. Take your time to align each piece properly, adjusting as needed before final placement. This step is vital for creating a smooth, cohesive mosaic that enhances the lamp’s visual appeal and guarantees even light dispersion once it’s illuminated. Being mindful of efficient design techniques can further improve your project’s overall effectiveness.
Gluing and Grouting the Mosaic
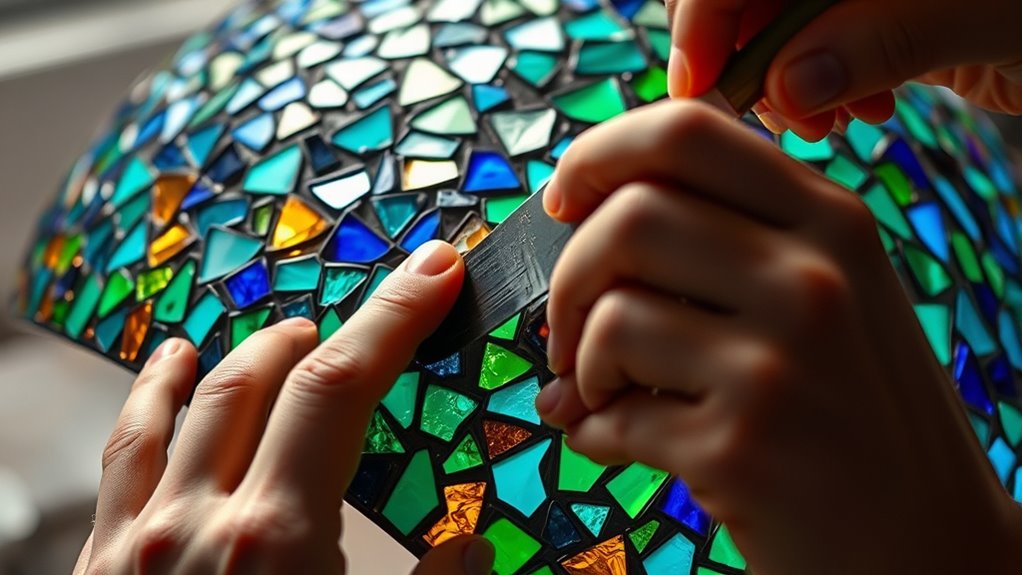
After arranging your mosaic pieces carefully, it’s time to secure them in place with glue. Choose the right adhesive type—whether thinset, epoxy, or craft glue—based on your mosaic material and project needs. Here are the key steps:
- Apply adhesive evenly using a spatula or brush.
- Press each piece firmly onto the surface, ensuring no gaps.
- Allow the adhesive to cure fully, following manufacturer instructions.
- Once secure, prepare your grout by mixing it to the correct consistency.
- Using a proper technique, wipe away excess grout with a damp sponge and smooth the surface for a uniform finish. Proper adhesive and grout techniques ensure your mosaic stays durable and looks polished.
Assembling and Finishing Your Lamp
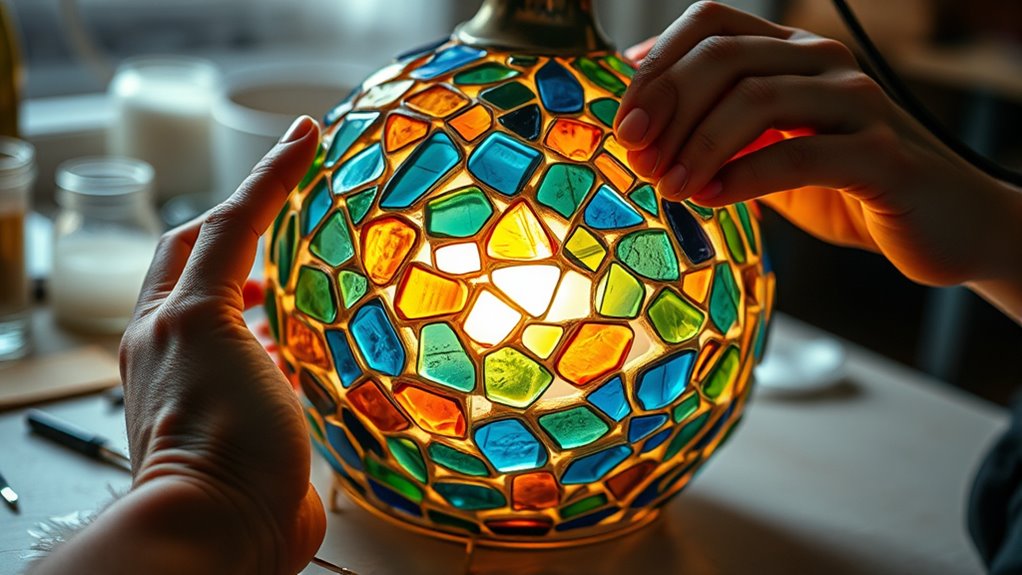
As you begin assembling your mosaic lamp, focus on carefully aligning the glass pieces to create a seamless design. Once the mosaic is complete, attach the lamp base securely, guaranteeing stability. When selecting lighting options, consider LED bulbs for energy efficiency and low heat, which also helps prevent damage to your mosaic. Before plugging in, double-check all wiring and connections for safety precautions. Make sure the electrical components are properly insulated and that no wires are exposed. If your lamp has a switch or dimmer, install it according to the manufacturer’s instructions. Finish by sealing any gaps and cleaning the surface to highlight your work. Proper assembly and attention to safety will assure your best laundry detergents are both beautiful and safe to use.
Frequently Asked Questions
Can I Use Recycled Glass for My Mosaic Lamp?
Yes, you can definitely use recycled glass for your mosaic lamp. Recycled glass benefits include being eco-friendly and reducing waste, making your project more sustainable. When sourcing eco-friendly materials, look for clean, smooth pieces that fit well together. Using recycled glass not only enhances your lamp’s unique look but also supports environmental conservation. Just make sure to clean and prepare the glass properly for safe, beautiful mosaics.
How Do I Ensure Even Lighting With My Mosaic Design?
Did you know that proper light diffusion can improve your lamp’s brightness by up to 30%? To guarantee even lighting with your mosaic design, pay attention to bulb placement—centered and evenly spaced works best. Use diffusers or frosted glass to spread light smoothly, avoiding dark spots. Test your setup before sealing, adjusting bulb position if necessary, so every piece of your mosaic is beautifully illuminated and balanced.
What Safety Precautions Should I Take During the Project?
You should always wear protective gear like gloves and safety glasses to prevent injuries. Make sure your workspace is well-ventilated and free of clutter to avoid accidents. Keep sharp tools away from children or pets. Use a stable surface for working and handle glass carefully to prevent cuts. Regularly check your tools and materials for damage, and follow safety instructions on adhesives and other supplies to guarantee a safe project.
How Long Does It Typically Take to Complete a Lamp?
It typically takes about 10 to 20 hours to complete your glass mosaic lamp, depending on your project planning and experience. You should allocate time for material sourcing, gathering all your glass pieces, adhesive, and tools, then spend several sessions arranging and securing the mosaic. Rushing can lead to mistakes, so plan your work in stages, allowing ample drying time, ensuring a quality, beautiful finished lamp.
How Do I Maintain and Clean the Finished Mosaic Lamp?
Your mosaic lamp is a shining jewel, and caring for it keeps its beauty alive. To maintain its sparkle, dust it gently with a soft cloth regularly. For cleaning tips, use a damp cloth with mild soap—avoid harsh chemicals that can dull the glass. Implement simple maintenance routines like checking for loose tiles and cleaning the base. With care, your lamp remains a mesmerizing glow for years to come.
Conclusion
Now that you’ve completed your DIY glass mosaic lamp, you’re ready to enjoy your stunning handcrafted piece. With patience and creativity, you’ve transformed simple glass and tiles into a beautiful functional art. Isn’t it rewarding to create something unique with your own hands? Keep experimenting with different patterns and colors, and let your imagination shine. Your custom lamp isn’t just a light source — it’s a reflection of your style and craftsmanship.