To DIY block print on fabric, start by gathering supplies like fabric, dye or paint, carving tools, brushes, and containers. Design your stamps with simple motifs and prepare your fabric by washing and ironing it. Carefully apply ink or fabric paint to your carved blocks, pressing firmly to create clear patterns. Allow your design to dry and fix it properly. If you keep practicing, you’ll discover more tips to improve your fabric printing skills.
Key Takeaways
- Gather clean fabric, carving tools, fabric dye or ink, and brushes for designing and printing.
- Design and carve simple motifs or patterns on carving blocks or stamps.
- Prepare fabric by washing, drying, and ironing to ensure a smooth surface for printing.
- Apply ink or fabric paint evenly to the carved block and press firmly onto fabric for a clear print.
- Allow prints to dry completely, then fix the design with gentle heat or steaming for durability.
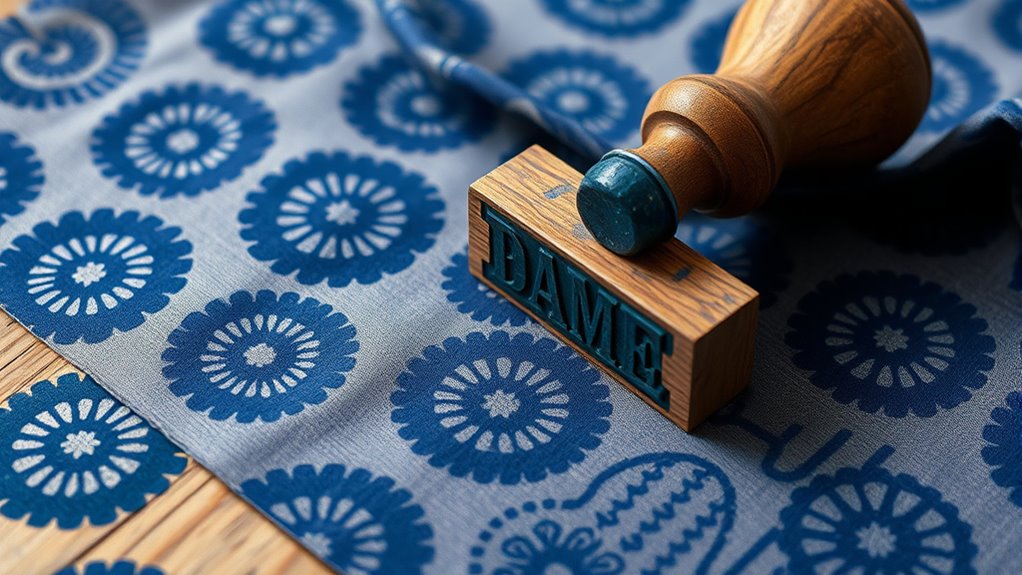
fabric block printing kit
As an affiliate, we earn on qualifying purchases.
As an affiliate, we earn on qualifying purchases.
Gathering Supplies and Tools
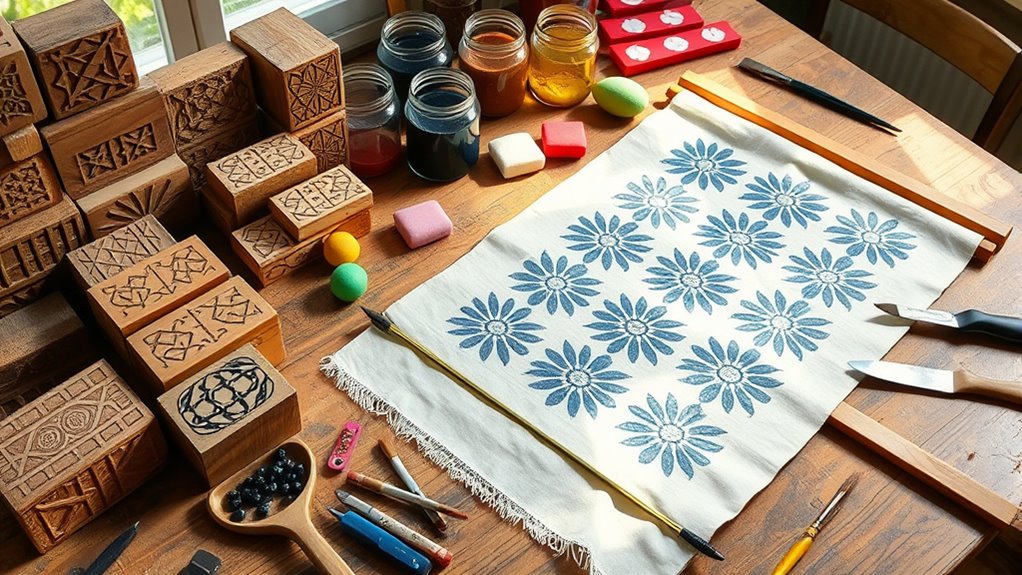
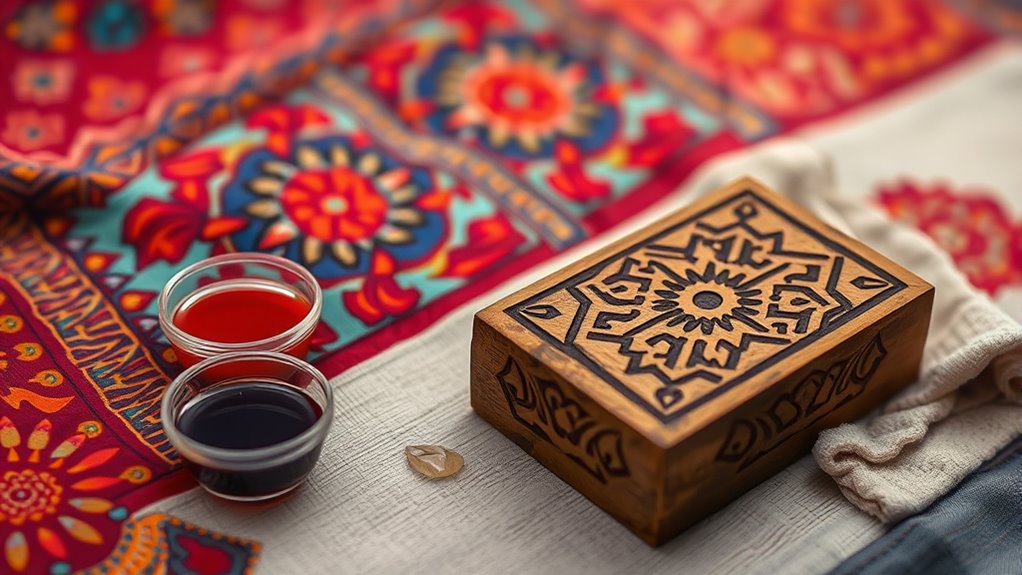
Before you begin your block printing project, gathering all the necessary supplies and tools is vital. Start with fabric dyeing supplies, such as dye, gloves, and stirring sticks, to guarantee vibrant, consistent colors. You’ll also need fabric, preferably pre-washed and dried, for your printing. Keep textile storage in mind—use clean, flat surfaces and containers to keep your fabric organized and prevent staining. Sharp tools like carving knives, sponges, and brushes are essential for creating stamps and applying dye. Don’t forget masking tape, pencils, and rulers for precise measurements and markings. Having everything ready not only streamlines your process but also minimizes interruptions. Additionally, considering the horsepower of your tools can ensure efficient work, especially when carving or printing larger designs. With your supplies in place, you’ll be set to plunge into your creative block printing adventure confidently.
fabric carving tools set
As an affiliate, we earn on qualifying purchases.
As an affiliate, we earn on qualifying purchases.
Designing Your Stamps and Patterns
When designing your stamps and patterns, start by choosing motifs that inspire you and suit your project. Experiment with crafting unique shapes that add personality and originality to your prints. Remember, your creativity is the limit, so have fun customizing your designs! Incorporating visual and auditory cues can also enhance your creativity and help you develop more engaging patterns.
Choosing Your Motifs
Choosing your motifs is a crucial step in creating unique and appealing fabric designs. Your chosen motifs carry motif symbolism that can evoke emotions, tell stories, or represent specific ideas. Consider cultural influences that shape traditional patterns and inspire modern interpretations. For example, floral designs might symbolize growth and beauty, while geometric shapes can evoke order and harmony. Think about what message or feeling you want your fabric to convey. Incorporate elements that resonate personally or reflect cultural significance. Keep your motifs simple or intricate, depending on your skill level and desired aesthetic. Remember, the right symbols and influences will give your fabric a meaningful and authentic touch, making your DIY project truly special. Additionally, understanding design principles can help you create balanced and visually appealing patterns.
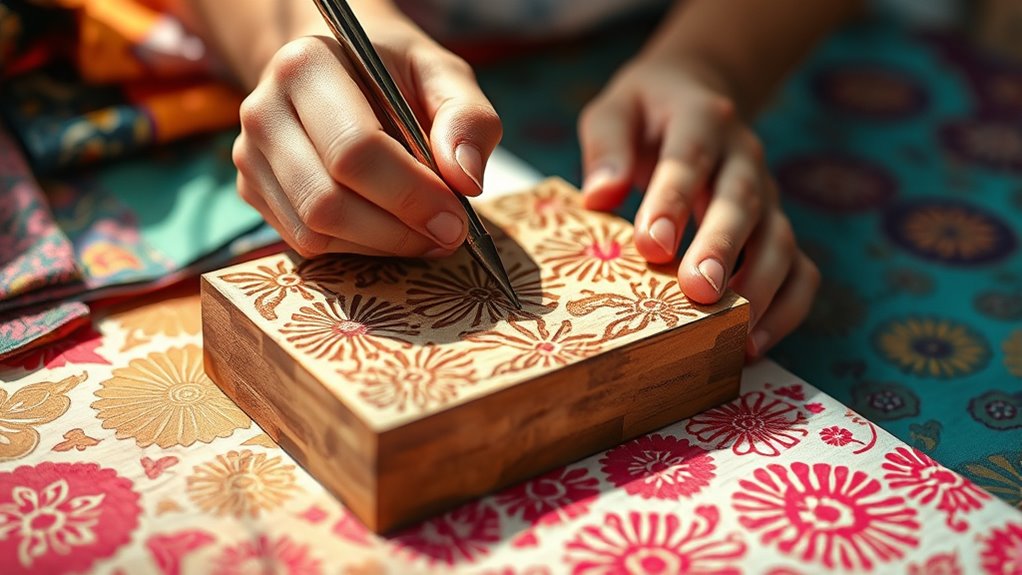
Crafting Unique Shapes
Once you’ve selected your motifs, the next step is to craft unique shapes for your stamps and patterns. Exploring geometric shapes helps create bold, structured designs, while experimenting with abstract designs adds spontaneity and originality. To start:
- Sketch simple shapes like circles, squares, or triangles for clean, crisp patterns.
- Combine geometric forms to develop more complex, eye-catching motifs.
- Play with asymmetry and irregular lines to craft abstract shapes that evoke movement.
- Carve or cut these shapes into your chosen material, ensuring each design reflects your creative vision.
fabric dye and paint for printing
As an affiliate, we earn on qualifying purchases.
As an affiliate, we earn on qualifying purchases.
Preparing the Fabric for Printing

Before you start block printing, it’s vital to prepare your fabric properly to guarantee crisp, vibrant designs. Begin with fabric pre-treatment by washing the fabric to remove any dirt, oils, or residues that could interfere with ink adhesion. Pay special attention to stain removal; even small stains can affect the clarity of your print. Use a gentle detergent and rinse thoroughly to make certain the fabric is clean. Dry the fabric completely before proceeding. Iron it to create a smooth, flat surface, which helps achieve clean lines and sharp details. Proper preparation ensures the ink or paint adheres evenly and prevents smudging or bleeding. Digital literacy programs can help you learn how to handle different printing techniques and tools effectively. Taking these steps will result in crisp, professional-looking prints on your fabric.
DIY fabric stamping supplies
As an affiliate, we earn on qualifying purchases.
As an affiliate, we earn on qualifying purchases.
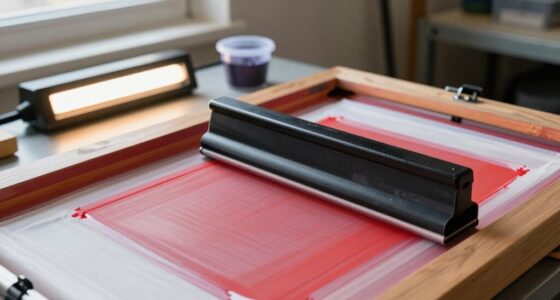
Applying Fabric Paint or Ink
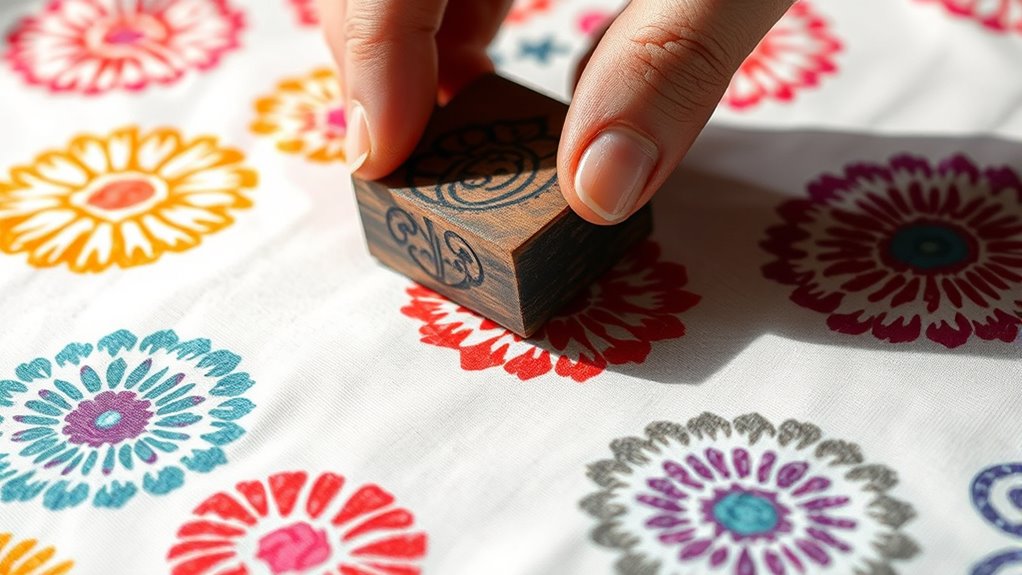
To achieve vibrant and precise designs, carefully apply fabric paint or ink directly onto your prepared surface. Proper surface preparation ensures smooth application and prevents bleeding. When applying, consider these key steps:
- Use a clean palette or tray for your paint or ink to keep colors pure.
- Dip your roller or brush lightly, avoiding overloading to prevent excess paint.
- Practice color blending on a scrap piece to achieve seamless gradations before working on your fabric.
- Apply the paint or ink evenly, maintaining consistent pressure for sharp, clean edges.
- Ensuring the color accuracy of your chosen paints or inks can significantly improve the overall visual quality of your design.
Creating Your Block Prints

Start by designing a pattern that reflects your style and fits your fabric. Once your design is ready, apply the ink evenly onto your carved block to guarantee a clean print. With these steps, you’ll be well on your way to creating unique and vibrant fabric prints. To enhance the authenticity of your design, consider incorporating vintage decor elements that complement your pattern and overall aesthetic.
Designing Your Pattern
Designing your pattern is a creative step that sets the tone for your entire fabric piece. To start, consider your color mixing—choose harmonious shades that complement each other. Think about how you’ll use pattern repetition to create visual rhythm and consistency across your fabric. Next, sketch your design, focusing on how the elements will repeat seamlessly. Decide whether your pattern will be symmetrical or freeform, keeping in mind the overall look you want. Finally, plan the layout carefully, spacing your motifs evenly for a balanced appearance. Remember, a well-thought-out pattern enhances your block printing, making each print come alive with intentional design choices. This foundation ensures your fabric turns out vibrant and cohesive. Additionally, understanding the importance of visual rhythm can help you create a more dynamic and engaging design.
Applying the Ink
Applying the ink is a crucial step that brings your pattern to life on the fabric. To do this, start by preparing your fabric dyeing mixture, ensuring the ink has the right consistency for printing. Use color mixing techniques to create vibrant or subtle shades, depending on your design. Dip your carved block into the ink, making sure to evenly coat all raised surfaces. Gently press the block onto your fabric, applying steady pressure to transfer the pattern cleanly. Avoid excess ink to prevent smudging or bleeding. If needed, re-dip and re-apply ink for multiple impressions. Consistent pressure and proper ink application are key to sharp, crisp prints. With attention to detail during this step, your fabric will showcase beautifully vibrant, well-defined patterns.
Drying and Fixing the Design
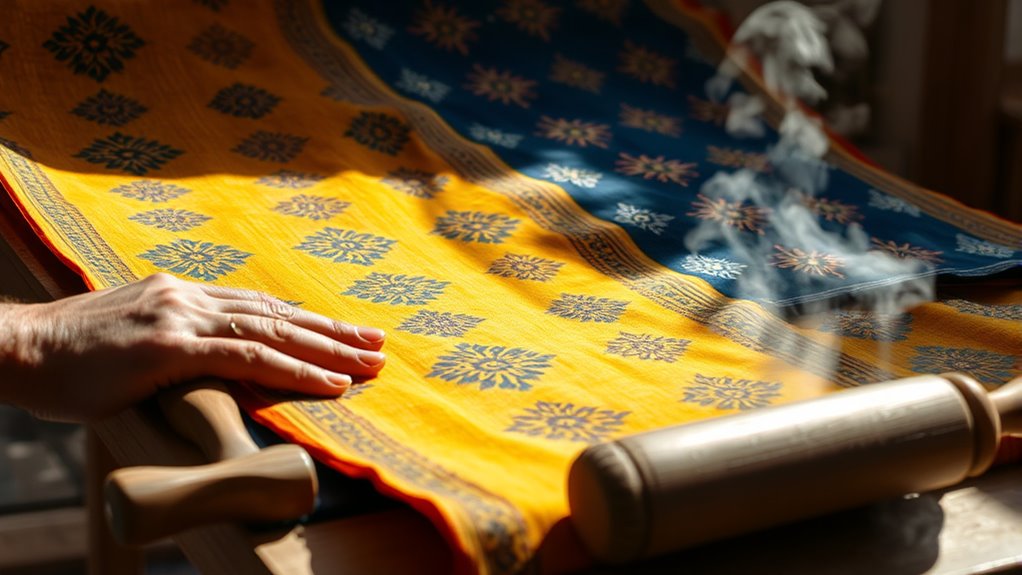
After you’ve finished printing your fabric, it’s important to let the ink dry thoroughly before handling or fixing the design. This guarantees the colors stay vibrant and your fabric care remains simple. To achieve maximum colorfastness, follow these steps:
- Place the fabric in a well-ventilated area and allow it to air dry completely, avoiding direct sunlight.
- Once dry, gently press the fabric with a warm iron, using a pressing cloth to prevent smudging.
- If needed, set the design by steaming or using a fixative spray designed for fabric.
- Always test on a small section first to ensure the colors won’t bleed or fade over time. Proper drying and fixing will keep your design bright and durable.
Tips for Maintaining and Cleaning Your Tools
To keep your block printing tools in top condition, regular maintenance and cleaning are essential. Proper tool maintenance prevents paint buildup and preserves the sharpness of the carved design. After each use, clean your tools promptly to avoid paint drying and becoming difficult to remove. Use warm water and mild soap for paint cleanup, and gently scrub with a soft brush if needed. Store your tools in a dry, protected space to prevent damage. Here’s a quick guide:
| Step | Tool Maintenance Tip | Paint Cleanup Method |
|---|---|---|
| Regular Cleaning | Clean immediately after use to prevent drying | Use warm water and mild soap |
| Storage | Keep in a dry, safe spot | Avoid soaking for long periods |
| Inspection | Check for damage and sharpen if necessary | Remove dried paint with soft tools |
Additionally, inspecting your tools regularly for signs of wear ensures they remain effective for your projects and maintain quality.
Frequently Asked Questions
Can I Reuse Fabric Paint on Multiple Projects?
Yes, you can reuse fabric paint on multiple projects if you follow some reusing paint tips. To maximize fabric paint longevity, make sure to store it tightly sealed and in a cool, dry place. Stir the paint well before reuse to maintain its consistency. Keep in mind that over time, the paint may thicken or dry out, so use it quickly or add a small amount of water or medium to restore its original texture.
What Types of Fabrics Are Best for Block Printing?
You’ll be amazed at how well natural fabrics like cotton, linen, and silk work for block printing—they’re practically made for it! Before you start, guarantee proper fabric preparation by washing and ironing to remove any residues. This helps the design transfer smoothly, giving you crisp, vibrant results. Avoid stretchy or synthetic fabrics, as they can distort your print and make your design look uneven.
How Do I Prevent Paint From Bleeding Under the Stamp?
To prevent paint from bleeding under the stamp, you should apply consistent stamp pressure, ensuring you press firmly but evenly. Use a paint with the right consistency—not too thick or thin—to avoid excess paint that can seep under the edges. Dab off any excess paint before stamping, and lift the stamp straight up without dragging. Practicing these steps helps achieve clean, crisp designs every time.
Are There Eco-Friendly or Non-Toxic Ink Options Available?
Sure, eco-friendly inks and non-toxic fabric dyes are your best friends here. They’re available in vibrant hues, safe for you and the planet, and perfect for guilt-free printing. Why settle for harmful chemicals when you can flaunt your eco-conscious style? These alternatives keep your designs bright and your conscience clear—because who says you can’t be stylish AND environmentally responsible? Embrace sustainable creativity and make your prints a statement!
How Long Should I Wait Before Washing the Finished Fabric?
You should wait at least 24 to 48 hours before washing your fabric to guarantee proper drying time and curing period. This allows the ink to set fully, preventing smudging or fading. Avoid washing the fabric too soon, as it might not have dried completely. When you do wash it, use gentle, cold water and mild detergent to preserve your design. Patience here makes your block printing last longer.
Conclusion
By mastering these DIY block printing techniques, you can effortlessly transform plain fabric into stunning, personalized designs. Did you know that handmade block printing has been practiced for over 2,000 years, showcasing its timeless appeal? With patience and practice, you’ll create beautiful textiles that reflect your unique style. Keep your tools clean and well-maintained, and your projects will stay vibrant and last longer. Happy printing!