
To effectively place wall art, start by identifying your wall’s center for balance. Position artwork at eye level, around 57-60 inches, for natural viewing. Mix sizes thoughtfully, maintaining proper spacing of 2-5 inches, and choose frames that complement each piece. Create cohesion with a unified theme or color scheme, or opt for a grid layout for symmetry. Adjust your arrangements for wall features and height variations to boost visual appeal—explore how to do that next.
Key Takeaways
- Establish the wall’s center to create balanced art arrangements and focal points.
- Place artwork at eye level, approximately 57-60 inches from the floor, for optimal viewing.
- Use consistent spacing (2-5 inches) between pieces to enhance visual flow and cohesion.
- Create symmetry and order with grid layouts, ensuring uniform frames and precise measurements.
- Vary artwork sizes and styles thoughtfully to achieve balance, harmony, and visual interest.
Understanding the Center of Your Wall
Understanding the center of your wall is essential for creating a balanced and visually appealing art arrangement. When you identify the wall’s midpoint, you can better plan for wall symmetry, ensuring your artwork feels harmonious. Proper focal point placement starts with this center, guiding how you hang pieces to draw attention naturally. If your main piece is centered, it anchors the layout, making everything else feel cohesive. For asymmetrical designs, knowing the center helps you offset artwork intentionally, maintaining visual weight. Additionally, considering the visual balance of your display ensures a pleasing arrangement that feels intentional. By establishing the wall’s midpoint first, you set a foundation for arranging art that feels intentional and well-balanced. This attention to the wall’s center ensures your display captures the eye without feeling cluttered or uneven.
Considering Eye Level for Optimal Viewing

To create an engaging and comfortable art display, you need to contemplate eye level as a key factor. Proper art placement at eye level guarantees your artwork aligns with natural sightlines, enhancing visual flow. Consider these points:
- The average eye level for most viewers is about 57-60 inches from the floor.
- Adjust for specific spaces or audiences, like children or taller individuals.
- Center artworks to match this height for balanced visual flow.
- When grouping pieces, maintain consistent eye-level baselines for cohesiveness.
- Remember that art placement guidelines can significantly influence how your display is perceived and appreciated.
Focusing on eye level helps your art placement feel natural and inviting. It guides viewers’ gaze smoothly across your wall, creating harmony and preventing visual clutter. Remember, small adjustments can dramatically impact how your art is perceived and enjoyed.
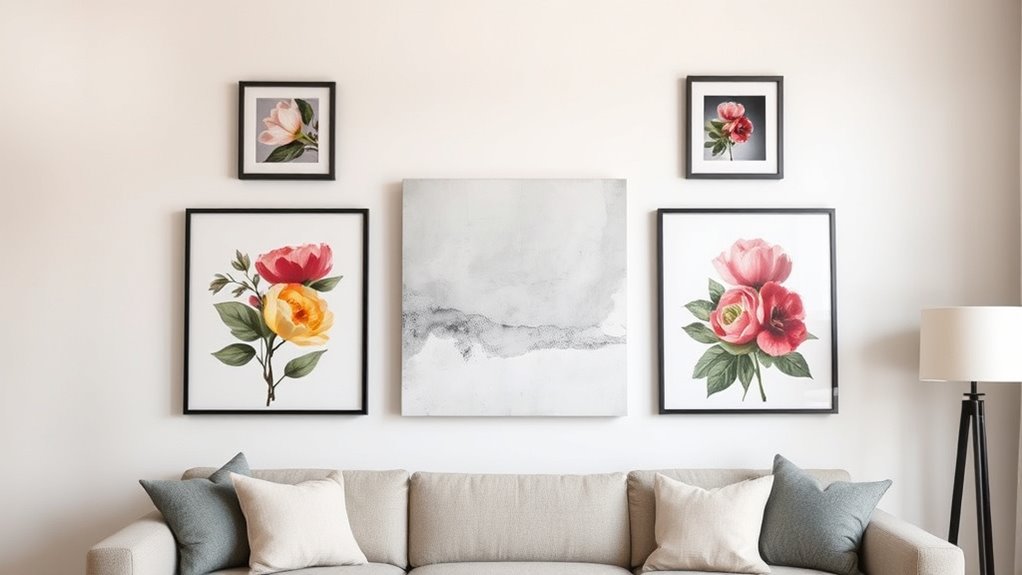
Balancing Scale and Proportion of Artwork

Balancing the scale and proportion of your artwork is essential to creating a harmonious wall display. When selecting pieces, aim for scale harmony by mixing larger and smaller artworks that complement each other. Proper proportion balance ensures no single piece overwhelms the space or gets lost. Consider the size of your wall and the furniture below to determine appropriate artwork dimensions. If you have a large, open wall, larger pieces or a grouping of smaller works can create visual interest without clutter. Conversely, on a smaller wall, smaller artwork grouped thoughtfully maintains balance and prevents overcrowding. Always keep in mind that proportion and scale should work together to achieve unity, guiding the viewer’s eye smoothly across your display. Additionally, understanding artistic balance can help you create a more cohesive and visually pleasing arrangement.
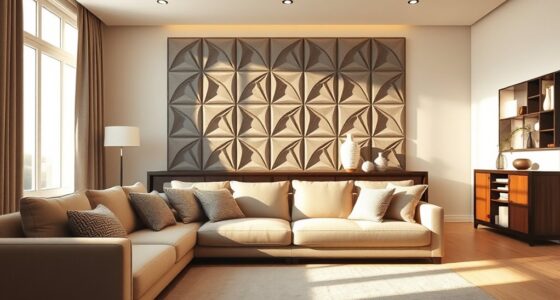
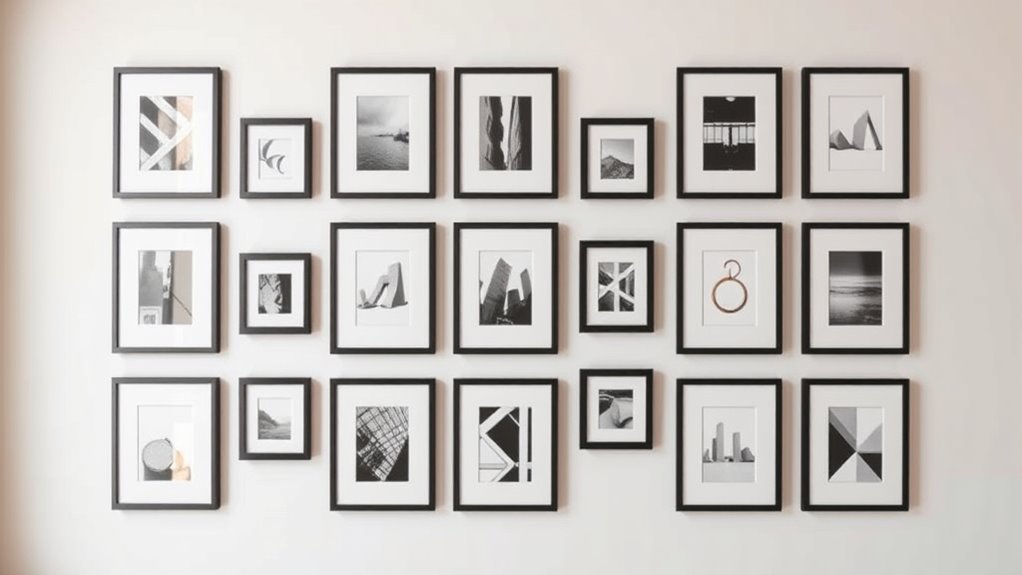
Creating a Cohesive Gallery Wall
Once you’ve selected artwork with varied sizes and proportions that work well together, the next step is to arrange them cohesively on your wall. To create a unified gallery wall, consider these key points:
- Use consistent color coordination to tie different pieces together visually.
- Mix frame styles thoughtfully, balancing ornate and simple frames for variety without chaos.
- Arrange artwork so that the eye flows smoothly from one piece to the next, avoiding clutter.
- Keep a common theme or color palette to reinforce cohesion across diverse artwork.
- When planning your layout, consider visual balance to ensure the arrangement feels harmonious and well-distributed across the wall.
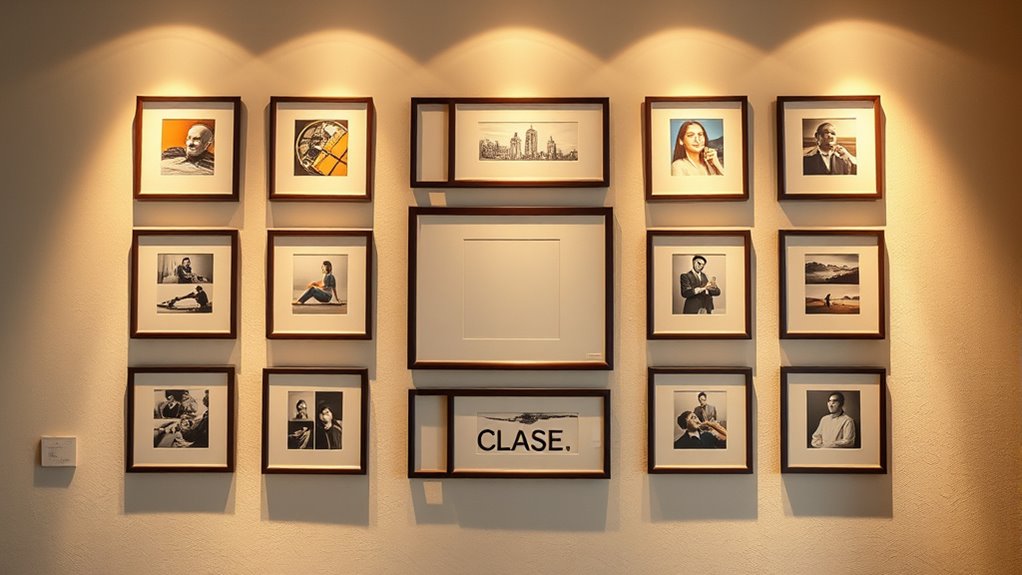
Using Grid Layouts for Symmetry and Order
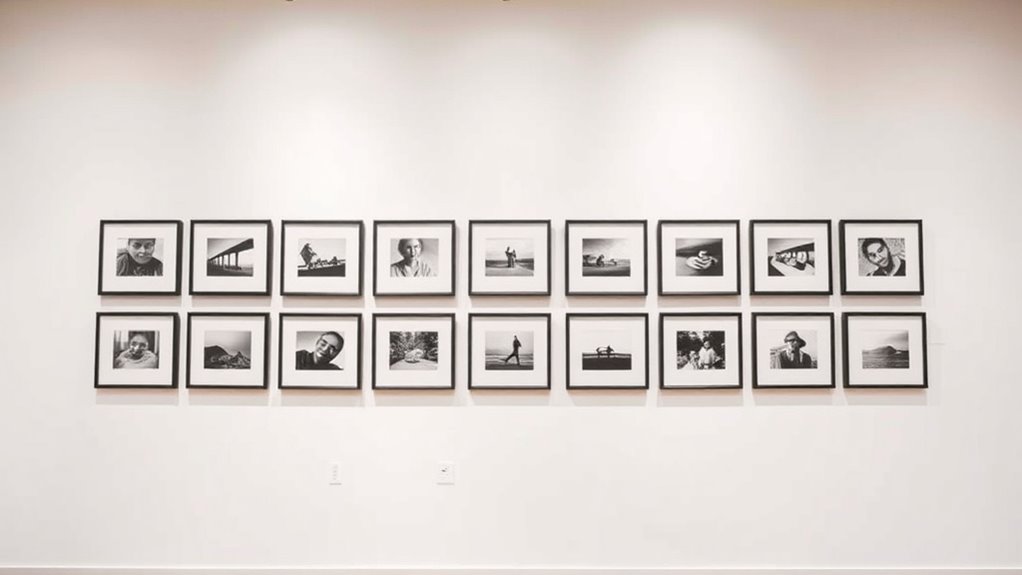
Using grid layouts helps create a sense of symmetry and order on your walls. You can achieve this by centering your artwork or applying balanced spacing techniques. These methods make your display look intentional and visually pleasing.
Centered Grid Alignment
Centered grid alignment is a popular method for creating a sense of symmetry and order in wall art arrangements. It directs attention to a focal point and balances your space effortlessly. To pull off this look effectively:
- Choose framing styles that enhance the grid’s symmetry, such as uniform frames or mats.
- Consider lighting considerations to highlight the central artwork and avoid shadows that disrupt the grid’s harmony.
- Maintain consistent spacing between pieces to reinforce the aligned, orderly feel.
- Use a measuring tool to ensure precise placement, keeping the entire grid centered on your wall.
This approach provides a clean, cohesive look, making your wall feel curated and intentional. Proper framing and lighting will elevate the symmetry, giving your art a polished, professional appearance.
Balanced Spacing Techniques
Achieving balanced spacing in grid layouts guarantees your wall art looks harmonious and intentional. To do this effectively, pay attention to framing styles, ensuring each piece complements the others without overpowering the overall arrangement. Consistent framing creates a unified look, enhancing symmetry and order. Additionally, focus on color coordination; selecting artwork with a cohesive color palette ties the display together and prevents visual clutter. Maintain equal gaps between pieces to create a clean, organized appearance. Use a grid template to measure and mark spacing accurately, ensuring all artworks align perfectly. This approach helps your wall art feel thoughtfully curated, balancing visual interest with harmony. Proper spacing, framing styles, and color coordination work together to produce a polished, balanced display that elevates your space. Incorporating a farmhouse aesthetic into your layout can also reinforce the theme and create a cohesive look.
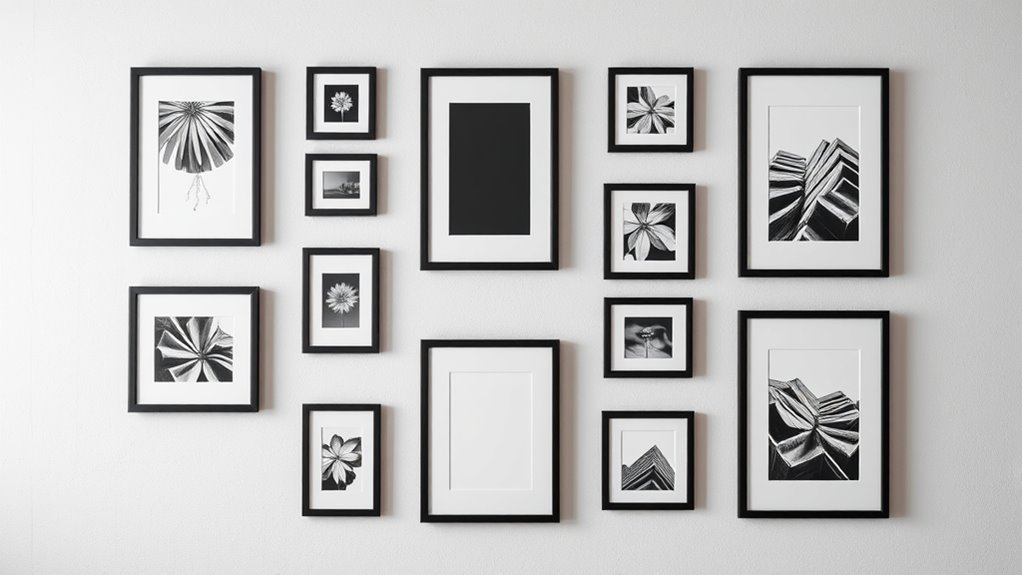
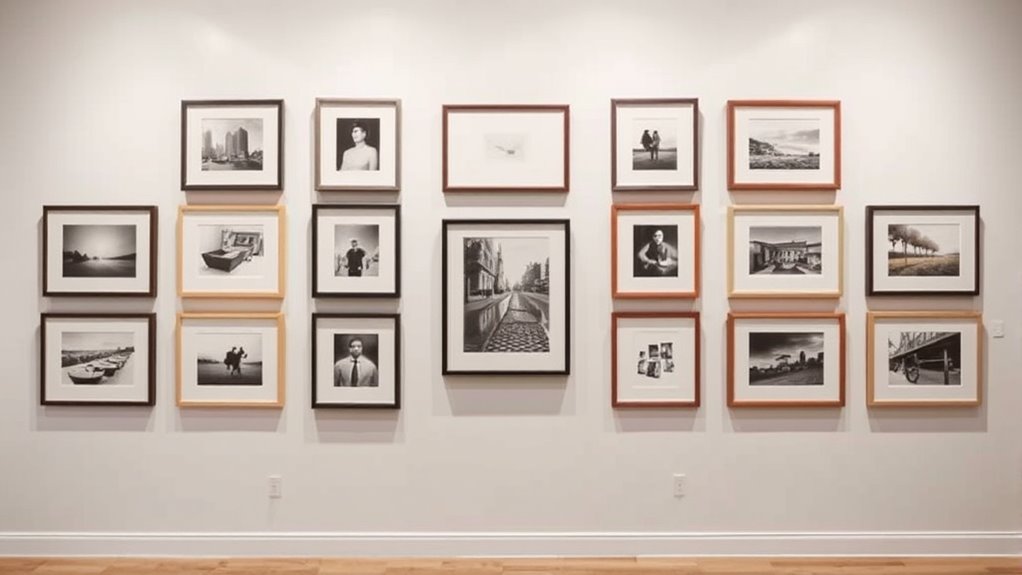
Mixing and Matching Different Art Sizes
Mixing and matching different art sizes can add visual interest and create a dynamic display on your wall. To do this effectively, consider these tips:
Mixing art sizes adds visual interest and energy to your wall display.
- Vary frame styles to introduce texture and contrast, blending sleek modern with ornate vintage frames.
- Coordinate colors across pieces to ensure harmony, even if sizes differ.
- Balance large and small artworks so they complement each other without overwhelming the space.
- Use a unifying element, like a common mat or border, to tie diverse sizes together.
- Pay attention to art placement rules to maintain a cohesive and aesthetically pleasing arrangement.
Maintaining Proper Spacing Between Pieces
Have you ever noticed how uneven spacing between art pieces can disrupt the harmony of your display? To maintain balance, pay attention to the spacing between frames, ideally 2 to 5 inches apart, depending on your art’s size. Use the right hanging hardware to guarantee each piece stays securely in place and aligns properly with others. Consider frame styles—bulkier frames may require more space to avoid a crowded look, while slimmer frames can be placed closer together. Keep a consistent measurement across all pieces to create a cohesive display. When hanging multiple items, use a template or painter’s tape to mark spacing beforehand. Proper spacing enhances visual flow and keeps your wall art looking polished and intentional. Additionally, proper spacing can prevent damage to your artwork if they are too close together.
Tips for Hanging Art at Different Wall Heights
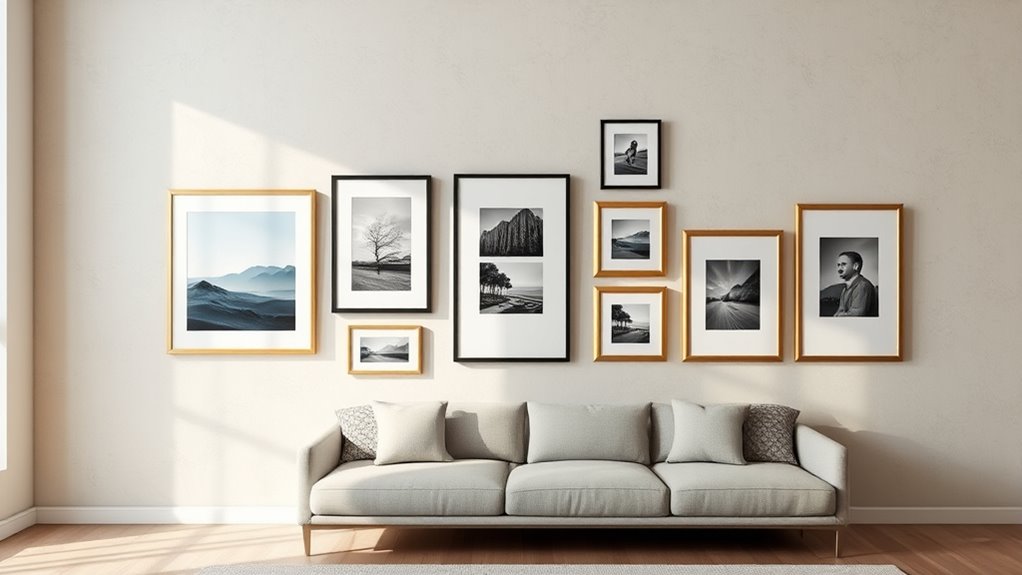
When hanging art at different wall heights, consider eye-level placement to create a balanced look. Varying wall heights can add visual interest, but you’ll want to adjust your art placement accordingly. Keep these tips in mind to make certain your gallery feels cohesive and well-proportioned. Additionally, understanding optimal angles for wall art can help you enhance the visual appeal and harmony of your display.
Eye-Level Placement Tips
Hanging art at the right height can make a big difference in how it complements your space. To guarantee your pieces look their best, consider these eye-level tips:
- Measure the art’s center and position it approximately 57-60 inches from the floor, aligning with your eye level for most viewers.
- Choose frame styles that enhance the artwork and suit your decor, balancing thickness and color.
- Factor in lighting considerations—avoid glare and shadows by positioning art where natural or artificial light complements it.
- Keep in mind that wall height varies, so adjust accordingly if ceilings are high or low. Following these tips ensures your art feels intentional, engaging, and perfectly integrated into your space.
- Regularly assess and rotate your artwork to maintain a fresh and organized display that complements your evolving decor.
Varying Wall Heights
Adjusting your art placement for different wall heights can transform a space from average to extraordinary. When dealing with varying wall heights, consider art style contrast to create visual interest—combine tall, narrow pieces with wider, shorter artworks to add dimension. Framing options also matter; bold frames can anchor art on high walls, while slim or floating frames work well on lower surfaces. Varying wall heights challenge you to think creatively about grouping and spacing, making sure each piece complements its surroundings. Don’t be afraid to hang some artwork higher or lower than standard eye level to emphasize architectural features or to achieve a balanced look. This approach keeps your display dynamic, engaging, and perfectly tailored to the unique proportions of your walls. Incorporating biodiversity principles like natural textures and plant-inspired motifs in your artwork can further enhance the visual harmony with your space.
Frequently Asked Questions
How Do I Choose the Best Frame Styles for My Wall Art?
To choose the best frame styles for your wall art, consider your art coordination and overall decor. Opt for sleek, modern frames if your space is contemporary, or ornate styles for a classic look. Match frame materials and colors to your room’s palette for harmony. Think about the art’s personality—bold pieces work well in simple frames, while intricate artwork benefits from detailed frames that enhance its character.
What Lighting Options Enhance Wall Art Displays Effectively?
You should use a mix of ambient and accent lighting to enhance your wall art. Ambient lighting provides overall brightness, making the space inviting, while accent lighting highlights specific pieces. Spotlights, picture lights, or track lighting work well for accent effects. Position these lights carefully to avoid glare and shadows, ensuring your artwork stands out. Combining these options creates a balanced, visually appealing display that draws attention to your art.
How Can I Incorporate Wall Art Into Small or Irregularly Shaped Rooms?
You can transform small or irregularly shaped rooms by cleverly using multi-use wall spaces, turning tricky corners into stunning displays. Imagine creating a focal point with a gallery wall or mixing art with functional pieces like shelves or mirrors. Incorporate creative corner ideas that draw the eye and maximize every inch. With strategic placement, your wall art becomes a mesmerizing feature, making even the tightest spaces feel thoughtfully designed and uniquely yours.
What Are the Best Tools for Hanging Artwork Securely?
You should use sturdy picture hooks and hanging wires for secure artwork placement. Picture hooks are easy to install and hold various weights, perfect for most wall types. Hanging wires provide extra support and allow you to level your art easily. Make sure to choose hooks rated for your frame’s weight, and use a level to keep everything straight. These tools keep your artwork safe and securely displayed.
How Do I Update or Rotate Wall Art Seasonally?
Imagine you’re a modern-day curator, like a Renaissance artist, updating your gallery for each season. To rotate your wall art seasonally, start by removing existing pieces carefully using proper tools. Store them safely, then select new artwork that complements your seasonal decor. Use art rotation techniques like swapping frames or rearranging wall layouts to keep your space fresh and inviting. This keeps your home dynamic and reflects the changing seasons effortlessly.
Conclusion
Remember, the way you hang your art reflects your personality. While symmetry and rules help create harmony, trusting your instincts often leads to the most authentic display. Some believe that a well-placed piece can transform a space, but it’s your eye and intention that truly make it special. So, experiment, break the rules if needed, and let your walls tell your unique story—because sometimes, chaos is just a different kind of order.