Connect with us

DIY and Crafts

Crafting Your Own Boho Jewelry

With vibrant materials and unique designs, crafting your own boho jewelry can unleash your creativity—discover the essential tips to get started!

Published

on

diy bohemian jewelry creation

Crafting your own boho jewelry lets you express your unique style while embracing a free-spirited vibe. Start by gathering essential tools like pliers, wire cutters, and a bead mat. Choose vibrant materials like stones, wood, and metals to capture that earthy aesthetic. Don't forget to accurately size your pieces for comfort, and consider fun projects like layered necklaces or statement earrings. Personalize your designs with unique patterns and textures. Join local or online jewelry-making communities for support and inspiration. If you're enthusiastic to elevate your craft, there's plenty more to explore on techniques and project ideas.

Key Takeaways

  • Boho jewelry emphasizes natural materials and unique designs, allowing for personal expression and vibrant aesthetics.
  • Essential tools for crafting include jewelry pliers, wire cutters, and a bead mat for effective workspace organization.
  • Accurate sizing is crucial; use a flexible measuring tape for comfort and style in your jewelry pieces.
  • Popular projects include statement drop earrings, layered necklaces, and wire-wrapped cuffs, reflecting the bohemian aesthetic.
  • Regular maintenance, proper storage, and frequent inspections ensure the longevity of your boho jewelry creations.
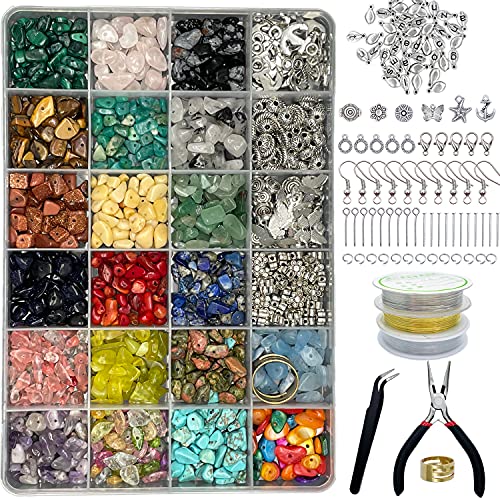
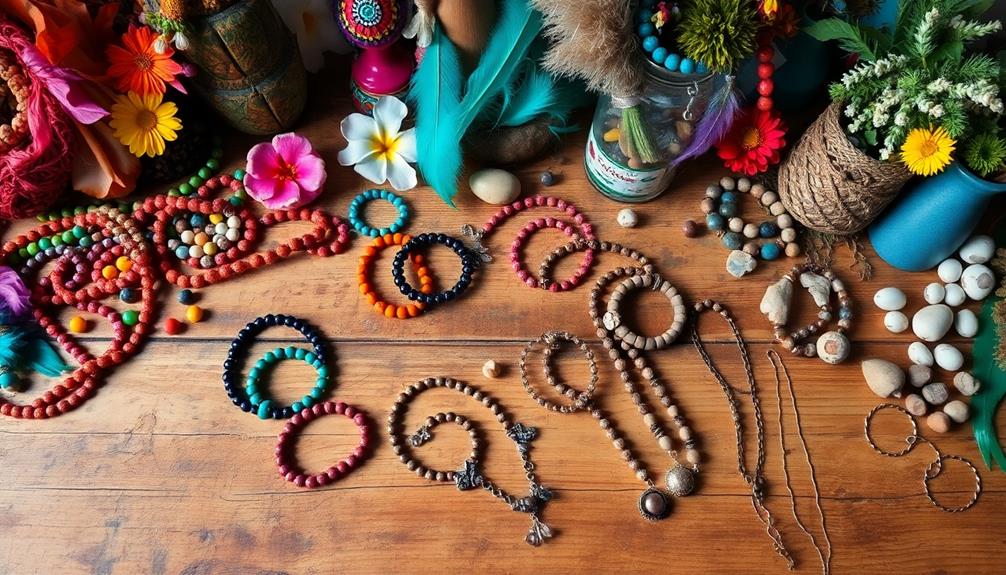
Understanding Boho Jewelry Aesthetics

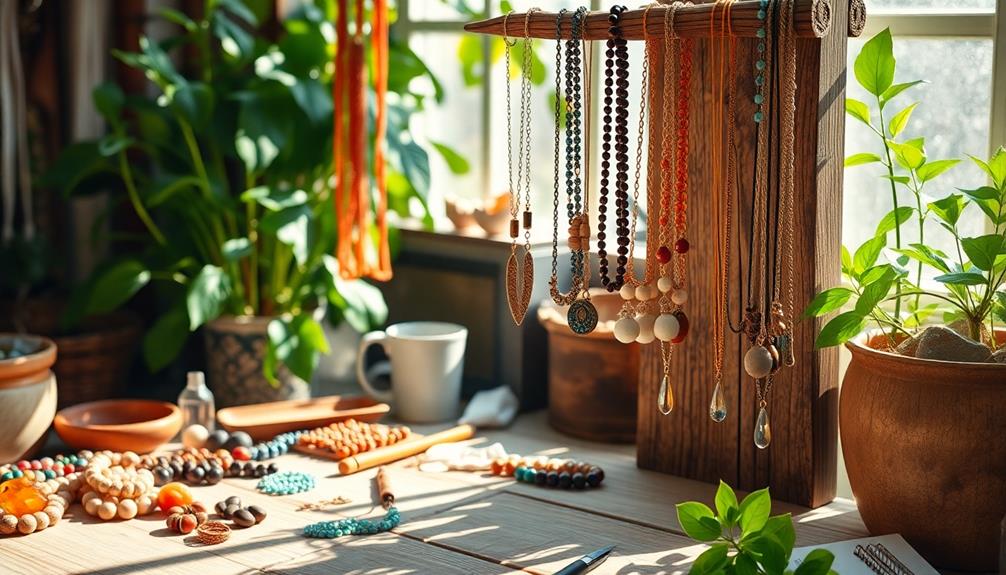
When you think about boho jewelry, picture a vibrant mix of natural materials and artistic flair that reflects a free-spirited lifestyle. This style thrives on earthy elements like wood, stones, and metals, all contributing to its organic feel.

The use of vibrant colors and unique patterns allows you to express your individuality, making each piece a true reflection of your personality. Incorporating elements inspired by nature, such as unlocking aromatic cleaning power, can further enhance the authenticity of your designs.

Layering techniques play a vital role in achieving that eclectic look. You can combine various pieces, using different lengths and styles to create a visually enchanting ensemble. When crafting, consider how many holes you'll need; designs often incorporate five holes for versatility in stringing and layering.

If you're working with gauge wire, it's important to confirm it's shaped properly, as it provides structure and support to your designs.

Once you've finished your piece, remember to let it dry if you've used any adhesives or finishes. This final touch not only enhances the integrity of your creation but also reinforces that handmade, artisanal quality that boho jewelry is celebrated for.

Advertisement

Embrace this aesthetic as a way to showcase your creativity and connection to nature.

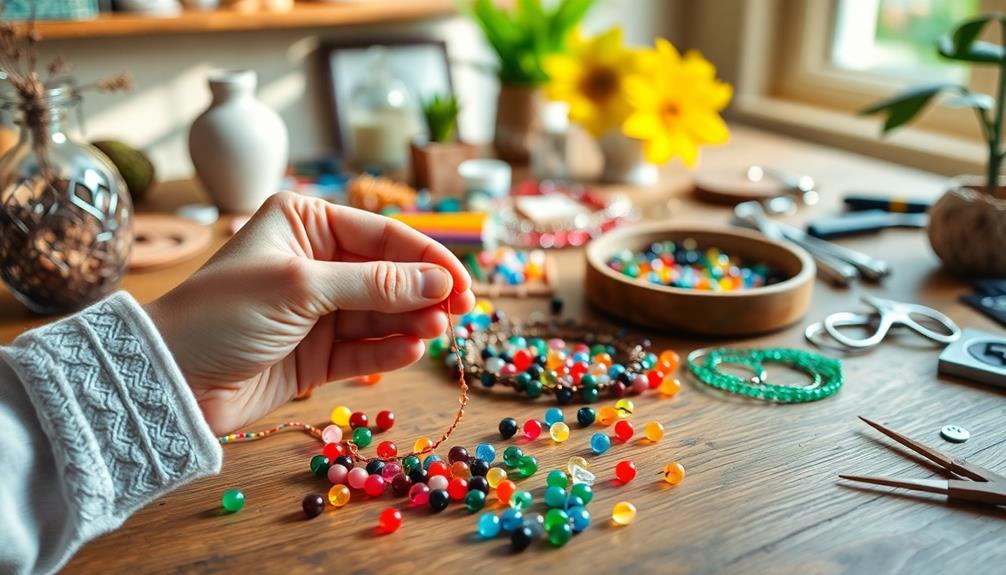
Essential Tools for Jewelry Making

jewelry making essential tools

When you start making boho jewelry, having the right tools is essential for both your safety and your creativity. Proper maintenance of your tools can also enhance your crafting experience, as well-maintained tools perform better and last longer appliance longevity and efficiency.

You'll need must-have items like pliers, wire cutters, and a bead mat to help you manipulate materials and keep your workspace organized.

Let's explore these tools and some important safety precautions to guarantee a smooth crafting experience.

Must-Have Tools

To create stunning boho jewelry, you'll need some essential tools that make the crafting process efficient and enjoyable. First, invest in a set of jewelry pliers; these are fundamental for bending, cutting, and crimping wires and findings, ensuring secure connections in your designs.

Alongside pliers, a good pair of wire cutters is necessary for trimming excess wire and cutting materials to your desired lengths, giving you clean edges for a polished finish. You might also consider using accessories for inspiration, such as seasonal design pillows to set the mood while you craft.

Advertisement

Don't forget about a bead mat! This non-slip surface helps you organize your beads and prevents them from rolling away while you work, enhancing your overall efficiency.

Plus, a measuring tape or ruler is essential for accurately sizing bracelets and necklaces, helping you achieve the perfect fit for anyone who wears your beautiful creations.

These tools won't only streamline your crafting process but also elevate the quality of your boho jewelry. With the right equipment at hand, you'll find that your creativity flows more freely, making your jewelry-making experience even more enjoyable.

Safety Precautions

Crafting jewelry is a rewarding experience, but safety should always come first. By taking a few precautions, you can guarantee a smooth and enjoyable process while minimizing the risk of injury.

It's also important to have a clear understanding of the tools you'll be using, such as pliers and cutters, which can be similar to those used in best hair styling tools.

Advertisement

Here are some essential safety tips to keep in mind:

  • Wear safety glasses when using tools like wire cutters and pliers to protect your eyes from flying debris or sharp edges.
  • Keep your workspace clean and organized to prevent accidents and make it easier to find tools and materials as you work.
  • Use a bead mat to prevent beads from rolling away and to cushion your tools while working on delicate pieces.
  • Be cautious with sharp tools and materials; always cut away from your body and keep your fingers clear of cutting paths.
  • Familiarize yourself with each tool's functions and safety features before starting any project to minimize the risk of injury.

Sizing Your Jewelry Pieces

jewelry size measurement guide

When sizing your jewelry pieces, accurate measurements are essential for comfort and style.

Think about using a self-watering planter to keep your inspiration for natural elements flowing as you create.

You'll want to know the common size ranges, like small, medium, and large, to guarantee your creations fit just right.

Remember to take into account the thickness of your wrist and any added length for clasps to achieve a perfect fit.

Accurate Measurement Techniques

Measuring your wrist accurately is vital for creating a perfectly fitting bracelet. To do this, grab a measuring tape or a piece of string and wrap it around your wrist just above the bone where you typically wear your jewelry. Note the measurement in inches.

Advertisement

Remember, common bracelet sizes range from small (6-7 inches) to large (8-9 inches), but you may need to adjust based on your wrist shape. Additionally, just as the role of color accuracy is important in achieving the best image quality in home cinema projectors, accurate measurements will guarantee your jewelry fits comfortably and beautifully.

Here are some tips to guarantee you get the best fit:

  • Use a flexible measuring tape for easy conforming to your wrist's curves.
  • Consider the thickness of the beads or materials; chunky designs may require extra length.
  • Add 0.5 to 1 inch to your wrist measurement for a comfortable fit, depending on your preference for snugness or looseness.
  • Double-check your measurements to avoid any mistakes.
  • Don't forget to account for any additional embellishments or charms that could affect sizing.

Common Size Ranges

Finding the right size for your jewelry pieces guarantees both comfort and style. When it comes to bracelets, common sizes include small (6-7 inches), medium (7-8 inches), and large (8-9 inches). To determine your size, measure your wrist with a flexible measuring tape or a piece of string, making sure it fits snugly but comfortably.

Keep in mind that if you have a chunkier wrist, you may need to add extra length for a more comfortable fit. Additionally, consider the aesthetic appeal of layering when crafting bracelets, as this can enhance your overall look.

For necklaces, standard lengths range from 16 inches for a choker to 30 inches for longer, cascading styles. Your personal preference and the design will greatly influence the choice, so try on different lengths to find what feels best for you.

When crafting rings, measuring your finger's circumference is key. Use a ring size chart to ensure a secure fit, as size matters for both comfort and functionality.

Advertisement

Popular Boho Jewelry Projects

trendy bohemian jewelry ideas

In recent years, popular boho jewelry projects have captured the imagination of crafters and fashion enthusiasts alike.

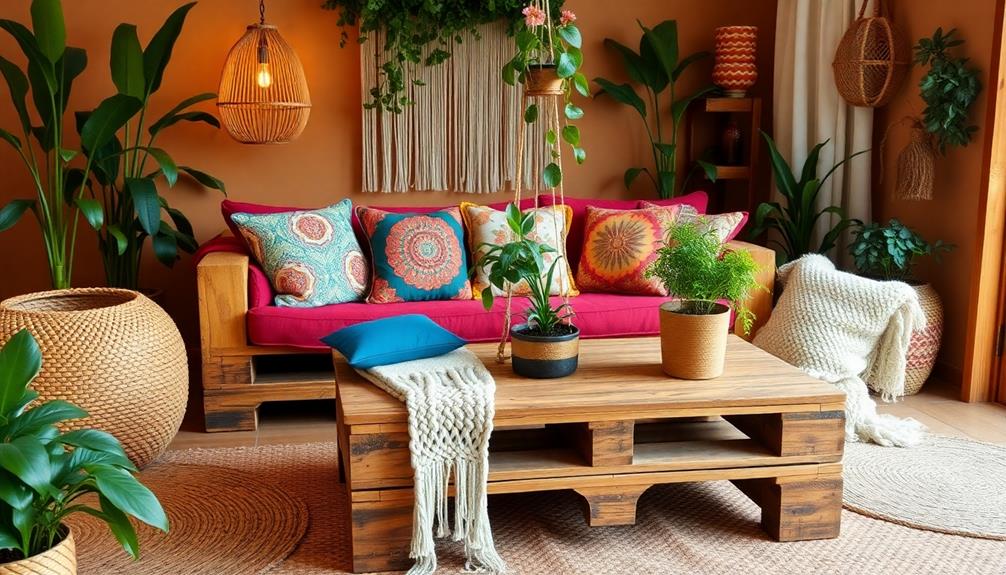
These projects often draw inspiration from various elements of the bohemian aesthetic, such as Boho Wall Decor Living Room Ideas that emphasize natural materials and unique designs, making them perfect for expressing your personal style.

Whether you're a beginner or an experienced crafter, online tutorials are plentiful, helping you immerse yourself in the boho aesthetic with ease.

Here are some exciting projects to reflect upon:

  • Statement Drop Earrings: Create bold earrings using feathers, beads, or fabric for an eye-catching look.
  • Layered Necklaces: Mix various chains and pendants to achieve the perfect layered effect that embodies bohemian spirit.
  • Wire-Wrapped Cuffs: Use wire and gemstones to craft unique cuffs that can be customized to fit your style.
  • Embellished Waist Belts: Transform simple belts with mandala designs and colorful embellishments for a standout accessory.
  • Leather and Sculpey Creations: Experiment with leather and liquid Sculpey to make personalized pieces that reflect your creativity.

Step-by-Step Project Guides

detailed project execution instructions

Creating your own boho jewelry can be a rewarding experience that allows you to express your unique style.

Start with a simple project: make a layered statement necklace using scrap leather and gold chain. Incorporating natural elements can enhance your designs, similar to using essential oils for toothache relief. Trace circles for the mandalas and secure them with industrial glue for that bohemian touch.

Next, craft some statement drop earrings by pouring gold liquid Sculpey into a mandala mold. After baking, attach the mandalas to gold chain with stud earrings for a standout look.

Advertisement

If you've got an old waist belt lying around, transform it by gluing a large mandala onto it. Make sure it's properly aligned before letting the glue dry completely.

Want to add artistic flair? Experiment with wire wrapping techniques on an old cuff. Secure 18-gauge wire around it, adding a mandala with industrial jewelry glue for durability.

Creative Material Choices

innovative design and sustainability

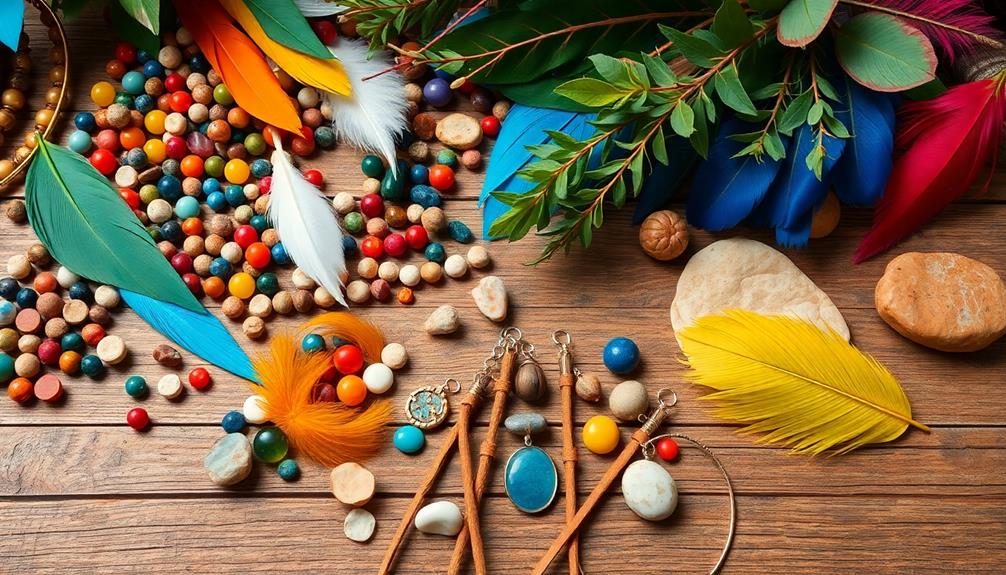
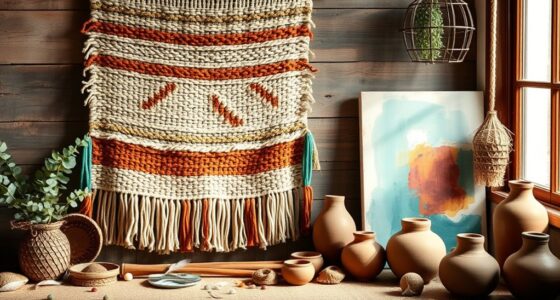
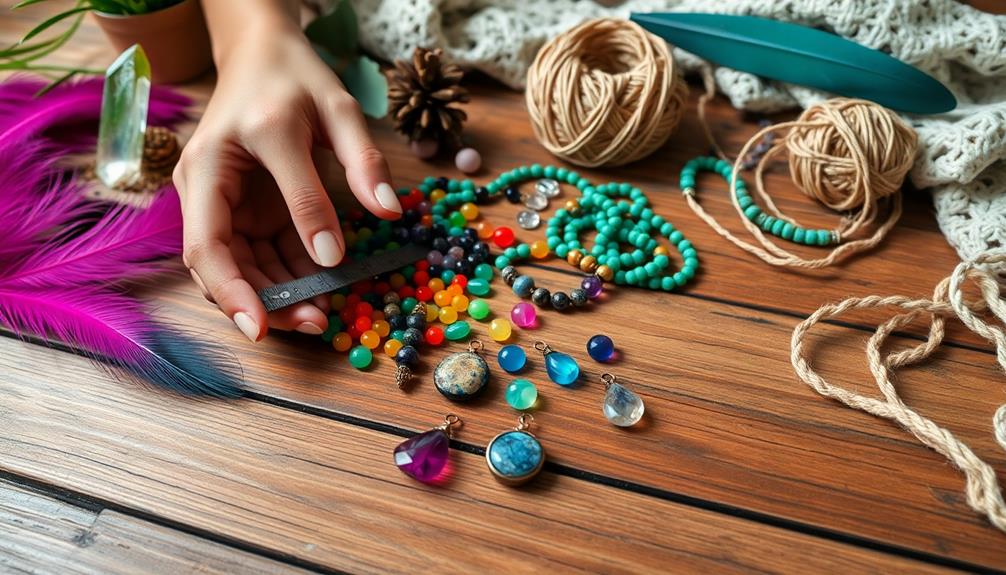
Boho jewelry thrives on a mix of materials that reflect individuality and a connection to nature. When you're crafting your pieces, prioritize natural materials like wood, gemstones, and metals. These enhance the organic aesthetic that defines the bohemian style.

You might also reflect on using elements that encourage creativity and imagination, such as vibrant colors and unique patterns; think about incorporating dyed leather, ceramic beads, or colorful threads to create eye-catching designs that embody a free-spirited vibe. best gifts for 4-year-old girls can inspire your creative choices.

Here are some creative material choices to reflect on:

  • Natural elements: Use gemstones, wood, and metals for a grounded look.
  • Dyed leather: Add color and texture to your designs.
  • Artisanal components: Incorporate handmade beads or woven threads for a personal touch.
  • Layering materials: Mix textures like leather with metal chains or fabric for an eclectic appeal.
  • Upcycled items: Experiment with vintage or repurposed materials to tell a unique story and promote sustainability.

These choices not only reflect your creativity but also make each piece a representation of your personal journey.

Embrace the freedom of expression that boho jewelry offers, and let your imagination guide you!

Advertisement

Techniques for Unique Designs

innovative design methodologies explored

When crafting unique jewelry designs, exploring various techniques can really elevate your creations. Start by experimenting with different stringing methods like knotting and layering to add texture and depth to your boho pieces. These techniques not only enhance the visual appeal but also create movement, making your jewelry stand out.

Incorporate a variety of natural materials—wood beads, semi-precious stones, and metals—to embody that earthy bohemian aesthetic. Mixing vibrant hues and unique patterns allows you to express your creativity and personalize your designs. Don't hesitate to play with colors; the more diverse, the better!

Utilize wire wrapping techniques to secure elements like crystals or stones, adding an artistic flair that showcases your craftsmanship. This method not only enhances the design but also provides durability.

Consider using handmade or artisanal components, such as hand-painted beads or unique charms, to infuse originality into your work.

Caring for Your Jewelry

jewelry maintenance and care

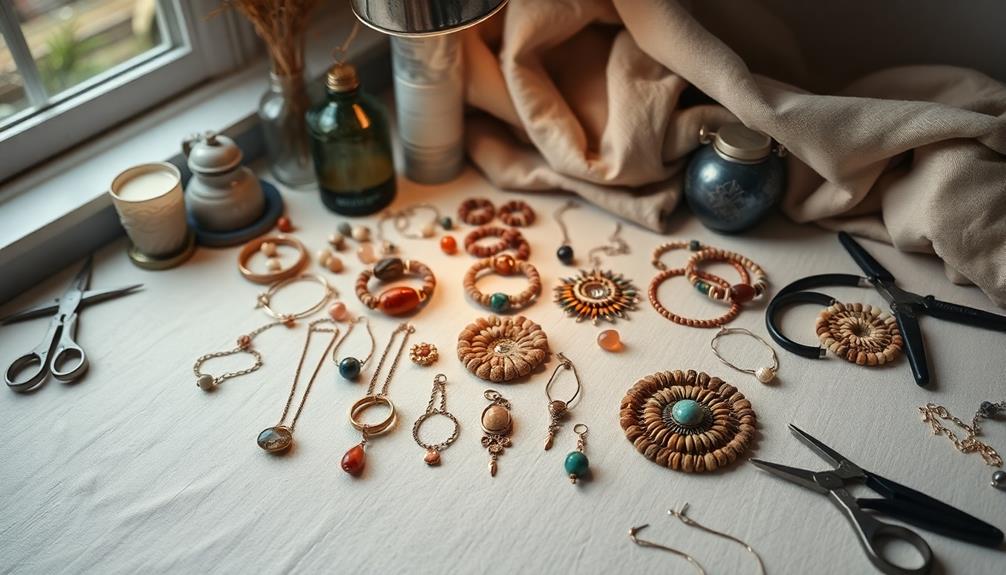
Caring for your boho jewelry is essential to keep it looking vibrant and unique.

You'll want to clean and store your pieces properly, while also keeping an eye out for any signs of damage.

Let's explore some simple tips on maintenance, storage, and repairs to help your jewelry last longer.

Advertisement

Cleaning and Maintenance Tips

Maintaining the beauty and integrity of your jewelry is essential for ensuring it lasts through countless adventures. Regular care not only enhances its appearance but also extends its lifespan.

Here are some practical tips to keep your boho creations looking their best:

  • Wipe with a soft cloth: After wearing, gently wipe your jewelry with a soft, lint-free cloth to remove dirt and oils that can dull natural materials.
  • Clean with gentle soap: Use warm water and mild soap to clean beaded pieces. Avoid harsh chemicals that can damage the materials.
  • Polish metal components: For any metal parts, consider using a jewelry polishing cloth to remove tarnish without scratching the surface.
  • Inspect periodically: Regularly check for loose components or signs of wear. Address any issues promptly to maintain both function and aesthetics.
  • Store wisely: Keep your jewelry in a cool, dry place, away from direct sunlight and humidity to prevent discoloration and damage.

Storage Recommendations

After you've cleaned your boho jewelry, proper storage plays a key role in preserving its beauty and longevity.

Store your pieces in a cool, dry place, away from direct sunlight to prevent fading and damage, especially to natural materials like wood and leather. Using soft pouches or separate compartments within a jewelry box is essential. This prevents scratching and tangling, particularly for intricate designs and embellishments.

To maintain the quality of metal components, consider incorporating anti-tarnish strips or silica gel packets in your storage area. These will help absorb excess moisture and keep your jewelry looking fresh.

Regularly cleaning your pieces with a soft cloth is also important; focus on removing oils and dirt, especially in spots where materials are glued together or where intricate patterns might trap debris.

Advertisement

Repairing Damaged Pieces

How can you guarantee your boho jewelry stays vibrant and intact? Regular maintenance and timely repairs are key.

Start by inspecting your pieces frequently for signs of wear, like loose beads, broken clasps, or frayed strings. Catching potential damage early can save you a lot of trouble down the line.

If you find a damaged component, consider these tips for effective repairs:

  • Use industrial jewelry glue for secure fixes; it provides a strong bond that can handle daily wear.
  • For beaded jewelry, re-string with high-quality elastic or wire if beads become loose or fall off.
  • Clean your jewelry gently using a soft cloth and a mild soap solution to prevent tarnishing.
  • Store pieces in a cool, dry place, ideally in individual compartments or pouches to avoid tangling.
  • Keep an eye on the condition of your storage setup; a well-maintained space will protect your jewelry from damage.

Joining the Jewelry-Making Community

becoming part of artisans

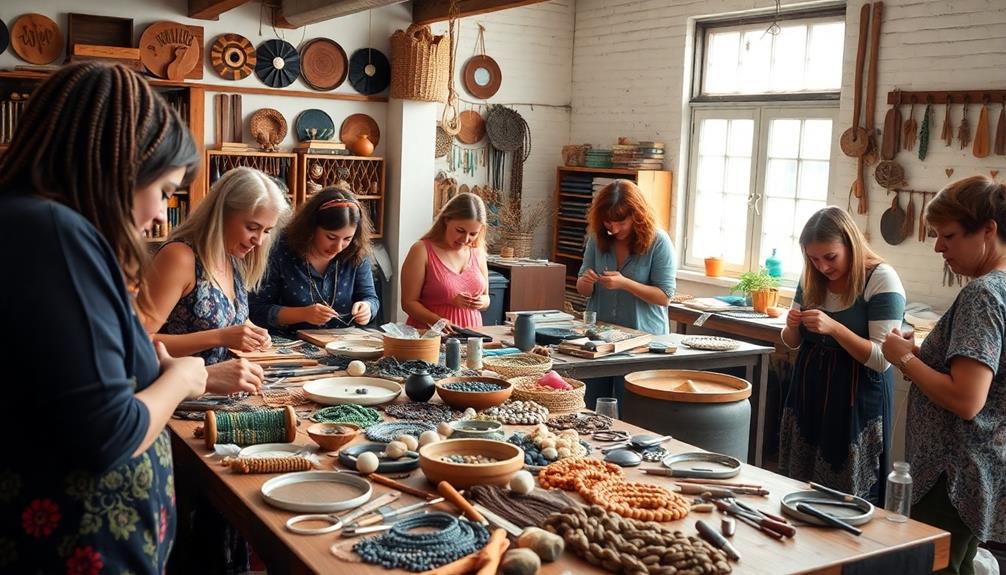
Joining the jewelry-making community can considerably enhance your crafting journey, whether you're just starting out or looking to refine your skills. By connecting with local or online groups, you'll find support, inspiration, and camaraderie among fellow crafters who share your passion for boho jewelry.

Online platforms like Facebook groups and forums are great spaces to share your projects, seek advice, and exchange tips specifically tailored to boho design. Participating in workshops or community classes not only sharpens your skills but also helps you build relationships with other enthusiasts who can motivate you.

If you're looking to meet others in person, websites like Meetup can guide you to local jewelry-making events or groups that match your skill level and style interests.

Advertisement

Don't forget to explore social media platforms like Instagram and Pinterest. They can expose you to a broader range of boho jewelry trends and techniques, connecting you with artisans and crafters from around the globe.

Engaging with the jewelry-making community will enrich your experience, inspire creativity, and elevate your crafting skills to new heights.

Inspiration and Resource Links

inspiration and resource guide

Finding inspiration for your boho jewelry creations is easier than ever with the wealth of resources available online and in your local community.

Start exploring free platforms like YouTube and Pinterest, where you can find countless tutorials tailored to all skill levels and styles.

Don't forget to join online communities or local workshops dedicated to boho jewelry making; they're perfect for sharing ideas and receiving feedback from fellow crafters.

To get the materials you need, check out websites that offer affordable supplies, focusing on natural elements like stones, wood, and metals to complement the boho aesthetic.

Advertisement

Keeping a jewelry-making journal can also be incredibly beneficial—document your creative process, ideas, and resources to help track your progress and techniques over time.

For daily inspiration, follow artisan jewelry makers on social media to discover unique designs and emerging trends within the boho jewelry community.

  • YouTube tutorials for boho styles
  • Pinterest boards for design inspiration
  • Local workshops for hands-on experience
  • Online marketplaces for affordable materials
  • Social media accounts of artisan jewelers

Frequently Asked Questions

How Do You Get Into Jewelry Crafting?

To get into jewelry crafting, start by gathering essential tools and exploring beginner tutorials online. Measure your wrist for comfort, join jewelry-making groups for inspiration, and keep a journal to document your progress and ideas.

What Makes Jewelry Bohemian?

Bohemian jewelry blends natural materials, vibrant colors, and unique patterns to create an eclectic style. You'll find layering techniques and handmade elements, reflecting individuality and a connection to cultural influences, perfect for expressing your free spirit.

What Do You Need to Make Handmade Jewelry?

To make handmade jewelry, you'll need essential tools like pliers and wire cutters, as well as materials such as beads and wires. Familiarize yourself with techniques and have measuring tools for accurate sizing.

How to Make Your Own Jewelry and Sell It?

To make and sell your own jewelry, start by honing your skills with tutorials. Create unique pieces, accurately measure for comfort, set up an online store, and engage with communities to promote your creations.

Advertisement

Conclusion

Now that you're armed with all this boho jewelry knowledge, you're ready to release your inner artisan! Imagine crafting stunning pieces that dazzle like a thousand stars and tell stories as vibrant as a sunset. With every bead, wire, and charm, you'll weave magic that leaves friends gasping in awe. So plunge into this colorful world, create your unique treasures, and let your creativity soar to heights that rival the tallest mountains! Happy crafting!

Continue Reading
Advertisement

DIY and Crafts

Building a DIY Hanging Chair for Your Boho Space

Discover how to create a stylish DIY hanging chair for your boho space, and elevate your comfort with these essential tips and tricks!

Published

on

By

diy boho hanging chair

Building a DIY hanging chair for your boho space is a fun project that adds both style and comfort. You'll need materials like 2 yards of fabric, a sturdy wooden dowel, durable rope, and a metal clip. Start by creating a pocket in your fabric to prevent fraying and guarantee a secure fit. Use a combination of square knots for stability and fiber ropes for support. Make sure your chair hangs at a comfortable height, around 4-5 feet. Don't forget to inspect your work regularly for safety. Keep going to discover detailed tips on making the perfect hanging chair!

Key Takeaways

  • Select 2 yards of fabric and 16 feet of durable rope to create a stylish and comfortable hanging chair for your boho space.
  • Mark and drill holes in a 3-foot wooden dowel at 2-inch and 4-inch intervals for secure rope threading during assembly.
  • Use basic and alternating square knots to ensure structural integrity and stability of the hanging chair.
  • Choose a hanging height of 4-5 feet for easy entry and exit, adding cushions for enhanced comfort.
  • Regularly inspect ropes and hardware for wear, ensuring safety and durability in your DIY hanging chair.

Project Overview and Design Considerations

When you commence the DIY Hanging Macramé Chair project, you'll find it's inspired by stylish designs from Urban Outfitters and crafted with insights from Mandi at Vintage Revivals. Since there aren't many tutorials available, you'll appreciate the step-by-step guidance that focuses on fundamental design considerations.

To enhance the learning experience as you build, consider incorporating eco-friendly materials that align with sustainable practices.

As you plan your hanging chair, keep in mind the comfort and stability it needs. Extensive trial and error may be necessary to achieve the perfect balance, ensuring the chair is durable and doesn't sag over time.

Consider using smaller hoops if your chair will cater to smaller users, while also designing it to accommodate various body sizes for inclusivity and safety.

You'll use over 200 feet of clothesline rope and basic knotting techniques, so it's vital to prioritize secure hanging methods.

Advertisement

Feedback from users emphasizes the chair's beauty and functionality, showing how thoughtful design can enhance your space.

As you navigate this project, remember the importance of clear instructions or video tutorials, which can make the building process smoother and more enjoyable.

Get ready to create a stunning piece that adds a boho touch to your home!

Materials Required and Construction Techniques

building materials and methods

To kick off your DIY hanging chair project, gather essential materials that guarantee both functionality and style. You'll need 2 yards of fabric, a metal clip that supports up to 200 pounds, 16 feet of durable rope, and a 3-foot wooden dowel for structure. Head to your local hardware store to find these items, ensuring they're sturdy and free of defects.

Engaging your imagination in this project can reveal transformative possibilities, allowing you to create a piece that reflects your personal style and enhances your space, making it a source of tranquility.

Start the construction process by marking your wooden dowel for drilled holes at 2-inch and 4-inch intervals. This step's significant because it allows the rope to be threaded through securely.

Advertisement

When you're ready to cut the fabric, create a pocket by folding the top edge and sewing it to prevent fraying. Make sure this pocket is thick enough for the rope insertion.

Next, you'll secure the rope by tying knots and threading it through the dowel and fabric. Don't forget to create a center knot to attach your metal clip for hanging.

Once that's done, install your macrame chair in your desired location and add cushions for extra comfort. With these materials and techniques, you'll have a stylish and functional hanging chair ready for your boho space!

Knotting Techniques and Assembly Process

knotting methods and assembly

How can you guarantee your DIY hanging chair is both sturdy and stylish? By mastering knotting techniques and following a thoughtful assembly process, you can achieve both. Start by using a Basic Square Knot around the hoop, making sure your knots are tight and secure. Then, utilize alternating Square Knots throughout the chair's structure to create a robust framework.

Next, construct the seat separately using poster board for shape and reinforce ties between the walls and seat. For the ropes supporting the chair, employ a braid technique, ensuring the wood pieces are drilled properly for ideal rope placement and leveling.

Here's a quick reference table for your knotting techniques:

Advertisement
Knotting Technique Purpose
Basic Square Knot Initial stability
Alternating Square Knot Structural integrity
Braid Technique Support for hanging
Reinforced Ties Seat stability
Finishing Techniques Aesthetic appeal

Comfort and Safety Considerations

safety and comfort priorities

Comfort and safety are essential elements in creating a reliable DIY hanging chair. To begin, establish a weight limit that accommodates various body sizes, guaranteeing everyone can enjoy the chair comfortably.

Additionally, incorporating natural materials, such as reclaimed wood for the frame, can enhance the rustic charm of your boho space while maintaining functionality. Next, focus on secure attachment; always anchor the chair to ceiling joists with appropriate hardware, as key elements of modern farmhouse decor emphasize stability and authenticity. Avoid using drywall as it can lead to a dangerous collapse.

Regularly inspect the integrity of the ropes and hardware for any signs of wear and tear. This guarantees that they remain strong enough to support you safely during use.

For peak comfort, hang the chair at a height of 4-5 feet from the ground. This height allows for easy entry and exit while maintaining stability.

To enhance your comfort during extended use, consider adding cushions or padding to the chair. This makes it perfect for long reading sessions or simply relaxing.

Taking these comfort and safety considerations into account will help you create a hanging chair that not only looks great in your boho space but also provides a secure and enjoyable experience for you and your guests.

Advertisement

Community Engagement and Feedback

participation and input gathering

Amid the growing interest in DIY projects, the community around the hanging chair has flourished with enthusiasm and creativity. This surge is reminiscent of the collaborative spirit found in the authors of Positive Thinking Day, who emphasize the importance of community support in personal growth.

You've likely noticed the surge of engagement on social media platforms like TikTok, where users share their unique setups and craftsmanship. With videos amassing over 17.1K views, it's clear that many are keen to showcase their work and inspire others in this DIY journey.

Positive feedback highlights not just the beauty of these chairs but also their functionality. As you navigate this project, you'll find that others appreciate the effort that goes into creating a stunning piece for their homes. The demand for step-by-step guides and patterns is palpable, underscoring the community's desire for shared resources.

Moreover, requests for video tutorials have emerged, suggesting that visual aids can greatly enhance your understanding of the assembly process. While creators like Mallory & Savannah are focused on providing tutorials, there's also growing interest in ready-made options, hinting at a market gap.

Engaging with this vibrant community can elevate your DIY experience, providing support and inspiration along the way.

Frequently Asked Questions

What Is the Best Fabric Choice for Outdoor Hanging Chairs?

When choosing fabric for outdoor hanging chairs, consider weather-resistant materials like solution-dyed acrylic or polyester. These fabrics resist fading, mold, and mildew, ensuring durability while keeping your space stylish and comfortable for relaxation.

Advertisement

How Do I Maintain and Clean My Hanging Chair?

Wondering how to keep your hanging chair looking fresh? Regularly dust it off and spot-clean stains with mild soap and water. For outdoor chairs, protect them from the elements when not in use.

Can I Use Recycled Materials for This Project?

Absolutely, you can use recycled materials for this project! It's a great way to save money and reduce waste. Just make sure the materials are sturdy enough to support your chair and provide safety.

What Are Alternative Designs for a Hanging Chair?

You can explore various designs for a hanging chair. Consider options like macrame, woven rattan, or even suspended fabric hammocks. Each design adds unique flair, enhancing your space's overall aesthetic while ensuring comfort and style.

How Much Weight Can a DIY Hanging Chair Support?

When considering how much weight a DIY hanging chair can support, you should factor in materials, construction, and attachment points. Typically, a well-built chair can hold between 200 to 300 pounds safely, depending on these elements.

Conclusion

You might think building a DIY hanging chair sounds complicated, but it's easier than you'd imagine. By taking it step by step, you'll create a cozy spot that reflects your style and brings comfort to your space. Picture yourself lounging in your beautiful chair, surrounded by friends, enjoying laughter and connection. This project isn't just about craftsmanship; it's about creating memories and a haven where you can unwind and let your boho spirit shine.

Advertisement
Continue Reading

DIY and Crafts

Tie-Dye Techniques for Boho Home Textiles

Inspire your boho decor with vibrant tie-dye techniques that transform simple textiles, but discover the secrets to achieving stunning, unique designs!

Published

on

By

boho tie dye home textiles

You can easily bring vibrant flair to your boho home textiles with tie-dye techniques. Try the classic spiral for colorful throws or the bullseye method for eye-catching cushions. Crumple and geode tie-dye offer organic and unique aesthetics, while ice dyeing creates soft, dreamy patterns. Use natural fabrics like cotton or linen for the best results. Don't forget to prewash to enhance dye absorption! Experiment with binding techniques and color application for custom designs. With a bit of practice, you'll be creating artfully dyed textiles that elevate your home. There's plenty more you can explore to perfect your techniques!

Key Takeaways

  • Utilize the classic spiral technique for vibrant swirls that complement boho-style throws and blankets.
  • Experiment with the bullseye pattern to create eye-catching cushions that enhance bohemian decor.
  • Incorporate crumple designs for an organic, marble-like look perfect for casual, relaxed spaces.
  • Use ice dyeing to achieve soft, watercolor-like patterns that evoke an ethereal bohemian aesthetic.
  • Choose natural fabrics like cotton and prewash them with vinegar for optimal dye absorption and vibrant results.

Overview of Tie-Dye Techniques

Tie-dye techniques open up a world of creativity in fabric design, allowing you to transform plain textiles into vibrant works of art. You can explore various tie dye patterns by folding, twisting, or crumpling fabric, with popular methods like spiral, bullseye, and crumple designs.

The beauty of tie-dye lies in its limitless potential; there are no strict rules, so you can freely experiment with color combinations and fabric manipulation. Additionally, incorporating boho wall decor ideas can enhance the overall aesthetic of your space, making it more inviting and personalized.

Traditional techniques such as Bandhani and Shibori offer intricate designs steeped in cultural heritage, while modern approaches emphasize bold, vibrant aesthetics. One contemporary method worth exploring is ice dyeing, which uses ice cubes to create fluid, unpredictable patterns. This technique results in stunning watercolor-like effects that can elevate any textile.

To achieve your desired results, understanding the dyeing process is vital. Proper preparation of the fabric and careful application of dyes play a significant role in your success.

Popular Tie-Dye Patterns

vibrant colorful fabric designs

Exploring the world of tie-dye reveals a variety of popular patterns that can elevate your home textiles. Each design adds a unique touch, so let's plunge into some favorites.

Pattern Description Ideal Use
Classic Spiral Vibrant swirls created by twisting fabric and dyeing in segments. Perfect for boho-style throws.
Bullseye Striking concentric circles made by pinching and tying fabric. Great for eye-catching cushions.
Crumple An organic, marble-like appearance from random crumpling. Ideal for casual decor.

You'll love how the Classic Spiral creates colorful patterns that brighten up any room. The Bullseye brings a focal point with its eye-catching design, while the Crumple offers a relaxed vibe. If you're feeling adventurous, try Geode Tie Dye, mimicking crystal formations for a unique aesthetic. Finally, Ice Dyeing provides soft, watercolor-like patterns that are perfect for ethereal curtains. With these techniques, your home textiles will reflect your personality and style beautifully!

Advertisement

Natural Dyeing Methods

eco friendly fabric coloration techniques

Embracing natural dyeing methods opens up a world of eco-friendly creativity for your home textiles. You can use plant-based materials like turmeric to create vibrant colors, such as a sunny yellow, while keeping your process non-toxic.

Before diving into dyeing, it's essential to prewash your fabric with vinegar to remove any sizing, which guarantees the dye absorbs better. Additionally, consider incorporating seeds like chia seeds for their binding properties when creating fabric designs that require additional texture or reinforcement.

To start, prepare your dye bath by boiling your natural dye material with water and salt. Immerse your fabric and tie it to achieve intricate patterns. You'll find that different fabrics, like cotton, linen, and silk, react uniquely to natural dyes, with cotton often yielding the brightest colors due to its absorbency.

Experimenting with these natural dyeing methods can lead to delightful surprises; the final color can shift upon drying, often fading into softer tones. This unpredictability adds a unique charm to each piece, making your home textiles truly one-of-a-kind.

Essential Supplies for Tie-Dye

tie dyeing essential supplies list

To create stunning tie-dye designs at home, you'll need a few essential supplies that make the process smooth and enjoyable. Start with natural fabrics like cotton, linen, or silk, as these materials absorb dye well and yield vibrant results. For those looking to guarantee their creations are safe for pets, consider using vet-approved materials to avoid any allergies or sensitivities.

Next, invest in a tie-dye kit, which typically includes various fabric dyes, rubber bands for binding, and protective gloves to keep your hands stain-free during the fun.

Prewashing fabric is an important step, too. Use detergent and vinegar to remove any sizing, allowing for better dye adherence and more vivid colors in your final piece. Once your fabric is ready, you'll need a large stainless steel or ceramic pot for preparing your dye baths. This guarantees the dyeing process is safe and effective, avoiding reactions with the material.

Advertisement

For added precision, consider using spray bottles for dye application. This will help you create more intricate designs and patterns on your textiles. With these supplies in hand, you're set to initiate your tie-dye journey and transform your home textiles into beautiful, boho masterpieces!

Tips for Successful Tie-Dyeing

creative tie dye techniques guide

Successful tie-dyeing relies on a few key techniques that can elevate your creations from ordinary to extraordinary. To guarantee vibrant colors and beautiful patterns, follow these essential tips: Incorporating elements of Textile Art trends can inspire unique tie-dye techniques and designs.

  • Pre-wash your fabric: This step removes any finishes, allowing better dye absorption.
  • Use high-quality dyes: Choose vibrant dyes specifically formulated for fabric to achieve the best results.
  • Experiment with binding techniques: Crumple, fold, or twist the fabric to create unique patterns that reflect your bohemian style.
  • Dye to each section: Apply colors carefully to different areas, guaranteeing a balanced and striking design.
  • Let it sit: Allow your tied fabric to soak in the dye bath for at least 6-8 hours, or overnight for deeper color penetration.

After dyeing, rinse your textiles in cold water and follow up with a baking soda rinse to set the dye. This prevents bleeding and fading after washing, guaranteeing your boho home textiles stay vibrant.

Frequently Asked Questions

What Do You Soak Fabric in Before Tie Dying?

Before tie-dying, you should soak fabric in a mixture of water and white vinegar—about 1/4 cup per gallon. This helps set the dye and guarantees more vibrant, long-lasting colors in your finished project.

What Are the 6 Techniques to Tie-Dyeing?

You've got six tie-dye techniques to explore: Spiral, Bullseye, Crumple, Stripes, Shibori, and the classic Twist. Each method offers unique patterns and effects, so experiment to find your favorite style!

How to Do Monochromatic Tie-Dye?

Monochromatic tie-dye's all about simplicity, yet it creates stunning depth. Start by diluting a single dye color, bind your fabric, and layer shades from dark to light. Let it set, then rinse for vibrant results.

How Do You Tie-Dye Silk Fabric?

To tie-dye silk fabric, pre-wash it, soak in vinegar, and use fiber-reactive dyes. Experiment with techniques like spirals or shibori. Rinse in cold water, then dry away from sunlight to preserve colors.

Advertisement

Conclusion

Now that you've explored tie-dye techniques, patterns, and supplies, you're ready to release your creativity and transform your home textiles into vibrant masterpieces. Whether you're opting for natural dyes or classic patterns, each piece you create will burst with personality and flair. Remember, the only limit is your imagination—so go wild! With a little practice, you'll be the tie-dye guru of your neighborhood, turning every fabric into a work of art that's nothing short of legendary!

Continue Reading

DIY and Crafts

DIY Boho-Inspired Wind Chimes

Gather materials and unleash your creativity with DIY boho-inspired wind chimes that will transform your outdoor space—discover the secrets to perfecting their sound!

Published

on

By

handmade bohemian wind chimes

Crafting your own boho-inspired wind chimes is a delightful way to beautify your outdoor space. Start by gathering materials like wooden rounds, glass beads, feathers, and a sturdy stick. Cut strings into various lengths for a layered musical effect. Paint the smaller round in bright colors, then drill holes in the larger one for string attachment. Securely tie knots and experiment with weights for balance and sound. Add personal touches, like meaningful colors or symbols, to make them unique. Keep going to uncover tips on perfecting sound and enhancing your chime's aesthetic appeal!

Key Takeaways

  • Gather materials like wooden rounds, glass beads, feathers, and natural wind chime pipes for a boho-inspired design.
  • Paint the smaller wooden round in vibrant colors and drill holes in the larger round for string attachment.
  • Use varying string lengths and secure components with slipknots for optimal sound quality and visual appeal.
  • Incorporate personal elements and meaningful symbols to create unique, cherished keepsakes.
  • Place wind chimes in windy areas to enhance sound interaction and enjoy seasonal musicality.

Materials You'll Need

To create your DIY wind chimes, you'll need a few essential materials. Start by gathering two wooden rounds: one large, about 8-10 inches for the base, and a smaller round, like a wooden toy wheel, for the center. These wooden pieces will provide a solid foundation for your wind chimes and contribute to that rustic Bohemian style you're aiming for.

Incorporating natural elements, like these wooden rounds, not only enhances the aesthetic appeal but also promotes tranquility in your outdoor space, aligning with calming decor ideas.

Next, collect decorative elements such as glass beads and feathers. These will enhance the aesthetic appeal of your wind chimes, adding color and texture. For sound production, source wind chime pipes—either from a disassembled wind chime or by crafting your own from natural materials.

To assemble everything, use vinyl string or basic string to secure the components together. Consider adding a weighted item, like a small owl, for balance.

Step-by-Step Construction

guided building process explained

Now that you've gathered your materials, it's time to start constructing your wind chime.

Focus on selecting a sturdy base and cutting your strings to the right lengths for an eye-catching design.

Advertisement

You might consider incorporating elements inspired by nature, such as colorful best daisy varieties for gardens, to enhance your chime's aesthetic.

As you assemble, keep in mind some helpful techniques to guarantee everything stays secure and looks great.

Materials Selection and Preparation

Gathering the right materials is essential for crafting beautiful DIY wind chimes that not only look good but also create enchanting sounds. Start by selecting components that resonate with your style and the natural elements around you. For inspiration, consider how you can incorporate natural elements like wood and plants into your design.

Here's a quick list of what you'll need:

  1. A Stick: This will serve as the base for your wind chime, so choose one that's sturdy yet visually appealing.
  2. Pretty Wood Beads: These will add color and texture to your design, so consider different sizes and shapes.
  3. Feathers: Use these for decoration; they'll bring a whimsical touch and flutter gracefully in the wind.

Once you have your materials, cut the basic string into various lengths to create layers that produce different sounds when the wind chimes move.

Secure your wood beads and feathers to the string using hot glue, ensuring they're firmly attached. Finally, tie the strings around the stick, making sure to knot them securely and add extra hot glue on the knots to prevent shifting.

Advertisement

Your wind chime is now ready for assembly, reflecting your unique style and creativity!

Assembly Techniques and Tips

With your materials prepared, it's time to start assembling your wind chime. Begin by painting the smaller wooden round in a vibrant color, like turquoise, to give your design a lively touch. Once it's dry, grab the larger wooden round and drill one center hole, plus eight outer holes, to hold the vinyl strings for both the chime pipes and decorative beads.

Choosing bright colors can enhance the visual appeal of your wind chime, similar to how brightly colored flowers attract hummingbirds.

Next, take the hanging ring and use a slipknot to securely attach each component. Make sure all strings are evenly adjusted to guarantee proper leveling. As you string the beads and pipes, position them closer to the center of the larger round. This placement will enhance the sound quality, creating a more harmonious chime.

Don't hesitate to experiment with different weights and materials for your chime pipes and beads. This way, you can achieve the desired auditory effect and visual appeal for your finished wind chime.

Advertisement

Once you've got everything in place and securely attached, hang your wind chime in a spot where it can catch the breeze, and enjoy the soothing sounds it creates!

Assembly Recommendations

guidelines for assembly procedures

To successfully assemble your DIY wind chimes, start by drilling a center hole and several outer holes in the larger wooden round. This step is vital as it facilitates the secure attachment of wind chime pipes and decorative beads.

Incorporating natural materials like wood will enhance the aesthetic quality of your wind chimes, making them a charming addition to your outdoor space, reminiscent of essential elements for a farmhouse dining room.

Follow these recommendations to guarantee a beautiful and functional design:

  1. Create a Hanging Mechanism: Use a long piece of vinyl string to make a slipknot around the hanging ring. This allows for easy adjustment and guarantees your wind chime hangs securely.
  2. Tie Knots for Stability: As you assemble the wind chime, tie knots at each hole on the large round. This maintains proper tension and positioning of the strings, crucial for producing superior sound.
  3. Arrange Decorative Elements: Randomly arrange the glass beads along the strings. This not only enhances the auditory experience when the wind blows but also adds a charming visual element.

As you add components, take care to level the top wooden round, guaranteeing a balanced and aesthetically pleasing design that enhances both sound and visual appeal.

Enjoy the process, and let your creativity shine!

Avoiding Common Mistakes

steering clear of pitfalls

When you're crafting your wind chimes, pay close attention to string length and the placement of your components.

Engaging in creative activities like crafting can enhance family bonds and provide opportunities for shared experiences, similar to how dads reveal the magic of reading together.

Advertisement

If the strands are too short or poorly positioned, you mightn't get the beautiful sound you're aiming for.

Strategically arranging everything can make a big difference in both sound quality and overall appearance.

Proper String Length

Achieving the perfect sound from your DIY wind chimes hinges on the proper length of your strings. If you want to avoid common mistakes, keep these tips in mind:

1. Length Matters: Aim for strings that are at least 10-12 inches longer than your desired hanging length. This extra length allows for adequate movement, which is essential for sound production.

Additionally, consider using essential oil safety to avoid any mishaps during your project, especially when working with materials that may be sensitive to specific scents.

Advertisement

2. Varying Lengths: Use different string lengths for various components, like pipes and beads. This creates a visually appealing layered effect, enhancing both the aesthetics and sound of your chimes.

3. Test and Adjust: As you assemble your wind chime, regularly test the lengths of your strings. Make on-the-spot adjustments to guarantee all elements move freely without tangling.

Avoid using strings that are too short; this can lead to poor sound quality and an unbalanced design.

Strategic Component Placement

Proper string length is only part of the equation; where you place your components plays a significant role in the overall sound and aesthetics of your wind chimes. To enhance sound quality and resonance, position your strands of wind chime pipes and decorative beads closer to the center of the wooden round. This placement allows for better movement and produces a richer sound.

Additionally, using natural materials for your wind chimes can contribute to a more authentic aesthetic and resonate with the environment, as seen in eco-friendly toy materials.

Advertisement

Make certain each vinyl string is securely knotted to prevent slippage, which can lead to uneven hanging and diminish sound production. Experiment with varying lengths for the strings of pipes and beads to create a balanced visual aesthetic while still allowing for ideal movement in the wind.

Regularly check and adjust the alignment of the top wooden round during assembly to maintain a level structure. This is vital for consistent sound.

Additionally, consider the weight distribution of your hanging components; unevenly placed weights can interfere with the chime's ability to create harmonious sounds. By strategically placing your components, you'll guarantee that your DIY wind chimes not only look beautiful but also produce delightful melodies that enhance your outdoor space.

Enhancing Your Wind Chime

improving your wind chime

To enhance your wind chime, consider incorporating a variety of materials like colorful beads, feathers, and crystals.

These elements not only add visual appeal but also create a unique aesthetic that reflects your personal style, much like the layered textiles found in Bedroom Boho Decor Ideas.

Here are three ideas to take your wind chime to the next level:

Advertisement
  1. Experiment with Lengths: Vary the lengths of your wind chime pipes. Different lengths produce different tones, creating a harmonious sound that resonates beautifully in the breeze.
  2. Add Weight: Use a small decorative object as a weighted end. This guarantees proper movement and sound production when the wind blows. Think about something that complements your theme, like a shell or a small charm.
  3. Paint for Contrast: Utilize vibrant paints or finishes on wooden components. This striking contrast against natural elements will draw the eye and enhance the overall design of your chime.

Enjoying the Sounds

embracing the musical experience

With the gentle whisper of the wind, wind chimes create an enchanting soundscape that can transform your outdoor space into a serene retreat. The soothing melodies these chimes produce enhance relaxation, making your garden or porch an ideal spot for unwinding. Deeper tones resonate beautifully, providing a calming auditory experience that can lift your mood and alleviate stress.

To maximize the auditory experience, place your wind chimes in areas with consistent wind exposure. This guarantees they interact with the breeze, producing a lovely sound throughout the day. Seasonal changes also play a role; different winds and temperatures can enrich the musicality of your chimes, making each moment unique.

Here's a simple way to visualize the impact of your wind chimes:

Sound Quality Atmospheric Effect
Resonant Tones Calming Ambiance
Soft Melodies Relaxation
Seasonal Variance Enriching Experience
Harmonious Blend Bohemian Vibe

Personalizing Your Design

tailored design for you

When creating your wind chimes, personalizing your design can truly elevate their charm and significance. By incorporating elements that resonate with you, your wind chimes will become more than just decor; they'll tell your story.

Additionally, you can consider adding natural elements that not only enhance the aesthetic but may also contribute to your well-being, such as incorporating chia seeds for digestive health in creative ways.

Consider these three ideas to personalize your wind chimes:

  1. Vibrant Materials: Use a mix of colorful wood beads and feathers to create a unique aesthetic that reflects your style. The more vibrant the materials, the more eye-catching your design will be.
  2. Meaningful Colors and Symbols: Choose specific colors or symbols that hold personal meaning for you. This adds a layer of significance, making each chime a representation of your experiences and emotions.
  3. Cherished Keepsakes: Add charms or trinkets that resonate with you, like small tokens from travels or gifts from loved ones. These elements can transform your wind chimes into cherished keepsakes, reminding you of special moments.

Creative Inspiration and Ideas

innovative thoughts and concepts

As you commence your wind chime creation journey, let your imagination soar with various creative inspirations and ideas.

Start by incorporating natural materials like wood, feathers, and beads to achieve that rustic, artistic vibe typical of boho decor. You can also explore using recycled or upcycled materials, such as disassembled wind chimes or intriguing found objects, which not only add uniqueness but support sustainable crafting.

Advertisement

Don't forget to experiment with different string types. Vinyl or natural fibers can greatly influence both the sound quality and the visual appeal of your chimes, allowing for a personalized auditory experience.

Adding crystals with drilled holes can elevate your design, enhancing its beauty while adding a spiritual touch often associated with bohemian styles.

Layering elements like feathers and beads creates depth and movement, ensuring your wind chimes are visually engaging. This layering also aids in producing a pleasant sound when the wind blows, turning your decorative piece into a sensory experience.

Frequently Asked Questions

What Are the Best Locations to Hang My Wind Chimes?

You'll want to hang your wind chimes in areas with gentle breezes, like near windows or porches. Avoid crowded spaces to guarantee they can freely sway and create soothing sounds without obstruction.

How Can I Maintain My Wind Chimes Over Time?

You'll want to keep your wind chimes sounding beautiful, right? Regularly check for debris, tighten loose parts, and clean them gently. With a little care, they'll keep enchanting you with their melodies for years.

Advertisement

Are There Specific Weather Conditions to Consider?

When considering weather conditions, you should watch for extreme temperatures, heavy rain, and strong winds. These factors can damage your chimes, so placing them in a sheltered spot protects them and guarantees longevity.

Can I Incorporate LED Lights Into My Wind Chime Design?

Absolutely, you can incorporate LED lights into your design! String them through the chimes or attach them creatively. Just make sure they're weatherproof, so your beautiful creation shines brightly, day and night, regardless of the conditions.

What Types of Sound Can Different Materials Produce?

Think of sound as a painter's brush, each material creating its own vibrant hue. Bamboo offers soft, mellow tones, while metal produces bright, ringing chimes. Experiment with glass for delicate tinkling, and explore wood for warm, earthy sounds.

Conclusion

Now that you've crafted your beautiful boho-inspired wind chimes, it's time to let them dance in the breeze. Just like a retro mixtape, each chime sings its own unique tune, creating a symphony of sound that'll soothe your spirit. Don't forget to personalize your design with colors and charms that reflect your style. So go ahead, hang them up, and enjoy the enchanting melodies they bring to your space—nature's very own playlist!

Advertisement
Continue Reading
Advertisement

Affiliate disclaimer

As an affiliate, we may earn a commission from qualifying purchases. We get commissions for purchases made through links on this website from Amazon and other third parties.

Advertisement

Vetted

bohemian accent tables guide bohemian accent tables guide
Vetted6 days ago

15 Best Bohemian-Inspired Accent Tables to Elevate Your Home Decor

Uncover the charm of bohemian-inspired accent tables with our curated selection that transforms any space into a vibrant oasis. Discover...

stylish handwoven dog beds stylish handwoven dog beds
Vetted6 days ago

15 Best Handwoven Boho-Style Dog Beds for Your Stylish Pup

Check out these 15 stunning handwoven boho-style dog beds that combine comfort and chic design, perfect for your stylish pup's...

boho inspired cycling bike baskets boho inspired cycling bike baskets
Vetted6 days ago

15 Best Boho-Inspired Bike Baskets to Elevate Your Cycling Style

Wondering how to enhance your cycling style? Discover the 15 best boho-inspired bike baskets that will transform your rides into...

elegant rattan magazine holders elegant rattan magazine holders
Vetted6 days ago

15 Best Rattan Magazine Holders That Add a Touch of Elegance to Your Space

Get inspired by 15 exquisite rattan magazine holders that elevate your decor—discover the perfect blend of style and functionality for...

boho chic natural fiber hats boho chic natural fiber hats
Vetted6 days ago

15 Best Natural Fiber Boho-Chic Sun Hats for Effortless Summer Style

Get ready to elevate your summer wardrobe with the 15 best natural fiber boho-chic sun hats that offer style and...

boho tarot decks guide boho tarot decks guide
Vetted6 days ago

15 Best Boho-Inspired Tarot Card Decks for the Free-Spirited Seeker

Witness the enchanting world of 15 boho-inspired tarot card decks that beckon the free-spirited seeker—discover which one resonates with your...

boho outdoor poufs guide boho outdoor poufs guide
Vetted6 days ago

15 Best Boho-Style Outdoor Poufs to Elevate Your Outdoor Space

Add charm and comfort to your outdoor space with the 15 best boho-style poufs; discover which options will transform your...

unique handmade ceramic burners unique handmade ceramic burners
Vetted6 days ago

15 Best Handmade Ceramic Incense Burners to Elevate Your Space (Plus Unique Designs!)

Browse through our curated list of the 15 best handmade ceramic incense burners that will transform your space—discover the unique...

boho watering cans collection boho watering cans collection
Vetted6 days ago

15 Best Boho-Inspired Watering Cans for Indoor Plants That Will Elevate Your Home Décor

Get inspired by these 15 boho watering cans that elevate your indoor plants and home decor—discover which ones made my...

top macram table runners 2024 top macram table runners 2024
Vetted6 days ago

15 Best Macramé Table Runners to Elevate Your Home Décor in 2024

Upgrade your dining experience with the 15 best macramé table runners for 2024—discover unique styles that will transform your home...

bohemian wind spinners selection bohemian wind spinners selection
Vetted6 days ago

15 Best Bohemian-Style Wind Spinners to Elevate Your Outdoor Decor

Overflowing with vibrant designs, these 15 bohemian-style wind spinners will elevate your outdoor decor—discover which one is perfect for you!

eco friendly boho chic totes eco friendly boho chic totes
Vetted6 days ago

15 Best Natural Fiber Boho-Chic Tote Bags for Eco-Friendly Style Lovers

Discover chic and sustainable tote bags that elevate your style while caring for the planet—find out which ones made our...

Advertisement

Trending