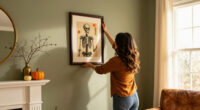
This guide shows you how to make spooky Halloween wall art: painted silhouette panels on stretched canvas that you can hang on any wall for the holiday. You will trace or print a template, transfer it to canvas, fill it in with paint, and add atmospheric background effects. The finished result is a set of one to three lightweight art panels featuring designs such as bats, a haunted house, a black cat, or a gnarled tree against a glowing orange or moody purple sky.

Get furniture and decor delivered free with Prime
- Fast, free delivery on millions of items
- Prime Video, Amazon Music and more included
- Member-only deals all year

Whaline 10Pcs Halloween Dark Wall Art Prints
- ✔ Quantity: 10 prints
- ✔ Sizes: 3 pcs 8×10 in, 3 pcs 11×14 in, 4 pcs 12×9 in
- ✔ Material: Premium paper

Halloween Wall Art – Gothic Haunted House and Pumpkin Print
- ✔ Format: Art print on wrapped canvas
- ✔ Frame: Wood, included
- ✔ Available Sizes: 6×8 in to 24×36 in

Vodefoad Vintage Cute Ghost Wall Art
- ✔ Size: 8×10 inches
- ✔ Format: Unframed art print
- ✔ Material: Premium fade-resistant canvas
This guide is written for beginners. You do not need to be able to draw — the template method does the shape work for you, and the painting itself is mostly filling in solid areas with one color. Expect about 2-3 hours of active work spread across an afternoon, plus overnight drying before the panels are ready to hang. If you can use scissors and a paintbrush, you can complete this project.
Difficulty: Beginner | Time: 2-3 hours (plus overnight drying time)
What You’ll Need
Tools & Materials:
- Stretched canvases, 8×10 inch or larger (one to three panels)
- Acrylic craft paint in black, plus orange, purple, and white for backgrounds
- Assorted paintbrushes: a 1-inch flat brush for backgrounds and a small detail brush
- A pencil and a sheet of transfer or carbon paper (or a soft pencil for the graphite-rub method)
- Printer paper and a printer, or tracing paper
- Scissors and masking tape
- A sponge or rag for texture effects
- Newspaper or a drop cloth to protect your work surface
- Optional: adhesive picture hooks or removable wall strips for hanging
Knowledge:
- Basic familiarity with painting flat areas with a brush
- Ability to print and scale a template image to fit a canvas
- No drawing skill required
Work in a ventilated area and wear clothes you don’t mind getting paint on — acrylic paint is water-soluble when wet but permanent once dry. Lay down newspaper before opening any paint. If you are working with children, an adult should handle any cutting of thick paper or cardstock templates.
Whaline 10Pcs Halloween Dark Wall Art Prints
When the goal is to make an entire room feel haunted, volume beats a single statement piece, and that’s exactly where this Whaline set pulls ahead of the competition. Ten separate designs — bats, pumpkins, ghosts, skulls, and crows in a creepy vintage aesthetic — give you the raw material for a proper gallery wall, something neither the Gothic Haunted House canvas nor the Vodefoad ghost print can match on their own. The mixed sizing (8×10, 11×14, and 12×9 inches) is a genuinely useful touch, letting you build an asymmetric arrangement rather than a rigid grid.Compared with the Vodefoad print, this set wins on variety and scale of decorating coverage, though it loses on material — the Whaline prints are paper rather than fade-resistant canvas, so they’re more vulnerable in sunlit rooms and across many seasons of reuse. The vintage creepy aesthetic is cohesive enough to mix and match designs across bedrooms, dorms, offices, or party spaces without clashing. The paper itself is described as durable and tear-resistant for its class, which is fair for the format.The obvious cost of all this variety is framing. Ten prints mean ten frames if you want a finished look, which adds real expense and effort — buyers who want art on the wall within minutes should look at the ready-to-hang Gothic Haunted House canvas instead. But if you enjoy styling a space and want maximum Halloween atmosphere per dollar, this set makes the most sense.
Pros:
- Ten distinct designs allow a full gallery wall from one purchase
- Three different sizes enable flexible, layered arrangements
- Durable premium paper resists everyday tearing and wear
- Versatile across bedrooms, dorms, offices, and Halloween parties
Cons:
- Unframed — all ten prints require separately purchased frames for a finished look
- Paper construction is less durable and fade-resistant than canvas options
Best for: Anyone decorating a full wall, dorm, or party space who wants maximum variety and a cohesive creepy-vintage look for less.
Not ideal for: Buyers who want art ready to hang out of the box, or those hanging pieces in bright, sun-exposed rooms where paper fades faster.
Bottom line: The strongest overall pick for transforming a whole space into a spooky scene, provided you’re willing to handle the framing yourself.
“The strongest overall pick for transforming a whole space into a spooky scene, provided you’re willing to handle the framing yourself.”
Halloween Wall Art – Gothic Haunted House and Pumpkin Print
This is the pick for buyers who value convenience and finished quality above all else. Unlike the two unframed options in this lineup, the Gothic Haunted House print arrives on wrapped canvas with a real wooden frame and included hanging accessories — it goes from box to wall in minutes. That alone justifies its premium positioning for anyone who doesn’t want to shop for frames, and it’s the deciding advantage over the Whaline set’s ten bare prints.Size flexibility is the other major differentiator. With options ranging from 6×8 up to 24×36 inches, it’s the only pick here that can anchor a large living room wall as a true focal point. The Vodefoad ghost print, by comparison, is locked to a single 8×10 format, and the Whaline set tops out at 11×14 per piece. The haunted house and pumpkin composition reads as classic gothic Halloween rather than cute or kitschy, which suits traditional and moody interiors alike.The tradeoff is focus: you get one design, not ten. Where the Whaline set spreads atmosphere across a whole wall, this piece concentrates it in one spot — buyers decorating multiple rooms will need to buy several or pair it with other art. Its appeal is also more strictly seasonal than the Vodefoad’s year-round dark academia style, so expect to swap it out come November. For a single-piece, hang-and-done Halloween upgrade, though, this option stands out as the most polished in the group.
Pros:
- Ready to hang out of the box with included accessories
- Sizes from 6×8 up to 24×36 inches for everything from accents to focal points
- Quality canvas on a sturdy wooden frame for lasting display
- Made in USA construction
Cons:
- Single design only — no variety across multiple rooms or walls
- Seasonal appeal makes it less useful once Halloween passes
Best for: Buyers who want a single, finished statement piece that hangs immediately — especially for living rooms, hallways, or as a seasonal gift.
Not ideal for: Anyone decorating a large wall on a budget with unframed-print flexibility, or those wanting art that stays up year-round.
Bottom line: The best choice for a polished, hang-it-today statement piece — just know you’re buying one focal artwork, not a decorating system.
“The best choice for a polished, hang-it-today statement piece — just know you’re buying one focal artwork, not a decorating system.”
Vodefoad Vintage Cute Ghost Wall Art
Not everyone wants Halloween decor that disappears into storage on November 1st, and that’s the niche this Vodefoad print fills better than either competitor. Its cute ghosts, black cat graveyard scene, and dark academia silhouettes lean retro-whimsical rather than outright creepy, so the piece reads as gothic wall art first and Halloween decor second. Compared with the Gothic Haunted House canvas, it trades seasonal drama for everyday usability — you can reasonably leave it up through winter and beyond.Material-wise, it sits a notch above the Whaline paper prints: the fade-resistant premium canvas holds color better over repeated seasons and suits the rustic and farmhouse-adjacent styling the design aims for. Being unframed is less of a limitation than it sounds, since the standard 8×10 size fits inexpensive off-the-shelf frames, giving you styling freedom the pre-framed Gothic Haunted House doesn’t offer.The real constraints are scale and singularity. One 8×10 landscape print is an accent, not a room transformation — if you’re covering a gallery wall, the Whaline set is the better fit, and if you need something large for over a sofa, only the Gothic Haunted House goes big enough. It also makes a genuinely strong gift for dark academia and spooky-aesthetic fans, which is a role the other two can’t claim as naturally. Within its limits, it’s the most design-flexible piece here.
Pros:
- Design works for Halloween and year-round gothic decor alike
- Fade-resistant premium canvas outlasts paper prints across seasons
- Standard 8×10 size fits affordable ready-made frames
- Strong gift choice for spooky and dark academia aesthetics
Cons:
- Unframed, requiring a separate frame purchase
- Only one design in a single 8×10 size — no large-format option
Best for: Fans of dark academia, gothic, or farmhouse style who want spooky art that stays up all year, plus gift-givers shopping for aesthetic-minded friends.
Not ideal for: Buyers filling a large wall or wanting multiple designs — a single 8×10 print can’t carry a whole space.
Bottom line: The best pick if spooky-cute is your everyday aesthetic, not just an October phase — just don’t ask one small print to fill a big wall.
“The best pick if spooky-cute is your everyday aesthetic, not just an October phase — just don’t ask one small print to fill a big wall.”
As an Amazon Associate we earn from qualifying purchases.
Before You Start
Choose your designs before you buy or prep anything. The most forgiving spooky silhouettes are solid, recognizable shapes: a flock of bats, a cat with an arched back, a haunted house outline, a raven, or a bare tree with twisted branches. Avoid designs with fine interior detail or thin connecting lines, because brush-painting lines under a quarter inch wide on canvas tends to look wobbly.
Decide now whether you want one large statement panel or a set of three matching panels hung in a row. A triptych of three small canvases (8×10 each) with a shared color scheme looks more finished than one panel and takes barely more effort. If you make a set, paint all the backgrounds at the same sitting so the colors match across panels.
Step-by-Step Instructions
Step 1: Prepare your workspace and canvases
Cover your work surface with newspaper or a drop cloth, then set out your paints, brushes, water cup, and paper towels. Wipe each canvas with a dry cloth to remove dust. Remove all shrink-wrap plastic if your canvases came wrapped. Arrange the canvases in the layout you plan to hang them in so you can assign each panel a design.
Tip: Work near a sink or keep a large cup of water for rinsing brushes. Dried acrylic in a brush will ruin its shape.
Check: Your surface is protected, all canvases are clean and unwrapped, and every supply is within arm’s reach.
Step 2: Print or trace your template at the right size
Search online for your design name plus the word ‘silhouette’ and pick a simple, solid-black shape. Print the image scaled to fit your canvas with at least a one-inch margin on all sides, using your printer’s scaling options or a document editor to resize. Enlarge by hand if you cannot print large enough: tape paper to a window with the image behind it and trace it in sections. Cut out the silhouette with scissors, following its outer edge.
Tip: Test the cut template by holding it against the canvas before moving on. If it looks too small and lost in the middle, reprint 10-20% larger — a silhouette should fill roughly two-thirds of the canvas.
Check: The cut paper template sits on the canvas, fills most of the space, and its shape is clearly recognizable from a few feet away.
Step 3: Paint the spooky background
Paint the entire canvas with your background color before placing the silhouette. Build a classic glowing-sky look by painting the top third deep purple, the middle orange, and the bottom yellow-orange, then blending the boundaries with a damp brush while the paint is wet. Create a moody look by sponging uneven patches of dark gray and purple over a black base. Paint the canvas edges too if it is a gallery-wrap style. Let the background dry completely — at least 30 minutes — or speed it up with a hairdryer on low.
Tip: Acrylic blends only while wet. Work in horizontal bands and blend one band into the next immediately, or you will get hard edges where you don’t want them.
Check: The canvas is fully covered edge to edge, the colors blend smoothly, and the surface is dry to the touch before you continue.
Step 4: Transfer the template to the canvas
Tape the cut template in place on the dry canvas with small rolls of masking tape on the back. Slide transfer paper underneath, dark side facing the canvas, and trace around the template’s edge firmly with a pencil. Use the graphite-rub method if you don’t have transfer paper: flip the template over, rub soft pencil graphite across its back edge, place it graphite-side down, and trace the front — the pressure transfers the graphite. Remove the template and tape carefully.
Tip: Trace in good light and press hard enough to leave a visible line, but not so hard that you dent the canvas. Check that the outline is complete before removing the template, or you will have to realign it exactly.
Check: A clear pencil outline of your silhouette is visible on the background, with no gaps in the line.
Step 5: Fill in the silhouette with black paint
Load the flat brush with black acrylic and paint inside the pencil outline, working from the center of the shape outward toward the edges. Switch to the small detail brush for corners, points (like bat wings or cat ears), and any narrow sections. Let the first coat dry for 15-20 minutes, then apply a second coat — black over colored backgrounds almost always needs two coats to look truly solid. Paint up to the pencil line from the inside rather than over it so the silhouette keeps its crisp shape.
Tip: If you do stray over the line, let the black dry fully, then touch up the background color with a small brush. Never try to fix wet-on-wet — it turns to gray mush.
Check: The silhouette is a solid, even black with no streaks of background color showing through, and its edges look clean from three feet away.
Step 6: Add spooky finishing details
Wait until the black is completely dry, then add atmosphere. Dab a small white dot with a red center to make glowing eyes on a cat or bat. Create a moon behind a tree silhouette by painting a white or pale-yellow circle, letting it dry, then painting the branches over it. Spatter tiny white stars across the background by flicking a loaded detail brush with your fingertip. Limit yourself to three or four touches per panel — sparse details read as spooky, while many read as cluttered.
Tip: Practice spatter technique on newspaper first. Load a stiff brush with watered-down white paint and flick the bristles with your fingertip toward the canvas.
Check: Each panel has a few deliberate details, and the overall design still reads clearly as one shape from across the room.
Step 7: Dry and seal the panels
Set the panels flat in a dust-free spot and leave them to dry overnight. Brush on a thin, even coat of matte acrylic sealer the next day — optional but recommended — applying it in one direction with light strokes. Wait two hours before handling the panels, and then hold them by their edges.
Check: The paint is fully dry with no tacky spots, and the surface has a uniform finish.
Step 8: Hang your wall art
Position adhesive picture strips or picture hooks on the wall at the height where a screw or nail sits flush with the top of the canvas frame. Measure the wall, mark the center point, and space the outer panels 2-3 inches from the center panel on each side for a three-panel set. Step back, check that the panels are level, then press the adhesive strips fully home.
Tip: Use a level app on your phone or a coin balanced on the top edge to check each panel before committing adhesive strips to the wall.
Check: The panels hang level, evenly spaced, and each silhouette is clearly visible and recognizable from across the room.
Common Mistakes to Avoid
- Tracing the template onto a wet or tacky background — Wait until the background is fully dry to the touch, ideally 30-60 minutes. Wet paint smears under transfer paper and muddies both colors.
- Using a template that is too small for the canvas — Always hold the cut template against the canvas before painting. The silhouette should fill about two-thirds of the panel; anything smaller looks like an afterthought on the wall.
- Trying to get full black coverage in one coat — Plan for two coats of black from the start. One coat over an orange or purple background almost always shows streaks; thin, even coats look better than one thick one.
- Fixing mistakes while the paint is still wet — Let the error dry completely, then correct it — black over background or background over black. Wet paint mixed together turns gray and cannot be salvaged.
Troubleshooting
Problem: The transferred pencil outline is faint or patchy
Solution: Go over the visible sections freehand with the pencil, using the template held beside the canvas as a reference. If the outline is unusable, repaint a thin background coat over the area, let it dry, and re-transfer with fresh transfer paper and firmer pressure.
Problem: The black silhouette has streaky or patchy areas after two coats
Solution: Apply a third thin coat, brushing in the opposite direction from the second coat. Crossing brush directions fills in the low spots that cause streaking.
Problem: Background colors blended into muddy streaks
Solution: Let the canvas dry completely, then reapply the two problem colors side by side and blend only the narrow boundary between them with a barely damp brush. Limit blending to a one-inch transition zone rather than working the whole surface.
Problem: Panels look mismatched as a set
Solution: Mix one larger batch of each background color before starting and use it across all panels. If they are already painted and uneven, glaze the most vivid panel with a thin wash of the darker color to pull it toward the others.
What Success Looks Like
Your project is complete when each panel hangs level on the wall, the silhouette reads instantly as its subject from at least six feet away, the black areas are solid with no background showing through, and the background shows a smooth glow or moody texture with no hard unintended edges. As a final check, photograph the wall with your phone — the camera view reveals streaks and crooked hanging that your eye adjusts for in person.
Next Steps
Once your panels are hung, extend the display with matching elements: paint small bats on wooden rounds for shelf accents, or repeat the silhouette technique on a painted pumpkin for a coordinated look. Store the panels flat in a closet between seasons, wrapped in a trash bag to keep dust off — acrylic-sealed canvas will last many years. If you enjoyed the process, try scaling up: a single 16×20 canvas with a layered tree-and-moon scene makes a striking front-entry piece for next October. If a panel gets scuffed, touch it up with matching paint and a detail brush; keep a note of which craft paints you used.
Frequently Asked Questions
Can I use spray paint instead of brushing on the black silhouette?
Yes, and it gives very flat, even coverage. Mask the background around the silhouette with newspaper and tape, spray in light passes outdoors, and peel the mask while the paint is still slightly tacky. Wear a mask and work in ventilated conditions. Brushed paint is safer for beginners and easier to touch up.
What if I can’t find transfer paper?
Use the graphite-rub method: cover the back of your template with soft pencil shading, place it shaded-side down on the canvas, and trace the outline from the front. The pressure transfers graphite to the canvas. A hard pencil works but leaves a lighter line, so go over it freehand afterward.
Can I do this project with kids?
Yes, with adjustments. Let children paint the backgrounds and do the spatter stars, while an adult handles the template cutting and the silhouette outline work. Use washable kid-grade acrylics and expect a looser, more folk-art look — that suits the spooky theme well.
How do I make the art look good in daylight, not just at night?
Higher contrast reads better in bright light. Deepen the background colors one shade darker than feels natural, and keep the silhouette pure black rather than dark gray. Hang the panels where they catch indirect light; direct sun will eventually fade acrylics even when sealed.
Can I use wood or cardboard instead of canvas?
Yes. Smooth plywood or thick cardboard both work — prime them first with one coat of white acrylic or gesso and let it dry, then follow the same steps. Cardboard panels will curl in humidity, so keep them indoors and hang them with adhesive strips rather than heavy hooks.
Evergreen bestsellers Picks
bestsellers
As an affiliate, we earn on qualifying purchases.