
TL;DR

Get furniture and decor delivered free with Prime
- Fast, free delivery on millions of items
- Prime Video, Amazon Music and more included
- Member-only deals all year
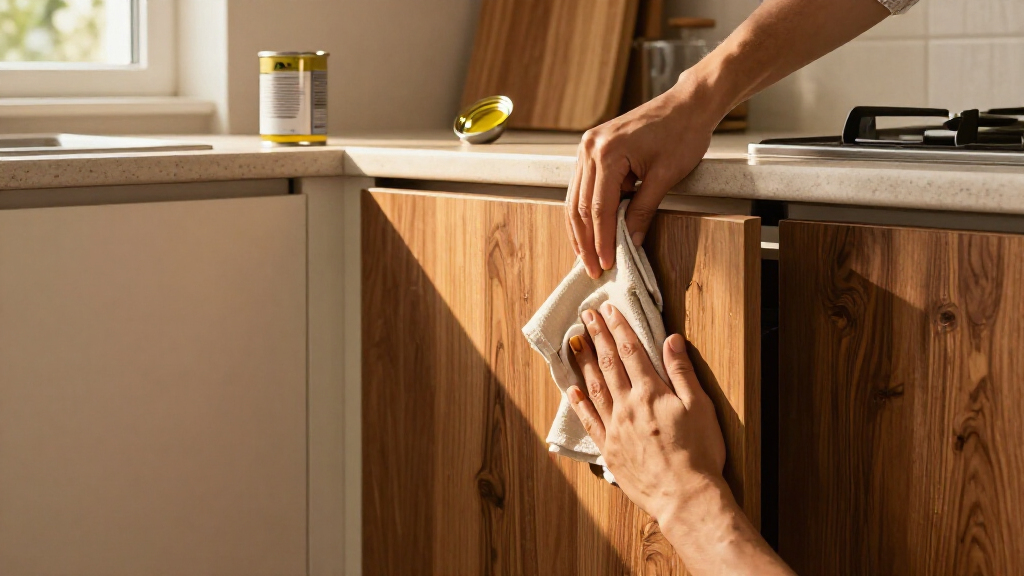
A Hunker report describes using an oil-based penetrating stain, such as Minwax Wood Finish, to color prepared bare-wood cabinets while keeping their grain visible. The method still requires careful sanding, stain cleanup and drying, followed by at least two coats of a protective finish; it is not a one-step substitute for paint or gel stain.
A Hunker woodworking report outlines how homeowners can use an oil-based stain to change the color of plain, bare-wood cabinets while retaining the visible grain. The process involves removing cabinet doors and hardware, preparing the wood through sanding, wiping on and off the stain, then applying a separate protective topcoat.
The report describes products such as Minwax Wood Finish as stains that suspend pigments in an oil solution. Applied to prepared raw wood, the stain colors the surface and can accent the wood’s grain pattern. Hunker’s contributor, who identifies as a professional woodworker with more than 40 years of experience, presents the approach as an alternative to opaque paint or gel products for people who want the wood’s natural appearance to remain visible.
Preparation is a major part of the process. The report recommends taking cabinet doors off and removing hardware, cleaning away dirt and grime, then sanding progressively from 60- or 80-grit paper through finer grits to at least 220 grit. A tack cloth should be used to remove sanding dust before staining. The article’s contributor prefers brushing stain onto the wood, including corners and moldings, and wiping away excess with a cotton cloth or shop towel for more even coverage.
The stain is only one part of the finish. After it has dried completely, the report recommends applying at least two coats of polyurethane, either water-based or oil-based, to protect the surface. It also says mineral spirits can be used for cleanup after oil stain. Rags or cloths saturated with stain should be laid flat and allowed to dry because they can pose a fire hazard; the report says dried rags can then be disposed of in landfill waste.
A Stained Look Without Hiding Grain
The method gives homeowners an option between leaving cabinets as they are and covering the wood with an opaque coating. Because the stain colors rather than conceals the grain, the result depends on the cabinet material and the condition and preparation of its surface. That makes it relevant to people seeking a change in tone while preserving a natural-wood appearance.
The approach is not a shortcut that skips finishing work. Sanding quality, even application and a protective topcoat all affect the completed surface, and the project requires time for the stain to dry before polyurethane is applied. Readers should also account for cleanup and the fire risk from stain-soaked cloths, rather than treating the oil product as a simple wipe-on cosmetic treatment.
Hunker’s contributor favors oil stain over paint and gel, but that is the contributor’s professional preference, not a universal finding that one finish is best for every cabinet. The report does not provide comparative testing of durability, cost or labor across finishes.
Minwax Wood Finish oil stain for cabinets
As an affiliate, we earn on qualifying purchases.
As an affiliate, we earn on qualifying purchases.
The Difference Between Stain and Topcoat
The report addresses confusion around the word “stain,” which is sometimes used broadly to mean both a coloring product and the protective coating applied afterward. In the method described, those are separate steps: oil stain adds color, while polyurethane or another suitable topcoat supplies additional surface protection. The product name “Wood Finish,” the report cautions, should not be taken to mean that the stain alone completes the cabinet finish.
The instructions specifically concern applying stain to plain, prepared wood. The article notes that pigmented oil stain can also be used over an existing finish in a technique called glazing, but that is not the cabinet process it explains. Its sanding sequence and application directions are presented for bare wood, so readers should not assume they apply unchanged to previously coated cabinets.
Results Depend on Cabinet Wood
The report does not specify how the method performs across different wood species, veneers, cabinet conditions or stain colors, and it offers no test results comparing oil stain with gel stain or paint. The final color and appearance can depend on the prepared wood, but the supplied material does not give a color chart or a method for predicting the result on a particular cabinet set. It also does not detail product-specific drying times, ventilation instructions or disposal rules beyond its advice to dry saturated rags flat. Readers should follow the label and safety directions for the product they use.
It is also unclear from the report whether every cabinet described as “plain” is bare wood. Its instructions apply to raw, prepared wood; cabinets with an existing coating may need a different approach. The article mentions glazing as a separate technique but does not provide full instructions for it.
Check the Surface Before Staining
Before starting, homeowners should establish whether the cabinet surfaces are bare wood and review the stain and topcoat labels for preparation, application, drying, ventilation and disposal directions. A small test on an inconspicuous area can help show how the chosen stain looks on that wood, although the Hunker report does not prescribe a testing procedure. The described sequence is to remove doors and hardware, clean and sand the wood, remove dust, apply and wipe off stain, let it dry fully, and then add at least two coats of polyurethane or a similar protective finish.
For anyone proceeding, the next milestone is the completed topcoat—not simply the application of color. The report gives no product-specific schedule for drying or recoating, so those timings remain dependent on the selected products and their instructions. Stain-soaked rags should be handled as a fire risk and dried flat as the report advises; users should also follow any additional safety and disposal guidance on the product label.
Key Questions
Can oil stain be applied directly to cabinet surfaces?
The Hunker instructions describe applying it to bare, prepared wood, not directly over an existing finish. The report mentions glazing over a finish as a separate technique but does not give full directions for that method.
Does oil stain protect cabinets by itself?
No. The report says the stain colors the wood and recommends applying at least two coats of polyurethane or a similar product after the stain has dried to add surface protection.
How should the wood be prepared?
The report advises removing doors and hardware, cleaning the wood, sanding progressively from 60- or 80-grit paper to at least 220 grit, and removing sanding dust with a tack cloth before staining.
How should stain-soaked rags be handled?
The report says to lay saturated cloths flat and let them dry to reduce fire risk. Follow the product label and local disposal guidance as well; the article says dried rags can be disposed of in landfill waste.
Is oil stain always better than paint or gel stain?
No comparative testing is provided. The report’s contributor prefers oil stain because it can show the wood grain, but the best choice depends on the cabinet surface and the appearance the homeowner wants.
Source: rss
Columbus Day / Indigenous Peoples' Day Picks
long weekend sales
As an affiliate, we earn on qualifying purchases.