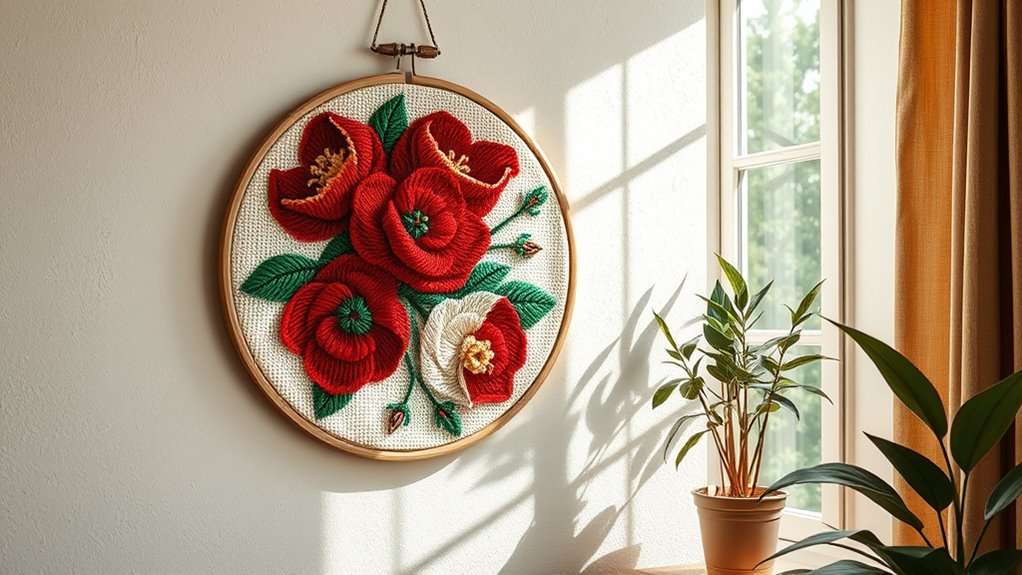

To create DIY punch needle embroidery wall art, start by gathering sturdy fabric and organizing your tools for easy access. Choose a design that inspires you and transfer it onto your fabric using tracing or stenciling techniques. Set up your punch needle, thread it with your chosen yarn, and adjust the needle depth for different textures. Finish by securing loose threads, then frame your work for a beautiful display. Keep exploring to master each step and craft stunning wall decor.
Key Takeaways
- Gather sturdy fabric, appropriate tools, and a clear design plan to start your punch needle wall art project.
- Transfer your chosen pattern onto fabric using tracing or stenciling techniques for accuracy.
- Adjust punch needle tension and needle depth to create varied textures and achieve desired visual effects.
- Secure finished embroidery with framing options like hoops or stretcher bars for a polished appearance.
- Hang your wall art in a suitable space, protecting it from sunlight and environmental damage for lasting display.

35Pcs Punch Needle Kit Adult Beginner, Adjustable Punch Needle Tool with Different Size Needles & Storage Case, Wooden Handle Embroidery Pen Set for Gifts, Decoration & DIY Craft Project
COMPLETE PUNCHING NEEDLE TOOL: The punching needle set includes 1 blue adjustable punch needle with 4-settings (5mm), 1…
As an affiliate, we earn on qualifying purchases.
As an affiliate, we earn on qualifying purchases.
Gathering Your Supplies and Preparing Your Workspace
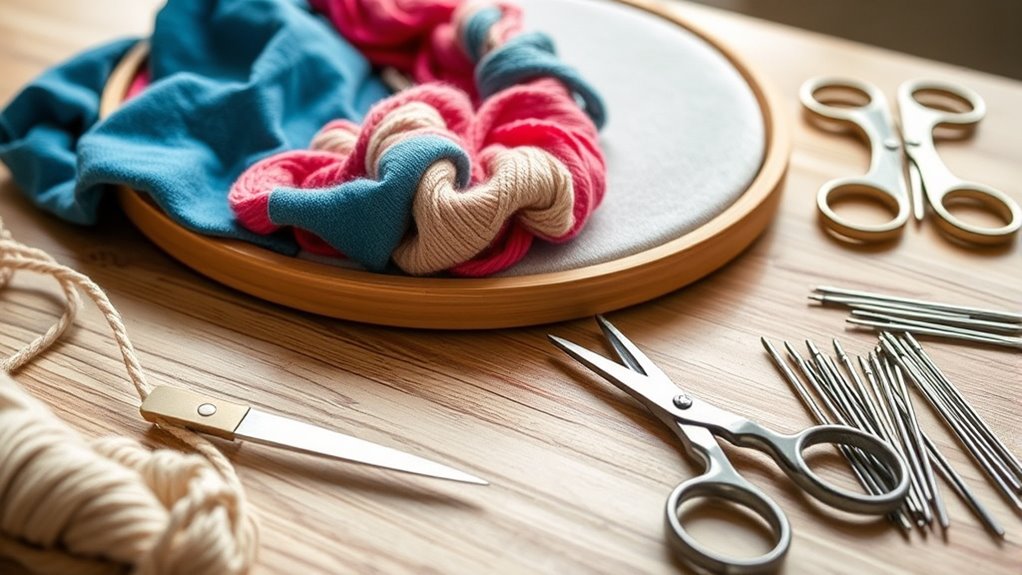
Before you begin your punch needle embroidery project, it’s important to gather all the necessary supplies and set up a comfortable workspace. Start with your fabric selection; choose a sturdy, even-weave fabric like monk’s cloth or linen, which will hold the stitches well. Organize your workspace by keeping tools such as needles, thread, and scissors within easy reach, reducing clutter and making the process smoother. Clear a flat surface to lay out your fabric and supplies, ensuring you have enough room to work comfortably. Good workspace organization helps maintain focus and prevents mishaps. Having everything ready and orderly allows you to work efficiently and enjoy the creative process without interruptions. Proper preparation sets the foundation for successful punch needle embroidery. Additionally, considering self watering plant pots can inspire you to create a beautiful wall art piece that complements your home decor.

Rindion 100% Cotton Fabric, 63 in x 1.3 Yard Unbleached Muslin Fabric, Medium Weight Linen Fabric by The Yard for Sewing Embroidery, Garments, Arts and Crafts
Product Details: You will receive 63 inches wide x 1.3 yards long of cotton fabric, providing ample material…
As an affiliate, we earn on qualifying purchases.
As an affiliate, we earn on qualifying purchases.
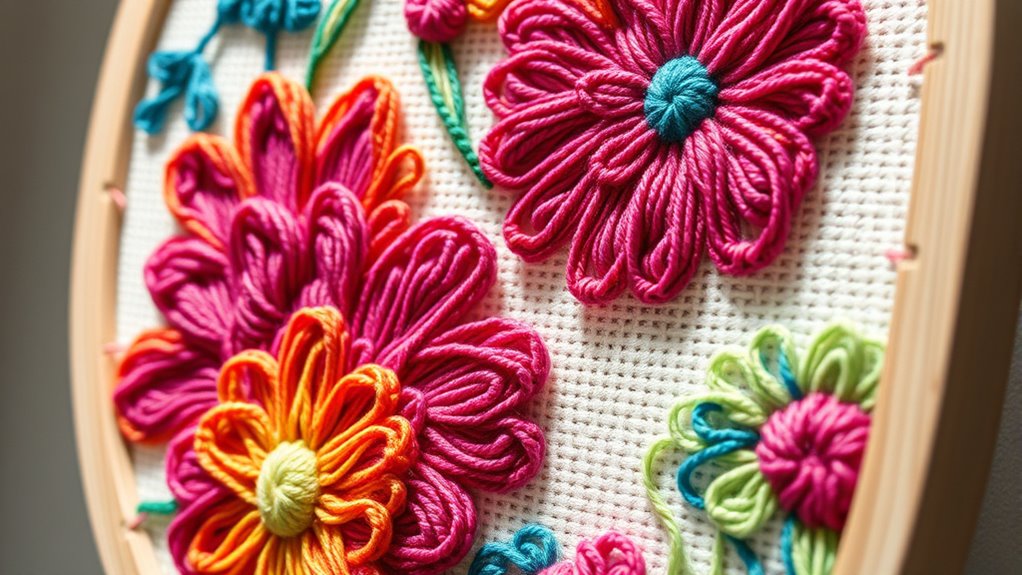
Choosing the Perfect Design and Planning Your Pattern
Once your workspace is organized and your supplies are ready, it’s time to choose a design that inspires you. Start by considering your desired color palette; selecting colors that complement your room or evoke the mood you want will make your wall art stand out. Next, evaluate the pattern complexity—if you’re a beginner, opt for simpler designs with bold lines and clear shapes. More intricate patterns can be rewarding but may require more time and attention to detail. Think about the size of your piece and how much detail it can accommodate. Planning your pattern carefully guarantees a smoother embroidery process and a polished final look. Remember, choosing a design that excites you will keep you motivated throughout your project. Additionally, selecting a pattern size that matches your skill level and available space will help ensure a satisfying result.

Jupean Embroidery Hoops, 7.5'' 9.2'' Oval Embroidery Hoop, Imitated Wood Display Frame with 30 Pieces Embroidery Needles, Embroidery Frame and Cross Stitch Hoop for Art Craft Sewing and Wall Hanging
Oval Display Embroidery Hoop: Our cross stitch hoop with sewing needles kit including 4 pcs oval embroidery hoops…
As an affiliate, we earn on qualifying purchases.
As an affiliate, we earn on qualifying purchases.
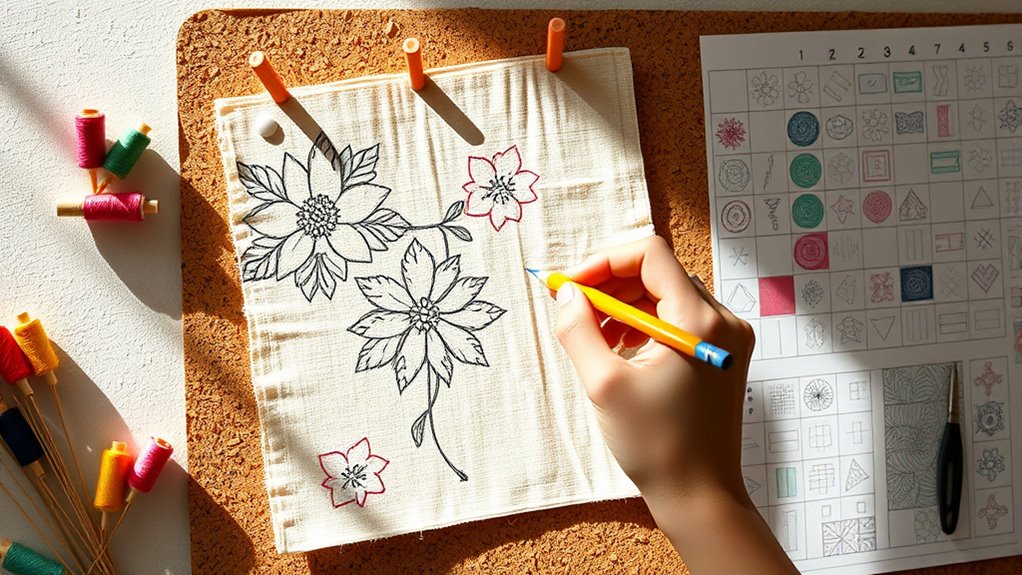
Transferring Your Design Onto Fabric
Transferring your design onto fabric is a vital step to guarantee your embroidery turns out just as planned. You can choose from various techniques like tracing or stenciling to get a precise outline. Select the method that best suits your project and fabric type to make the process smooth and accurate. Using easy-to-follow transfer methods can help ensure your design remains clear and vibrant during the stitching process.
Design Transfer Techniques
Are you wondering how to get your design onto fabric accurately? The key is choosing the right transfer method and considering color selection and fabric preparation. Here are four effective techniques:
- Trace with transfer paper – Use carbon or transfer paper to trace your design directly onto fabric.
- Use a lightbox or window – Place your design and fabric over a light source for easy tracing.
- Draw directly with fabric-safe pens – Perfect for simple designs, just ensure the ink is washable.
- Print and transfer – Print your design on transfer paper compatible with your fabric, then follow instructions for transfer.
Before starting, verify your fabric is clean, smooth, and well-prepared. Select colors that complement your design for a polished look, and always test your transfer method on scrap fabric first. Additionally, understanding color accuracy can help you choose the right shades for a vibrant and true-to-design final piece.
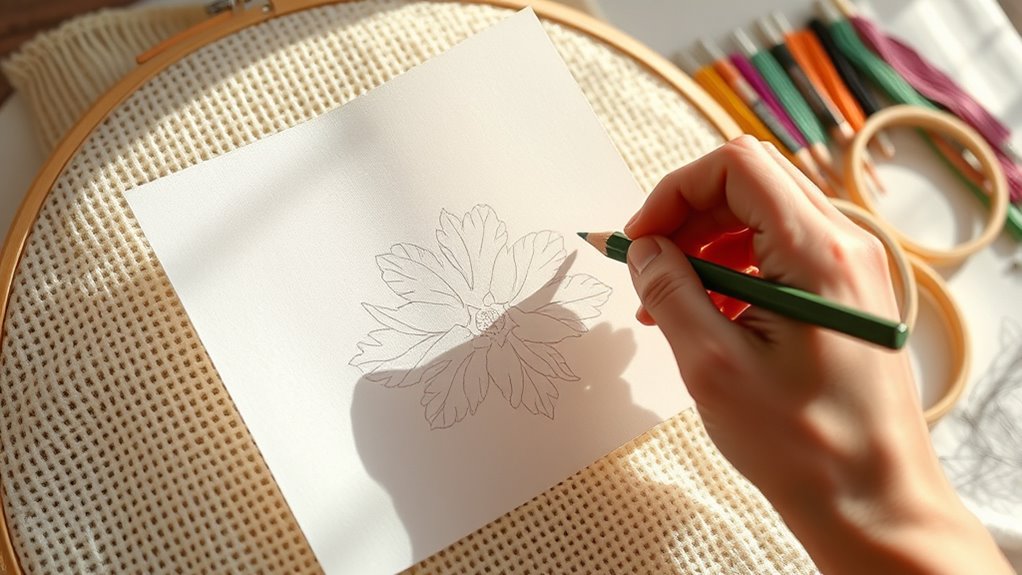
Tracing and Stenciling
After choosing your preferred transfer method, such as tracing with transfer paper or using a lightbox, the next step is to accurately trace or stencil your design onto the fabric. Before you start, make certain your fabric surface is properly prepared—smooth, clean, and taut—to prevent any shifting. When it comes to color selection, choose a light-colored or easily erasable marker to make tracing clearer and easier to correct. Carefully follow your design lines, keeping your hand steady. If you’re stenciling, secure your stencil firmly to avoid smudges or misalignments. Proper surface preparation and thoughtful color selection help ensure your design transfers cleanly, making the punch needle embroidery process smoother and more precise from the start. Additionally, understanding the importance of fabric preparation can significantly impact the quality of your transferred design.

12 Pcs Punch Needle Kit, Embroidery Punch Needle Tool Wooden Handle Embroidery Tool Punch Needle Threader Set for Adults Beginner Yarn Floss Cross Stitching
Super Value Set: This punch needle kit includes 1 wooden handle punch, 2 different sizes of metal handle…
As an affiliate, we earn on qualifying purchases.
As an affiliate, we earn on qualifying purchases.
Setting Up Your Punch Needle Tool and Threading It
Before you start punching, you need to set up your punch needle tool and thread it properly. A correct threading technique guarantees smooth stitching and prevents frustration. Follow these steps:
- Insert the punch needle into your hand or handle, making sure it’s secure.
- Thread the yarn or embroidery thread through the eye of the punch needle, pulling enough length for comfortable stitching.
- Use your preferred threading technique—either from the front or the back—depending on your punch needle model.
- Confirm the thread is securely in place and that there are no knots or tangles.
- Ensuring proper grooming of your tools can improve the overall quality and ease of your punch needle embroidery.
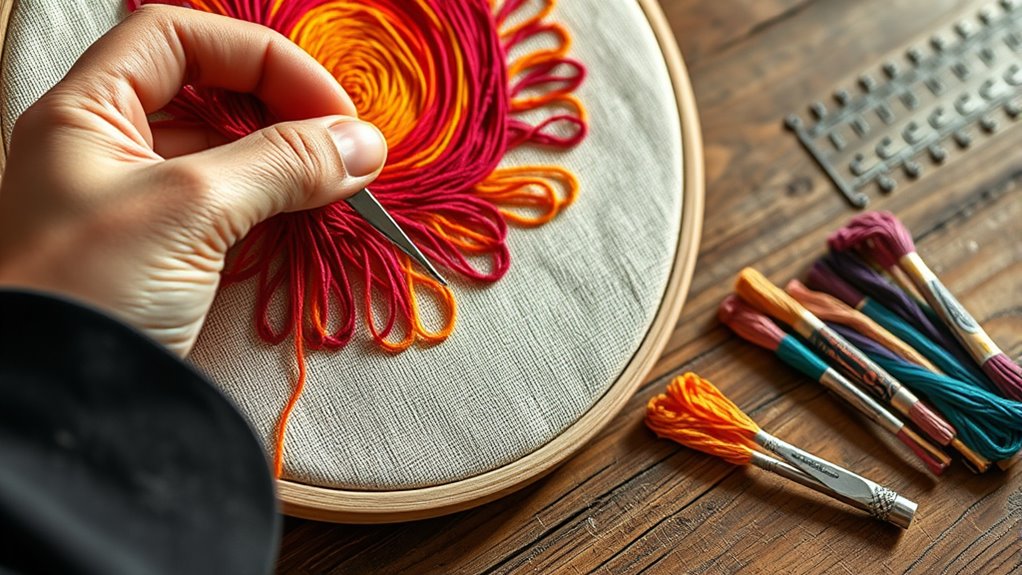
Executing the Stitching Technique for Different Textures
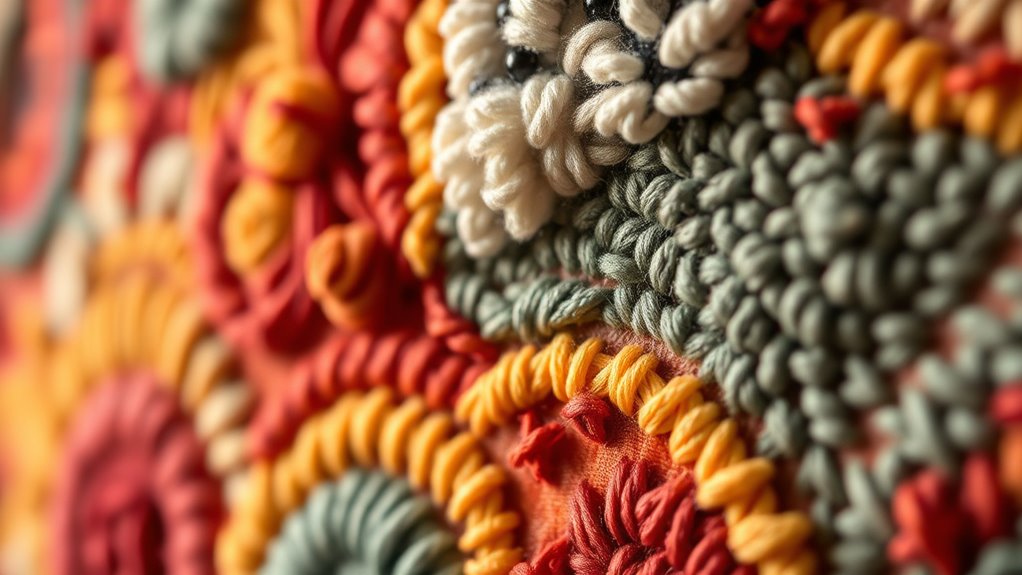
To create different textures, you need to experiment with thread tension and needle depth. Varying your stitch styles by layering or adjusting these settings helps achieve the desired effect. Practice changing these factors to master a range of textures in your embroidery. Additionally, incorporating vintage decor elements can enhance the overall tactile quality of your wall art.
Varying Thread Tension
Varying your thread tension is essential for creating different textures in punch needle embroidery. Adjusting the tension affects how tight or loose your stitches appear, adding depth and interest to your wall art. To master tension adjustment, follow these tips:
- Start with a moderate thread tension to establish a baseline for your stitches.
- Tighten the tension for raised, dense textures that stand out.
- Loosen the tension slightly for softer, more flexible stitches.
- Experiment by varying tension within the same project to create subtle shading and depth.
- Remember that consistent tension helps in achieving a uniform look, while varying tension can add a textured effect to your design.
Layering Stitch Styles
Layering different stitch styles allows you to create rich, textured surfaces that add dimension and visual interest to your punch needle embroidery. By combining varied stitch techniques, you can achieve effective texture layering, making your artwork more dynamic. Use color blending within these layers to enhance depth, blending shades seamlessly for a more realistic look. For example, switch between tight, dense stitches and looser, open stitches to create contrast and tactile variation. Experiment with overlapping stitch styles to build up layers that mimic natural textures like fur or foliage. The key is to think about how each stitch contributes to the overall surface, balancing smooth areas with textured accents for a engaging, multi-dimensional piece that draws viewers in. Incorporating different stitch techniques can also elevate your craft by adding unique visual effects.
Adjusting Needle Depth
Adjusting the needle depth is essential for creating different textures in your punch needle embroidery. Proper needle depth adjustment influences punch needle tension and the overall look of your stitches. To modify the depth:
- Loosen the needle guide or adjustment screw on your punch needle.
- Insert the needle to the desired depth, depending on the texture you want.
- Tighten the guide securely to lock the needle in place.
- Test stitch on scrap fabric, adjusting the needle depth as needed for tight or loose stitches.
- Always consider payment security measures when purchasing supplies or tools online to protect your investment.
Deeper needle settings produce taller, plush textures, while shallower depths create flatter stitches. Always check punch needle tension after adjusting needle depth, ensuring even stitches. Fine-tuning this setting allows you to craft diverse textures for your wall art.
Finishing and Securing Your Embroidery Piece
Once you’ve completed your embroidery, the next step is to finish and secure your work properly to guarantee it lasts. Start by trimming loose threads and securing all ends with knots or a bit of fabric glue. To give your piece a polished look, consider framing options like using a hoop, stretcher bars, or a ready-made frame that complements your design. Proper framing not only protects your embroidery but also enhances its visual appeal, making it suitable for display or gifting. If you plan to give your embroidery as a gift, safeguarding it behind matboard or glass can add extra durability. Remember, a well-finished piece ensures your beautiful work stays intact and looks professional, whether hung on your wall or presented as a thoughtful gift idea. Additionally, understanding the legacy of “What Is Love?” can inspire you to create a piece that resonates emotionally and stands the test of time.
Displaying and Caring for Your Wall Art
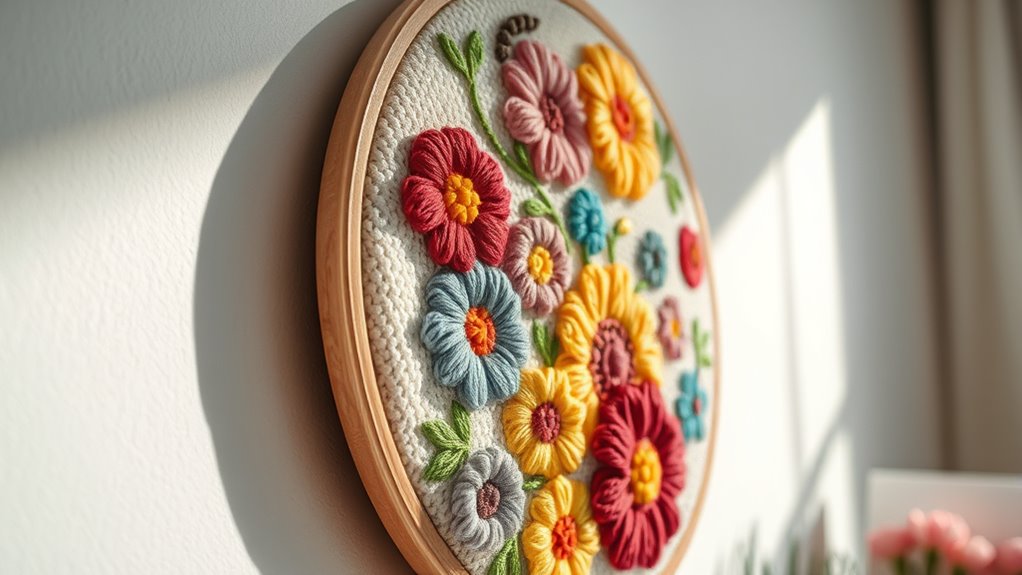
To showcase your embroidery, choose a wall space that highlights its colors and details while avoiding direct sunlight, which can fade the threads over time. Once hung, consider your framing options to protect and enhance your artwork. For mounting tips, make sure your piece is secure with appropriate hooks or nails that support its weight. Here are some ways to care for your wall art:
Display your embroidery away from direct sunlight and frame to protect its vibrant details over time.
- Use UV-protective glass or acrylic if framing to prevent fading.
- Regularly dust the surface with a soft cloth to keep it clean.
- Avoid placing your embroidery near heat sources or humid areas.
- Rotate or reposition your art occasionally to prevent uneven fading.
- If you plan to display your embroidery outdoors or in high-humidity environments, consider weather-resistant framing to protect it from moisture and environmental damage.
Proper displaying and caring practices preserve your punch needle embroidery’s beauty for years to come.
Frequently Asked Questions
What Are Some Common Mistakes to Avoid in Punch Needle Embroidery?
To avoid common pitfalls in punch needle embroidery, focus on maintaining consistent tension and avoiding uneven stitches. Don’t rush the process; take your time with technique tips like securing your fabric tightly and keeping your needle at a steady angle. Be cautious of over-punching or pulling too hard, which can distort your work. Staying attentive to these details helps guarantee your wall art turns out smooth and professional-looking.
Can I Use Recycled or Unconventional Materials for Punch Needle Wall Art?
Imagine turning discarded treasures into a vibrant tapestry of creativity; yes, you can use recycled fabrics and unconventional tools for your punch needle wall art. These materials breathe new life into your project, making it unique and eco-friendly. Just guarantee the fabrics are sturdy and smooth enough for punching, and adapt your tools as needed. Embrace your imagination, and your artwork will tell a story of sustainability and innovation.
How Long Does It Typically Take to Complete a Wall Art Piece?
It usually takes you about 10 to 20 hours to complete a punch needle wall art piece, depending on your project planning and the complexity of your design. As you gather your materials, set a realistic timeline and break the work into manageable sessions. Your pace may vary if you’re using recycled or unconventional materials, so stay flexible and enjoy the creative process as you bring your wall art to life.
Are There Specific Thread Types Best Suited for Different Textures?
Your punch needle project can turn into a masterpiece with the right thread selection. For soft, plush textures, opt for wool or chenille threads—they create cozy, velvety surfaces. If you want bold texture variation, use cotton or silk threads to add shine and contrast. Experimenting with different thread types helps you achieve the desired tactile effect, making your wall art truly stand out like a work of art that’s as unique as you are.
How Can I Repair or Fix Mistakes in My Punch Needle Embroidery?
If you make a mistake in your punch needle embroidery, start by carefully removing the stitches around the error. For color correction, use a needle to thread in matching yarn and seamlessly blend it into your work. For knot fixing, gently undo the knot, then reinsert the yarn through the punch needle. Take your time to guarantee your repairs blend in smoothly, maintaining the overall texture and appearance.
Conclusion
Now that you’ve completed your punch needle wall art, it’s time to enjoy your handiwork. Hang it with pride, protect it with care, and share your creation with others. Keep experimenting, keep learning, and keep growing your skills. Celebrate your progress, cherish your unique design, and continue crafting with passion. Your wall art is more than decoration—it’s a reflection of your creativity, patience, and dedication. Keep stitching, keep inspiring, and keep creating beautiful things.