
To start DIY soapstone carving and polishing, choose softer, consistent stone with your preferred color and pattern. Use sharp chisels, rasps, and safety gear like goggles and masks to make certain of safe carving. Plan your design carefully, then slowly shape the stone, gradually refining the surface with abrasive papers. Finish by polishing with fine-grit pads and a soft cloth or mineral oil for a smooth, glossy look. Keep learning to master shaping, finishing, and maintaining your sculpture for professional results.
Key Takeaways
- Select soft, uniform soapstone with suitable color and size for easier carving and better finish.
- Use sharp chisels, rasps, and safety gear like goggles and masks to carve carefully and protect yourself.
- Start with light cuts, shape the stone gradually, then smooth surfaces with progressively finer abrasives.
- Finish by polishing with fine-grit pads, mineral oil, or soapstone-specific polish for a silky, enhanced appearance.
- Regularly clean and maintain the sculpture, avoiding harsh chemicals, to preserve its look and durability.

Esamploe 12 Pcs Stone Carving Tool,Tungsten Steel Soapstone Carving Kit,Gravers for Metal with Portable Leather Roll Bag,Hand Engraving Tools for Slate,Wood,Soft Limestone,Lapis Lazuli,Bamboo
- Material: High-quality tungsten steel for durability
- Design: Leather-wrapped for comfortable grip
- Storage: Soft leather pouch for organized storage
As an affiliate, we earn on qualifying purchases.
As an affiliate, we earn on qualifying purchases.
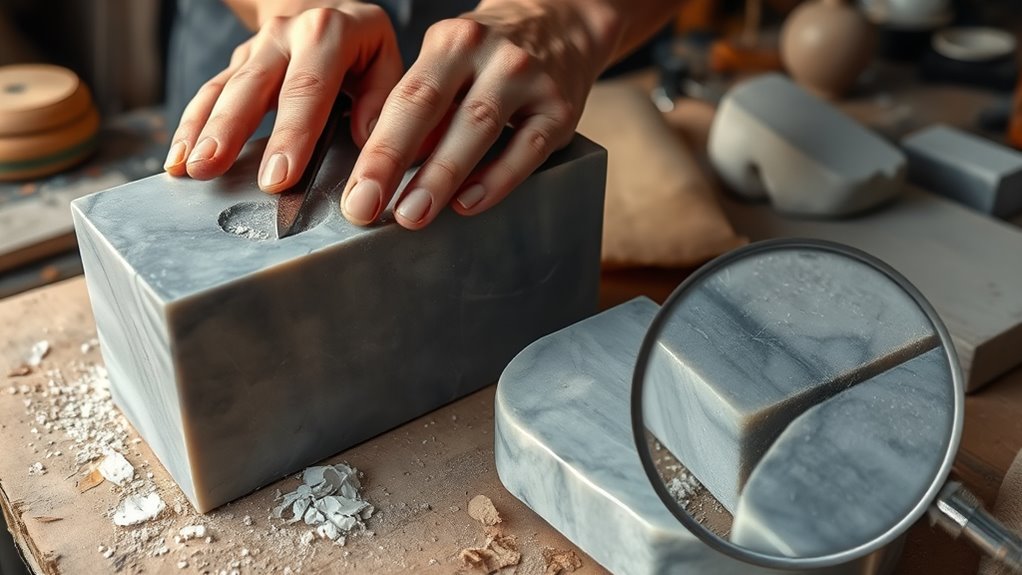
Choosing the Right Soapstone for Your Project
When selecting soapstone for your project, it’s important to contemplate its grade and composition. The quartz content in soapstone influences its durability and appearance, so higher quartz levels typically mean a harder, more resilient material. Consider the color variations, which can range from soft grays and greens to darker hues; these differences affect the overall look of your finished piece. Some soapstones have more uniform coloring, making them ideal for detailed work, while others showcase striking veining or mottling, adding character. Knowing these factors helps you choose a stone that aligns with your project’s purpose and aesthetic. By understanding the quartz content and color variations, you’ll select a soapstone that’s easier to carve and visually appealing for your creative goals. Additionally, the composition of soapstone affects how well it holds polish and its resistance to chipping during carving.
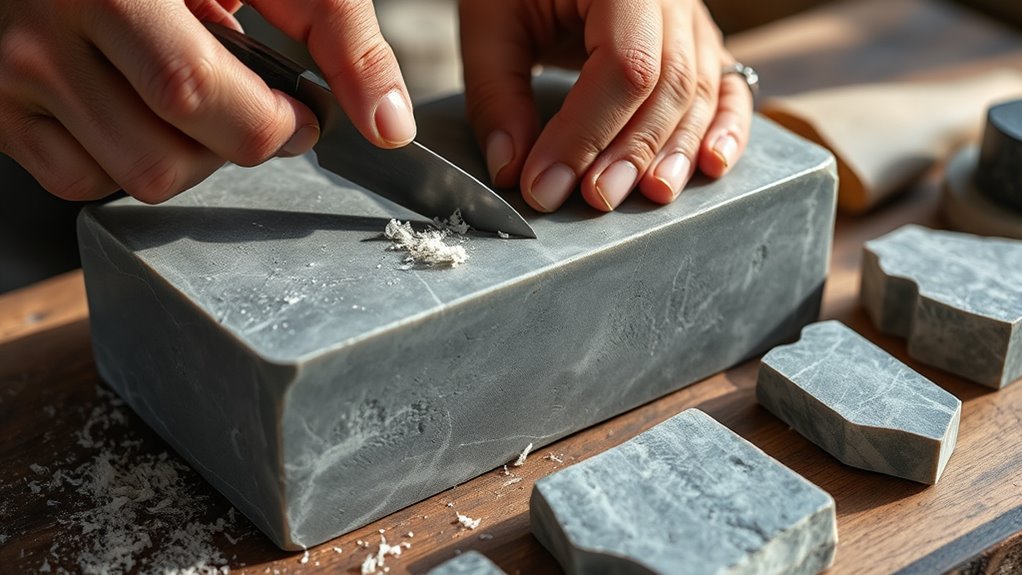
Essential Tools and Safety Tips for Carving
Carving soapstone requires the right tools and safety precautions to guarantee a smooth and safe process. You’ll need sharp chisels, rasps, and files designed for soft stone to execute precise carving techniques. Always wear safety equipment like goggles and a dust mask to protect your eyes and lungs from stone particles. Gloves can help prevent cuts, but choose ones that don’t hinder your grip. Keep your workspace well-ventilated, especially when using power tools, to avoid inhaling dust. Familiarize yourself with proper carving techniques, such as controlled, steady movements, to prevent accidents and achieve better results. Remember, patience and safety come first—using the correct tools and safety equipment ensures your project stays safe and enjoyable from start to finish.
Planning Your Design and Sketching Techniques
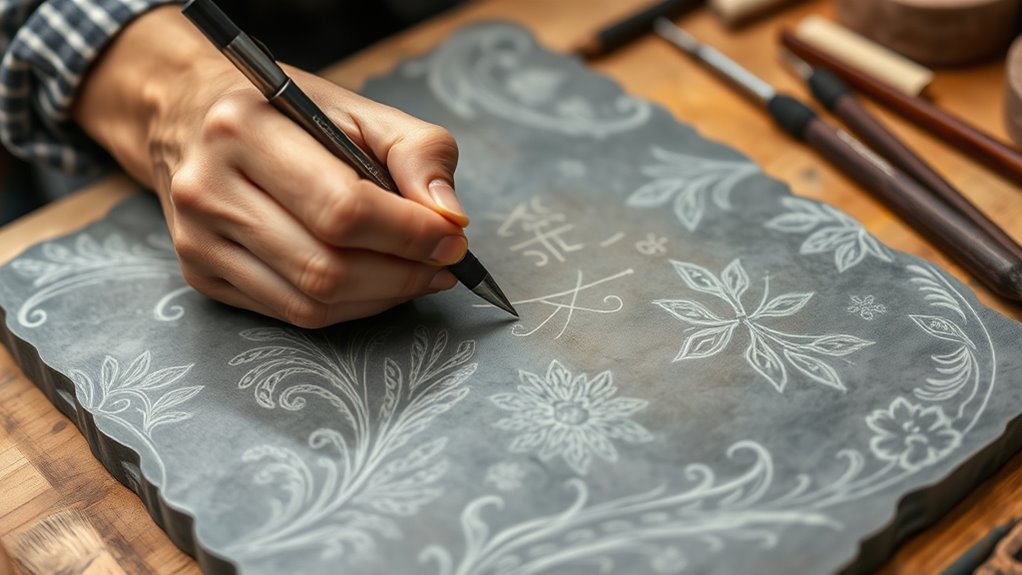
Start by choosing a design style that matches your skill level and vision. Use precision tools to sketch your idea clearly, ensuring the proportions are accurate. Keep in mind how the material flow will influence your design to avoid structural issues later on. Incorporating vintage decor elements can help you achieve an authentic farmhouse look, so consider how these details will blend into your overall design plan.
Selecting Your Design Style
Choosing a design style is a crucial first step in your soapstone carving project, as it guides your overall approach and influences the tools and techniques you’ll use. Consider your desired color palette, as soapstone varies from gray to green, and this can impact the visual effect of your piece. Cultural influences also play a significant role; traditional motifs from different regions can inspire unique designs that reflect your personal heritage or interests. Think about whether you want a modern, abstract piece or something more traditional and detailed. Clarifying your style early helps you select appropriate carving techniques and plan your sketching process. This focus ensures your final piece aligns with your vision, making the creative process more intentional and enjoyable. Additionally, understanding stone properties can help you choose the best carving methods and tools for your project.
Sketching With Precision Tools
Before making any cuts, it’s essential to plan your design carefully by sketching it out with precision tools. Use marking techniques such as fine pencils or scribe tools to outline your design clearly on the soapstone surface. Accurate marking helps guarantee your cuts follow the intended pattern, reducing mistakes. When sketching, employ shading methods to visualize depth and contours, which guides your carving process. Light shading indicates areas to carve lightly, while darker shading highlights sections needing more detail or removal. Take your time to refine the sketch, adjusting lines as needed. Precise sketching with proper marking techniques and shading methods sets a solid foundation for clean, controlled carving, ultimately helping you achieve a professional-looking finished piece. Being aware of resources and tools available can also help you access additional guidance and equipment to improve your craft.
Planning for Material Flow
Planning for material flow is essential to guarantee your design moves smoothly across the soapstone surface and minimizes waste. Good workspace organization and strategic material storage help streamline your process. To optimize flow:
- Arrange tools and materials nearby, ensuring easy access without clutter.
- Sketch your design on scrap soapstone first, testing the flow before committing.
- Organize your workspace to follow the carving sequence, reducing unnecessary movement.
- Store excess soapstone in designated areas to prevent damage and keep your workspace tidy.
- Incorporate effective planning techniques to enhance overall efficiency and reduce errors during the carving process.
Step-by-Step Guide to Carving Soapstone
To start carving soapstone, you first need to choose the right type that suits your project. Then, you’ll use basic techniques to shape your design, gradually refining your work. Finally, you’ll finish by polishing your piece to bring out its natural beauty and smoothness. Using appropriate safety precautions during carving is essential to ensure a safe and enjoyable experience.
Selecting the Right Soapstone
Choosing the right soapstone is essential for a successful carving project. To do this, consider these factors:
- Soapstone properties: Look for softer stones with consistent density, making them easier to carve and less prone to cracking.
- Color variations: Decide if you prefer a uniform color or striking pattern; soapstone ranges from light gray to deep green or black.
- Texture: Select a smooth, even surface to ensure easy carving and polishing.
- Size and shape: Pick a piece large enough for your project, with manageable weight and shape for handling.
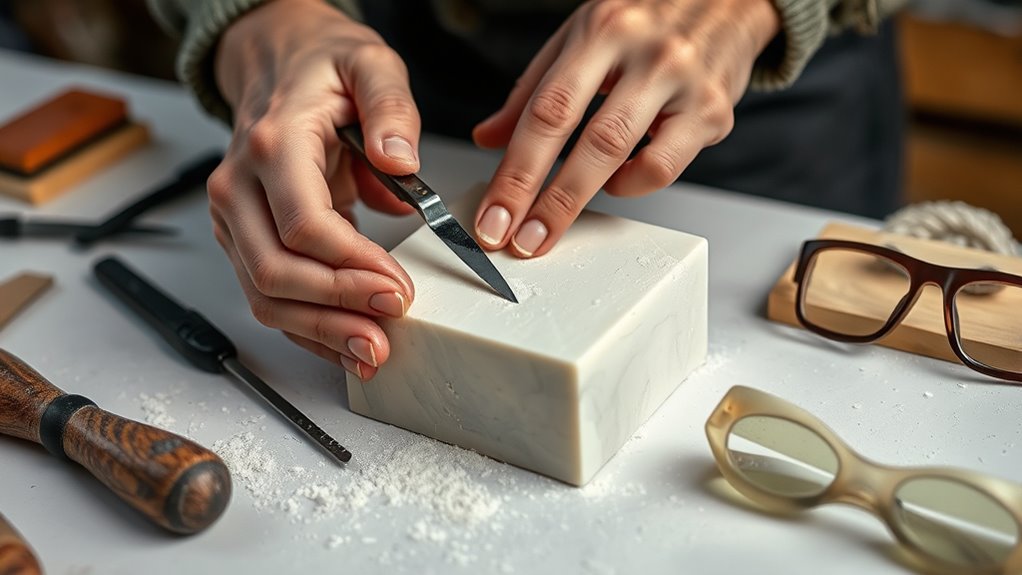
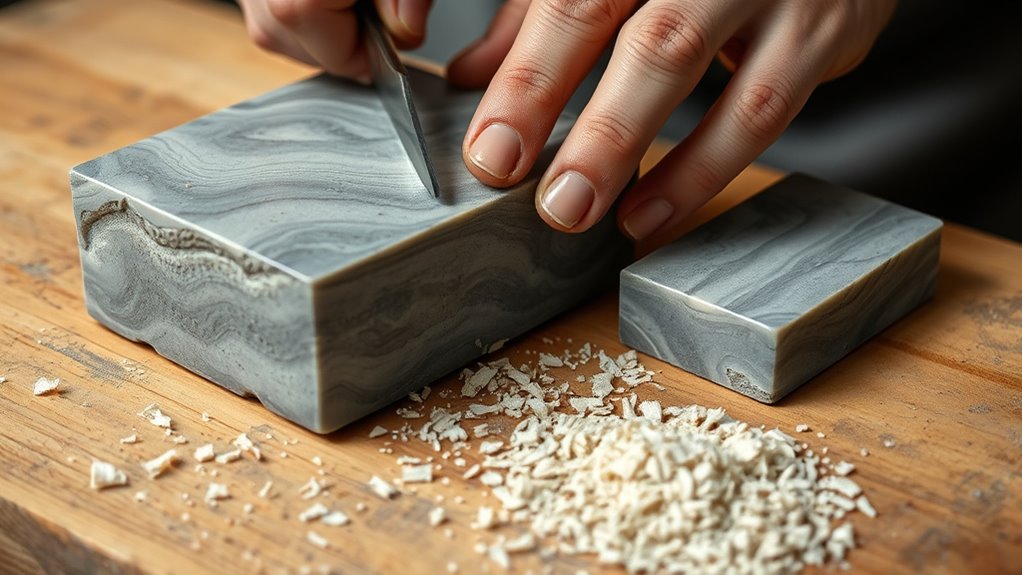
Basic Carving Techniques
Starting your soapstone carving journey involves familiarizing yourself with basic techniques that will help you shape your material effectively. Begin with light, controlled cuts using a carving tool, focusing on gradually increasing carving depth. As you work, pay attention to texture variation; carve more deeply in areas requiring detail and keep other sections smoother for contrast. Use steady, deliberate motions to maintain control and prevent slips. Don’t rush—layer your cuts to achieve the desired depth without damaging the stone. Keep a consistent carving pressure to ensure even texture variation across your piece. Remember, understanding how different carving depths affect your design will help you create more dynamic and polished results. Practice patience and precision, and you’ll develop a solid foundation for your soapstone projects.
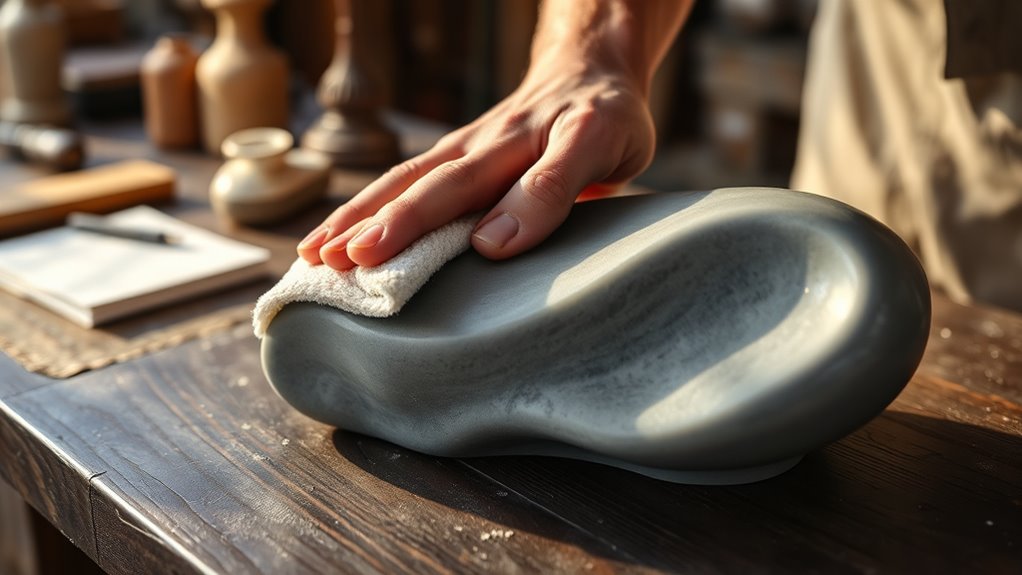
Finishing and Polishing
Once you’ve shaped your soapstone and achieved the desired form, the next step is to refine its surface through finishing and polishing. This process enhances texture and preserves vibrant color. Here are four essential steps:
- Sand gradually using finer grit sandpaper, starting with coarse and moving to ultra-fine to smooth out surface imperfections.
- Buff with a soft cloth to bring out the soapstone’s natural luster, improving texture enhancement.
- Apply mineral oil or a dedicated soapstone sealer to deepen the color and protect it from stains.
- Polish with a felt or cloth buffing wheel for a glossy finish that highlights the stone’s natural beauty while maintaining its color preservation.
Follow these steps carefully to achieve a polished, vibrant, and smooth soapstone surface.
Techniques for Smoothing and Refining Your Sculpture
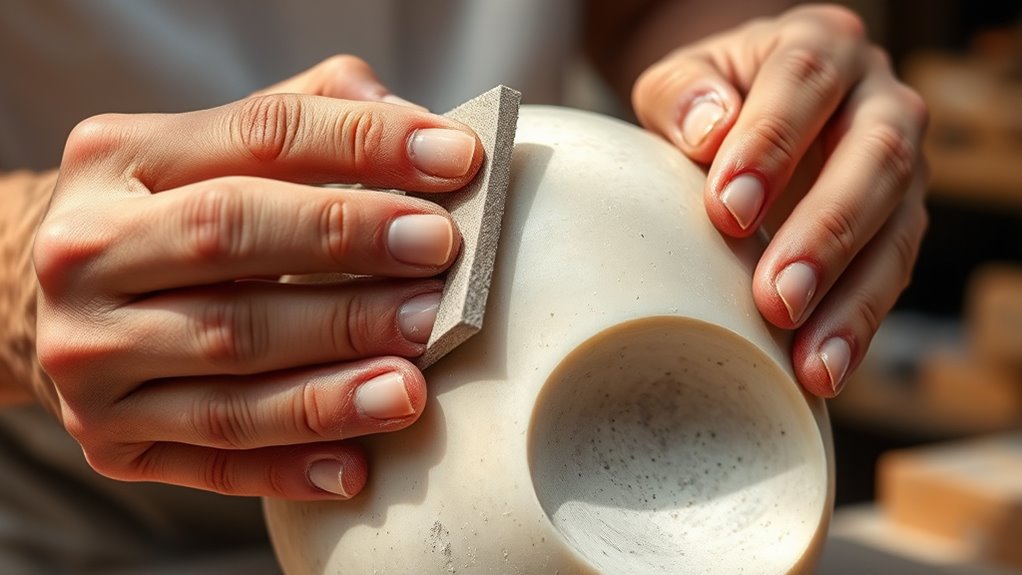
To achieve a smooth, polished finish on your soapstone sculpture, you need to employ effective smoothing and refining techniques. Start by using finer grit abrasives to gradually refine the surface, which helps improve texture techniques and reduce visible tool marks. Use light, even strokes to avoid creating uneven areas. As you work, pay attention to the stone’s natural color, and consider gentle polishing with a soft cloth to enhance its inherent hues—this is part of color enhancement. If needed, re-sand areas to smooth out imperfections. Keep your tools clean and apply consistent pressure for uniform results. Additionally, practicing professional equipment use can significantly improve the quality of your work. These steps will prepare your sculpture for the final polishing stage, ensuring a refined, attractive surface that highlights both texture and color.
Polishing Methods to Achieve a Beautiful Finish
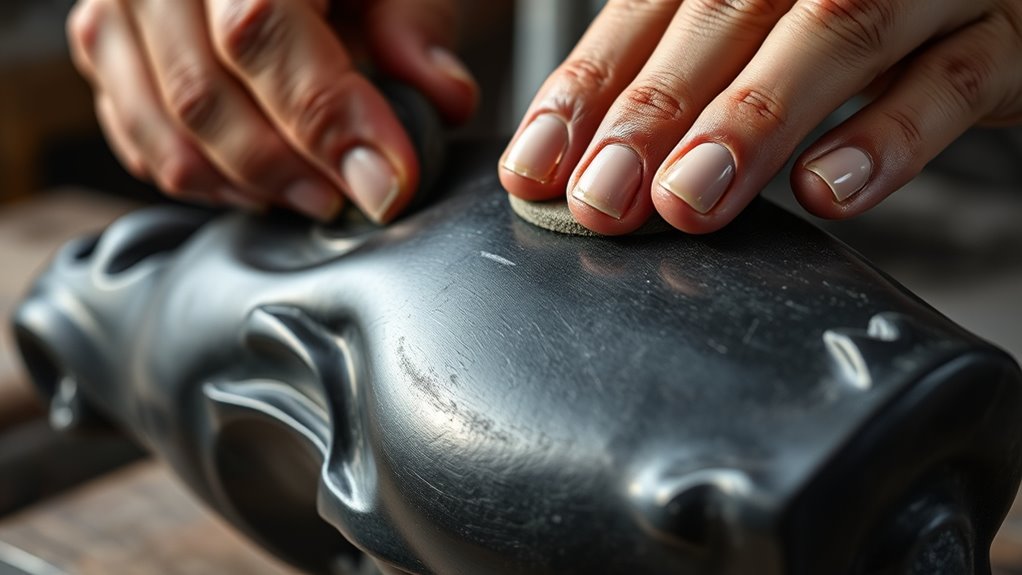
Polishing your soapstone sculpture is the final step to reveal its natural beauty and achieve a stunning finish. To enhance color and refine texture, follow these methods:
- Use fine-grit polishing pads or abrasives to smooth the surface and modify texture for a silky feel.
- Apply a mineral oil or specialized soapstone polish to boost color enhancement and deepen the stone’s natural hues.
- Buff with a soft cloth to remove any residue and bring out a subtle sheen that highlights the sculpture’s details.
- For an extra glossy finish, consider using a buffing wheel or polishing compound designed for soft stones, ensuring a reflective surface while maintaining the stone’s natural look.
- Incorporating proper cleaning and maintenance techniques can help preserve the polished finish and extend the life of your sculpture.
Troubleshooting Common Challenges in Soapstone Carving

Even with careful polishing, soapstone carving can present unexpected challenges that might hinder your progress or affect the final appearance. One common issue is soapstone’s durability; it’s soft enough to carve easily but can chip or crack if you press too hard or use the wrong tools. Always prioritize carving safety by wearing gloves and eye protection, especially when dealing with sharp tools. If you encounter uneven surfaces or deep scratches, gently sand or re-carve those areas instead of forcing the stone, which can cause fractures. Temperature fluctuations or excessive pressure can also weaken the stone, so work steadily and avoid rushing. Being aware of material properties is essential to prevent damage and ensure a successful carving process. Troubleshooting these issues early helps maintain your piece’s integrity and ensures a safer carving experience.
Displaying and Caring for Your Finished Piece
Once your soapstone piece is finished, proper display and care will keep it looking its best for years to come. To preserve its historical significance and cultural symbolism, follow these tips:
- Place it in a stable, dust-free area away from direct sunlight to prevent discoloration and damage.
- Use a soft cloth or gentle brush to clean dust and fingerprints regularly.
- Apply a mineral oil or soapstone conditioner every few months to maintain its luster.
- Handle your piece carefully, avoiding scratches or chips that can diminish its cultural value.
Frequently Asked Questions
How Long Does It Typically Take to Complete a Soapstone Carving?
It usually takes anywhere from a few hours to several days to complete a soapstone carving, depending on its complexity. You’ll spend time on the carving process, carefully shaping the stone, and then allow adequate drying time if you apply any finishes or sealants. Keep in mind that intricate designs may extend your project, but patience guarantees a polished result. Rushing can damage your work, so plan accordingly.
Can Soapstone Carvings Be Used Outdoors Without Damage?
Did you know soapstone is highly weather-resistant? Yes, your carvings can be used outdoors without damage if you apply proper sealing. Soapstone’s outdoor durability is impressive, with good weather resistance to rain, sun, and temperature changes. To guarantee longevity, seal your piece with a suitable mineral oil or sealant. Properly treated, your soapstone sculpture can withstand the elements and stay beautiful for years.
What Are Environmentally Friendly Alternatives to Traditional Carving Tools?
You can use recycled steel tools and biodegradable carving implements as eco-friendly alternatives to traditional carving tools. Recycled steel tools are durable, effective, and reduce environmental impact by repurposing materials. Biodegradable implements made from sustainable materials break down naturally, minimizing waste. By choosing these options, you support environmentally friendly practices while still achieving precise carvings. These alternatives help reduce your carbon footprint and promote sustainable art practices.
How Do I Repair Chips or Cracks in Finished Soapstone Sculptures?
Think of fixing chips or cracks in soapstone like patching a tiny hole in fabric. You’ll want to start with chip repair by gently sanding the area, then apply a smooth, matching epoxy or soapstone filler into the chip or crack. Once it’s set, sand it lightly to blend seamlessly. For larger issues, consider crack filling with a matching epoxy, then polish to restore your sculpture’s smooth, polished finish.
Are There Specific Soapstone Types Best for Beginners?
For beginners, you should choose soapstone with a lighter color like gray or green, as it’s softer and easier to carve. These types have lower carving difficulty, making your first projects less frustrating. Avoid darker or more dense soapstone, which can be harder to work with. Starting with a beginner-friendly soapstone color helps you learn techniques comfortably and build confidence quickly.
Conclusion
Now that you’ve learned the basics, your soapstone project is just beginning. With patience and practice, you’ll discover techniques that can transform rough stone into stunning art. But beware—each step reveals new surprises and challenges that can test your skills. Are you ready to take your carving to the next level? The true magic happens when you least expect it. Keep carving, and see where your creativity takes you next.